
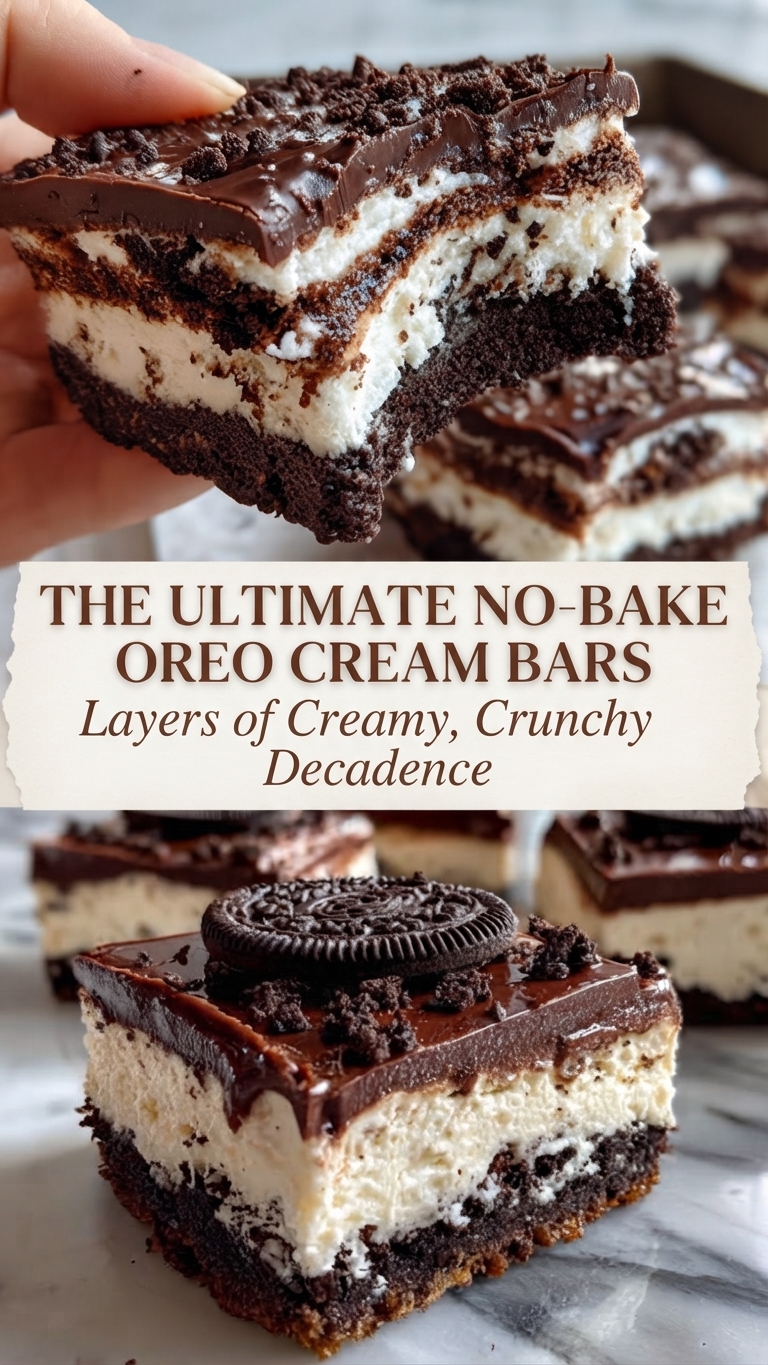
The Ultimate No-Bake Oreo Cream Bars
Indulge in the quintessential cookies-and-cream experience with these decadent, no-bake Oreo Cream Bars. This recipe requires zero oven time, making it the perfect dessert for any occasion, especially when you need a show-stopping treat without the heat.
These bars feature a dense, crunchy chocolate crust made entirely from crushed sandwich cookies. That sturdy base is topped with a thick, velvety layer of sweetened cream cheese, whipped to airy perfection. The entire creation is sealed with a rich, glossy layer of chocolate ganache and finished with a dusting of crushed cookie crumbs and a whole cookie on top for maximum impact.
This recipe is a masterclass in texture and flavor balance: the slightly salty, bitter cocoa crust complements the sweet, tangy cream, while the firm ganache provides a satisfying snap. Whether you are hosting a party or simply satisfying a serious chocolate craving, these bars deliver layers of creamy, crunchy decadence in every bite.
Ingredients
For the Crust:
-
30 standard chocolate sandwich cookies (like Oreos), whole (do not remove the cream filling)
For the Cream Layer:
-
2 packages (8 ounces each) full-fat cream cheese, softened to room temperature
-
1/2 cup (1 stick) unsalted butter, softened
-
1 teaspoon vanilla extract
-
1 1/2 cups powdered sugar
-
1/4 teaspoon salt
-
1 1/2 cups heavy cream, cold
For the Chocolate Ganache Topping:
-
1 cup semi-sweet chocolate chips or chopped chocolate bar
-
1/2 cup heavy cream
For Garnish:
-
4 additional chocolate sandwich cookies, crushed
-
12-16 whole chocolate sandwich cookies (optional, for placing on top of individual squares)
Numbered Instructions
Prepare the Pan and Crust:
-
Line an 8×8 inch (20×20 cm) square baking pan with parchment paper or aluminum foil, leaving an overhang on two sides to create “slings” for easy removal. Set aside.
-
Place the 30 whole chocolate sandwich cookies into a food processor and pulse until they form a fine, uniform crumb texture. (Alternatively, place them in a sturdy resealable plastic bag and crush them thoroughly with a rolling pin).
-
Pour the crushed cookies directly into the prepared pan. Use the bottom of a sturdy, flat-bottomed glass or measuring cup to press the crumbs firmly and evenly into the bottom of the pan, creating a dense, compact crust. Place the pan in the freezer or refrigerator while you prepare the cream layer.
Make the Cream Layer:
4. In the large bowl of a stand mixer fitted with the paddle attachment (or using a large mixing bowl and a hand-held electric mixer), beat the softened cream cheese and softened butter together on medium speed until completely smooth and creamy, about 2-3 minutes. Scrape down the sides and bottom of the bowl as needed.
5. Add the vanilla extract, powdered sugar, and salt. Beat on low speed until combined, then increase the speed to medium and mix until the mixture is smooth and fluffy, about another 2 minutes.
6. In a separate, chilled bowl, use a whisk or a clean hand mixer to beat the cold heavy cream until stiff peaks form. This means when you lift the whisk, the cream holds its shape firmly.
7. Gently fold one-third of the whipped cream into the cream cheese mixture using a rubber spatula to lighten the base. Once incorporated, gently fold in the remaining whipped cream until the mixture is uniform and no streaks remain. Be careful not to deflate the air you just whipped into the cream.
Assemble and Chill:
8. Remove the crust-lined pan from the refrigerator or freezer. Pour the cream cheese mixture evenly over the prepared crust. Use an offset spatula or the back of a spoon to spread the filling into a smooth, level layer.
9. Cover the pan with plastic wrap and refrigerate for at least 4 hours, or until the cream layer is completely set and firm to the touch. For best results (and cleaner cuts), freeze the entire pan for 1 hour before adding the ganache layer.
Make and Add the Chocolate Ganache:
10. Place the chocolate chips (or chopped chocolate) in a medium, heat-proof glass or metal bowl.
11. In a small saucepan over medium-low heat, bring the 1/2 cup of heavy cream just to a gentle simmer (do not let it come to a rapid, rolling boil).
12. Pour the hot cream directly over the chocolate chips in the bowl. Let the mixture sit, untouched, for 5 minutes.
13. After 5 minutes, use a small whisk or spatula to gently stir the mixture, starting in the center and working your way outward, until the chocolate is completely melted and the mixture is glossy, smooth, and combined. This is your ganache.
14. Remove the chilled cream bars from the refrigerator (or freezer). Immediately pour the warm ganache evenly over the set cream layer. Use an offset spatula to quickly and gently spread it to the edges.
Final Garnish and Serving:
15. While the ganache is still wet, immediately sprinkle the 4 crushed chocolate sandwich cookies over the top for decoration. If desired, place one whole chocolate sandwich cookie gently in the center of where each individual square will be cut.
16. Return the pan to the refrigerator for at least 30 minutes to allow the ganache layer to set before slicing.
17. Once the ganache is set, use the parchment paper slings to lift the entire block of bars out of the pan. Place it on a cutting board.
18. Using a large, sharp chef’s knife, carefully slice the block into 12 to 16 squares. To get clean cuts, wipe the knife blade clean with a damp cloth and re-warm it (by running it under hot water and drying it) between each slice.
Tips for Success
-
Soften Ingredients Properly: Ensure both the cream cheese and the butter are fully softened to room temperature. This is crucial for achieving a perfectly smooth cream cheese filling without lumps.
-
Whip Cream Correctly: Use cold heavy cream and a chilled bowl for maximum volume. Beat until stiff peaks form, but do not overbeat into butter.
-
Achieve Clean Cuts: The secret to professional-looking squares is chilling the bars thoroughly before slicing and using a warm, clean knife for every cut. Wiping and re-warming the knife blade prevents the ganache and cream from dragging.
-
Pan Size: Stick strictly to an 8×8 inch pan. Using a larger pan will result in a thinner layer of cream, altering the texture and balance of the final bars.
Storage and Reserving
-
Storage: Store the cut Oreo Cream Bars in an airtight container in the refrigerator for up to 4-5 days. They will become softer the longer they sit.
-
Freezing: These bars freeze beautifully. For longer storage, freeze the individual slices (without the whole cookie topping, if desired) on a baking sheet until solid, then transfer them to an airtight freezer bag or container for up to 1 month. Thaw in the refrigerator for a few hours or at room temperature for 20-30 minutes before serving.
-
Serving Temperature: For the best texture, let the bars sit at room temperature for about 15 minutes after removing them from the refrigerator. This allows the cream layer to soften slightly, making it perfectly luscious.
Serving Suggestions
These bars are rich and decadent on their own, but they pair wonderfully with a tall glass of cold milk or a cup of hot coffee to balance the sweetness. For an extra special dessert night, serve a chilled square alongside a scoop of vanilla bean ice cream and a drizzle of chocolate sauce.
Closing
This no-bake recipe is a testament to the magic of combining simple, high-quality ingredients. From the satisfying crunch of the Oreo crust to the velvety cloud of cream and the luxurious snap of the chocolate ganache, every layer offers a moment of pure bliss. Gather your ingredients and prepare to impress everyone with these sensational Oreo Cream Bars.