
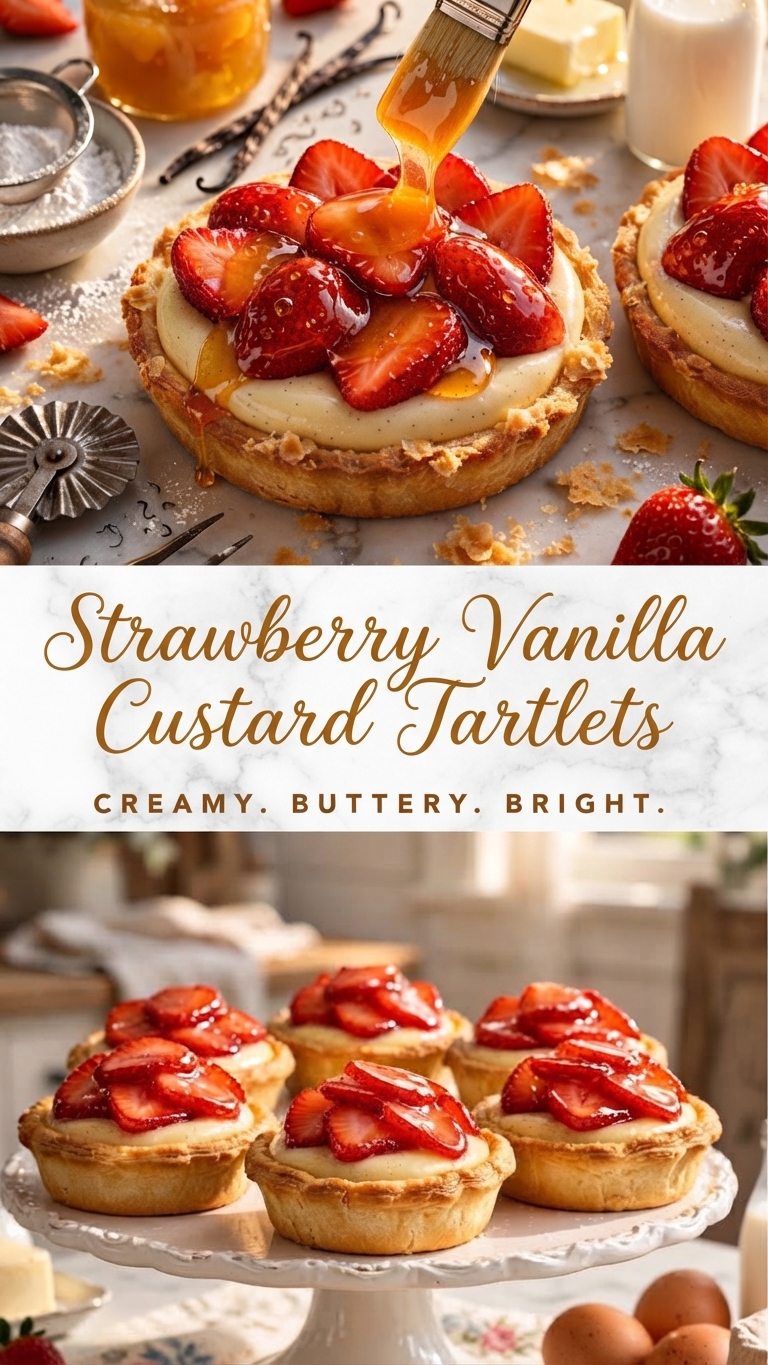
Strawberry Vanilla Custard Tartlets
Creamy, Buttery, Bright.
These Strawberry Vanilla Custard Tartlets are the epitome of summer dessert perfection. Featuring a crisp, buttery shortcrust pastry shell, a luscious, fragrant vanilla bean custard filling, and a generous crown of fresh, glazed strawberries, they are as beautiful as they are delicious. This recipe guides you through making these individual delights from scratch, ensuring a professional finish that will impress at any gathering. They are perfectly portioned, making them ideal for brunches, afternoon tea, or a sophisticated dessert table.
Ingredients
For the Pâte Sucrée (Sweet Tartlet Shells):
-
1 ½ cups (190g) all-purpose flour
-
½ cup (113g) unsalted butter, softened slightly, cut into small cubes
-
⅓ cup (65g) powdered sugar
-
¼ teaspoon salt
-
1 large egg yolk
-
1-2 tablespoons (15-30ml) ice water, as needed
For the Vanilla Bean Custard:
-
1 ½ cups (350ml) whole milk
-
½ vanilla bean, split lengthwise (or 1 teaspoon vanilla bean paste)
-
4 large egg yolks
-
⅓ cup (65g) granulated sugar
-
3 tablespoons (24g) cornstarch
-
Pinch of salt
-
2 tablespoons (28g) unsalted butter
For the Strawberry Topping:
-
1 lb (450g) fresh strawberries, hulled and sliced
-
¼ cup (85g) strawberry jam or apricot jam
-
1 teaspoon water
Instructions
Step 1: Make the Pâte Sucrée (Tart Shells)
-
In a food processor, combine the flour, powdered sugar, and salt. Pulse a few times to blend. Add the cubed butter and pulse until the mixture resembles coarse meal or wet sand.
-
Add the egg yolk and pulse until the dough just begins to clump together. Add 1 tablespoon of ice water and pulse; if the dough is still too dry and doesn’t hold together when pinched, add the remaining tablespoon of water. Do not overmix.
-
Turn the dough out onto a lightly floured surface and gently shape it into a flat disk. Wrap tightly in plastic wrap and refrigerate for at least 1 hour, or until firm.
-
Once chilled, roll the dough out on a lightly floured surface to a thickness of about ⅛ inch. Cut out rounds slightly larger than your tartlet pans.
-
Gently press the dough rounds into the bottom and up the sides of 6-8 individual tartlet pans (approx. 4 inches each). Trim any excess dough from the edges. Chill the formed tartlet shells in the refrigerator or freezer for 15 minutes.
-
Preheat your oven to 375°F (190°C).
-
Line the chilled tart shells with small squares of parchment paper and fill with pie weights or dried beans. Bake for 15 minutes. Carefully remove the parchment paper and weights, then bake for an additional 5-8 minutes, or until the shells are lightly golden brown and set. Let cool completely on a wire rack before filling.
Step 2: Prepare the Vanilla Bean Custard
-
In a medium saucepan, combine the whole milk. Scrape the seeds from the vanilla bean into the milk and add the pod itself. (If using vanilla bean paste, add it here). Bring the mixture just to a simmer over medium heat. Remove from the heat, cover, and let steep for 10 minutes.
-
While the milk steeps, in a medium bowl, whisk together the egg yolks, granulated sugar, cornstarch, and salt until pale yellow and creamy.
-
Slowly pour about half of the hot milk mixture into the egg yolk mixture while whisking constantly to temper the eggs.
-
Pour the tempered egg yolk mixture back into the saucepan with the remaining milk. Whisk constantly over medium heat.
-
Continue to cook, whisking vigorously, until the custard comes to a boil and thickens significantly (this will happen suddenly). Boil for 1 minute, whisking constantly.
-
Remove from the heat immediately and strain the custard through a fine-mesh sieve into a clean bowl (this removes any cooked egg bits and the vanilla bean pod).
-
Whisk in the 2 tablespoons of butter until melted and smooth.
-
Place a piece of plastic wrap directly onto the surface of the custard to prevent a skin from forming. Let cool to room temperature, then refrigerate until completely chilled, at least 2 hours.
Step 3: Assemble the Tartlets
-
Once the custard is fully chilled, give it a good whisk to make it smooth and creamy again. Divide the custard evenly among the cooled tartlet shells, spreading it to the edges.
-
Arrange the sliced strawberries decoratively over the top of the custard in each tartlet.
-
In a small saucepan or microwave-safe bowl, combine the strawberry or apricot jam with the 1 teaspoon of water. Warm gently until melted and smooth.
-
Using a pastry brush, lightly brush the warm jam mixture over the fresh strawberries to give them a glossy finish and prevent them from drying out.
-
Serve immediately or refrigerate for up to 2 hours before serving for the best texture.
Tips for Success
-
Keep Everything Cold: When making the pastry, it’s crucial that the butter and dough remain cold. If the dough becomes too warm, the butter will melt prematurely, resulting in a tough, greasy crust instead of a flaky, tender one. Chill the dough between steps if needed.
-
Don’t Rush the Custard: Whisking constantly while cooking the custard is non-negotiable to prevent scorching or lumps. Straining it ensures the silkiest texture. Ensure the custard is completely chilled before assembling the tartlets, otherwise, the heat can cause the pastry shell to become soggy.
-
Use Fresh, Ripe Strawberries: The quality of the strawberries makes a huge difference. Choose bright red, ripe, and firm berries for the best flavor and appearance.
-
Blind Baking is Key: Do not skip blind baking (baking the shell with weights first). This ensures the crust is fully cooked and crisp before adding the moist custard, preventing a dreaded “soggy bottom.”
Storage and Reheating
-
Storage: These tartlets are best enjoyed the day they are assembled. However, you can store them, loosely covered, in the refrigerator for up to 1 day. The pastry will gradually lose its crispness over time.
-
Make-Ahead: You can bake the tart shells up to 2 days in advance and store them in an airtight container at room temperature. The vanilla custard can be made up to 2 days ahead and stored in the refrigerator with plastic wrap directly on the surface. Assemble the tartlets with fresh strawberries on the day you plan to serve them.
Serving Suggestions
-
Plain and Simple: Serve these tartlets on their own to let the flavors of the fresh fruit, creamy custard, and buttery crust shine.
-
With Cream: A dollop of freshly whipped cream sweetened with a little powdered sugar and vanilla extract makes a wonderful accompaniment.
-
With Coulis: A raspberry or strawberry coulis drizzled onto the serving plate adds another layer of fruit flavor and a beautiful presentation.
-
For a Crowd: Arrange the finished tartlets on a tiered cake stand for an elegant display at a party or brunch.
Closing
These Strawberry Vanilla Custard Tartlets are a celebration of fresh flavors and classic techniques. While they require a few steps, the result—a perfect balance of textures and flavors—is incredibly rewarding. Whether you’re hosting a special event or simply treating yourself and your loved ones, these individual desserts are guaranteed to delight. Enjoy the process of creating them, and savor every delicious bite!