
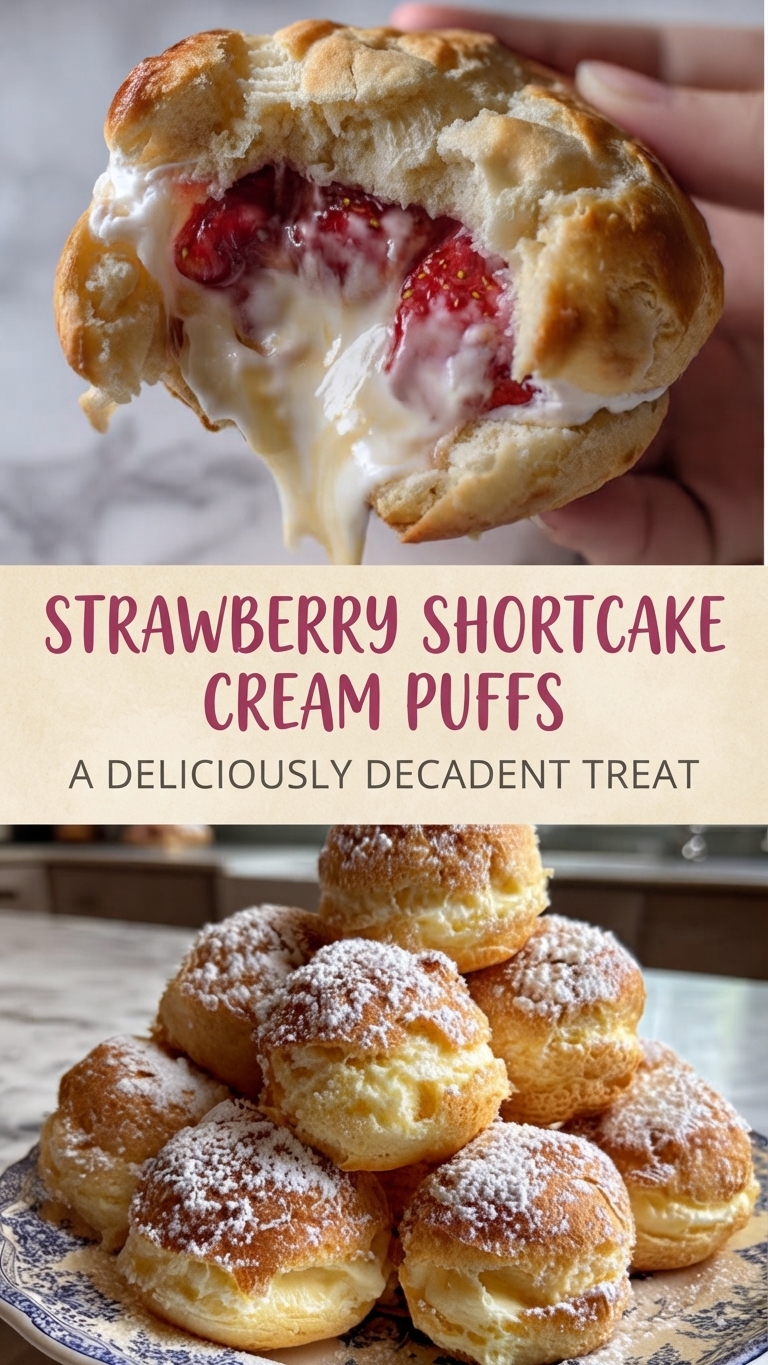
Strawberry Shortcake Cream Puffs: A Decadent Dessert Fusion
This recipe brings together two beloved dessert classics: the airy, delicate French pâte à choux (cream puff) and the fresh, sweet components of an American strawberry shortcake. These Strawberry Shortcake Cream Puffs feature golden-brown, crisp pastry shells generously filled with a rich, stable vanilla cream and fresh, macerated strawberries. It is the perfect chilled and creamy treat for summer gatherings, elegant brunches, or any time you need a truly show-stopping dessert.
Ingredients
For the Pâte à Choux (Cream Puff Shells):
-
1 cup (235 ml) whole milk
-
1/2 cup (113 g) unsalted butter, cut into cubes
-
1 tablespoon granulated sugar
-
1/4 teaspoon salt
-
1 cup (125 g) all-purpose flour
-
4 large eggs, at room temperature
For the Strawberry Filling:
-
1 lb (450 g) fresh strawberries, hulled and sliced
-
2 tablespoons granulated sugar
-
1 teaspoon fresh lemon juice
For the Stabilized Vanilla Cream Filling:
-
2 cups (470 ml) heavy whipping cream, very cold
-
4 ounces (113 g) full-fat cream cheese, softened
-
1/2 cup (60 g) powdered sugar, sifted
-
1 teaspoon vanilla extract
-
1/4 teaspoon salt
For Dusting:
-
2 tablespoons powdered sugar
Instructions
Part 1: Prepare the Strawberry Filling
-
Macerate the Strawberries: In a medium bowl, combine the sliced strawberries, 2 tablespoons granulated sugar, and lemon juice. Toss gently to coat. Set aside for at least 30 minutes, allowing the strawberries to release their juices and become syrupy.
Part 2: Prepare the Pâte à Choux
-
Preheat and Prep: Preheat your oven to 425°F (220°C). Line two large baking sheets with parchment paper.
-
Create the Base Liquid: In a medium saucepan, combine the whole milk, cubed butter, sugar, and salt. Place over medium heat and bring to a rapid simmer, stirring until the butter is fully melted.
-
Add the Flour: Remove the saucepan from the heat. Immediately add the all-purpose flour all at once. Using a wooden spoon or sturdy rubber spatula, vigorously stir the mixture until a smooth, cohesive ball of dough forms and pulls away from the sides of the pan.
-
Cook the Dough: Return the saucepan to medium-low heat. Continue to stir and cook the dough for 1–2 minutes. This step dries out the dough slightly and creates a thin film on the bottom of the pan.
-
Incorporate the Eggs: Transfer the dough to a large mixing bowl or the bowl of a stand mixer fitted with the paddle attachment. Let it cool for 3–5 minutes (it should be warm, but not hot enough to scramble the eggs). With the mixer running on low speed, add the eggs one at a time, ensuring each egg is fully incorporated before adding the next. The dough will look slippery and separated at first, but it will come back together. After all the eggs are added, mix until the dough is smooth, thick, and glossy. It should cling to the spoon and form a “V” shape when lifted.
-
Pipe the Puffs: Transfer the dough to a large piping bag fitted with a large round piping tip (like a Wilton 1A or 2A). Pipe rounds of dough, about 1.5 inches in diameter and spaced 2 inches apart, onto the prepared baking sheets.
-
Smooth and Shape: If there are peaks on top of the piped dough, lightly wet your fingertip with water and gently pat them down.
-
Bake: Bake at 425°F (220°C) for 15 minutes. Without opening the oven door, reduce the oven temperature to 375°F (190°C) and continue baking for another 20–25 minutes. The puffs should be deep golden brown and feel firm and crisp to the touch.
-
Dry and Cool: Turn off the oven, open the oven door slightly (using a wooden spoon to prop it open if necessary), and let the puffs dry out in the cooling oven for 15 minutes. This prevents them from collapsing. Transfer the baked puffs to a wire rack to cool completely.
Part 3: Prepare the Stabilized Vanilla Cream
-
Whip the Cream Cheese: In a large chilled bowl, using a hand mixer or stand mixer with the whisk attachment, beat the softened cream cheese until smooth and creamy. Add the powdered sugar, vanilla extract, and salt, and beat until fully incorporated and fluffy.
-
Combine and Whip: With the mixer running on low speed, slowly pour in the very cold heavy cream. Once the cream is fully incorporated, increase the speed to medium-high and whip until stiff, stable peaks form. Be careful not to over-whip. Store this stabilized cream in the refrigerator until you are ready to assemble.
Part 4: Assembly
-
Prepare the Puffs: Once the cream puff shells are completely cool, use a serrated knife to cut each puff horizontally, separating the top “lid” from the bottom “bowl.”
-
Fill the Base: Fit a large piping bag with a star tip (like a Wilton 1M or 2D) and fill it with the stabilized vanilla cream. Pipe a generous swirl of cream into the bottom half of each puff.
-
Add Strawberries: Spoon a generous amount of the macerated strawberries (and a little of their syrup) over the cream layer.
-
Cap It: Place the top “lid” of the cream puff gently onto the strawberries and cream.
-
Dust and Serve: Just before serving, generously dust the filled cream puffs with the remaining powdered sugar using a fine-mesh sieve.
Tips for Success
-
Room Temperature Eggs: Using room temperature eggs ensures they are fully incorporated into the dough, creating a better rise.
-
Don’t Rush the Eggs: Add the eggs one at a time and mix completely. Rushing this step will result in a runny, unusable dough.
-
Don’t Open the Oven Early: Opening the oven door during the first stage of baking will cause the delicate puffs to collapse due to the sudden drop in temperature.
-
Serving Temperature: For the best texture, serve these immediately after assembly. The contrasting temperatures (chilled filling and warm, crisp shell) and textures (creamy, crunchy) are key to the experience.
Storage and Reheating
-
Storage (Unfilled Shells): Baked, unfilled cream puff shells can be stored in an airtight container at room temperature for up to 2 days, or frozen for up to 1 month. To recrisp, place them in a 300°F (150°C) oven for 5–7 minutes.
-
Storage (Assembled Puffs): These cream puffs are best enjoyed the day they are assembled. However, any leftovers can be stored in an airtight container in the refrigerator for up to 1 day. The pastry shell will soften over time.
-
Make-Ahead Plan: Bake the shells and make the cream filling a day ahead. Refrigerate the cream. Make the strawberry filling and assemble just before serving.
Serving Suggestions
These Strawberry Shortcake Cream Puffs are an impressive standalone dessert. They are perfect for:
-
Summer afternoon teas
-
Garden parties
-
Mother’s Day brunch
-
An elegant finale to a dinner party
Serve them on a platter, piled high as shown in the image, with a small bowl of extra berries or a drizzle of balsamic glaze for a more sophisticated twist.
Closing
These Strawberry Shortcake Cream Puffs offer an exquisite balance of textures and flavors—the crisp, airy pastry yielding to the dense, cool vanilla cream and the sweet, juicy burst of fresh strawberries. While they require a few distinct steps to prepare, the final result is incredibly rewarding and a surefire way to delight dessert lovers. Enjoy this delicious fusion treat!