
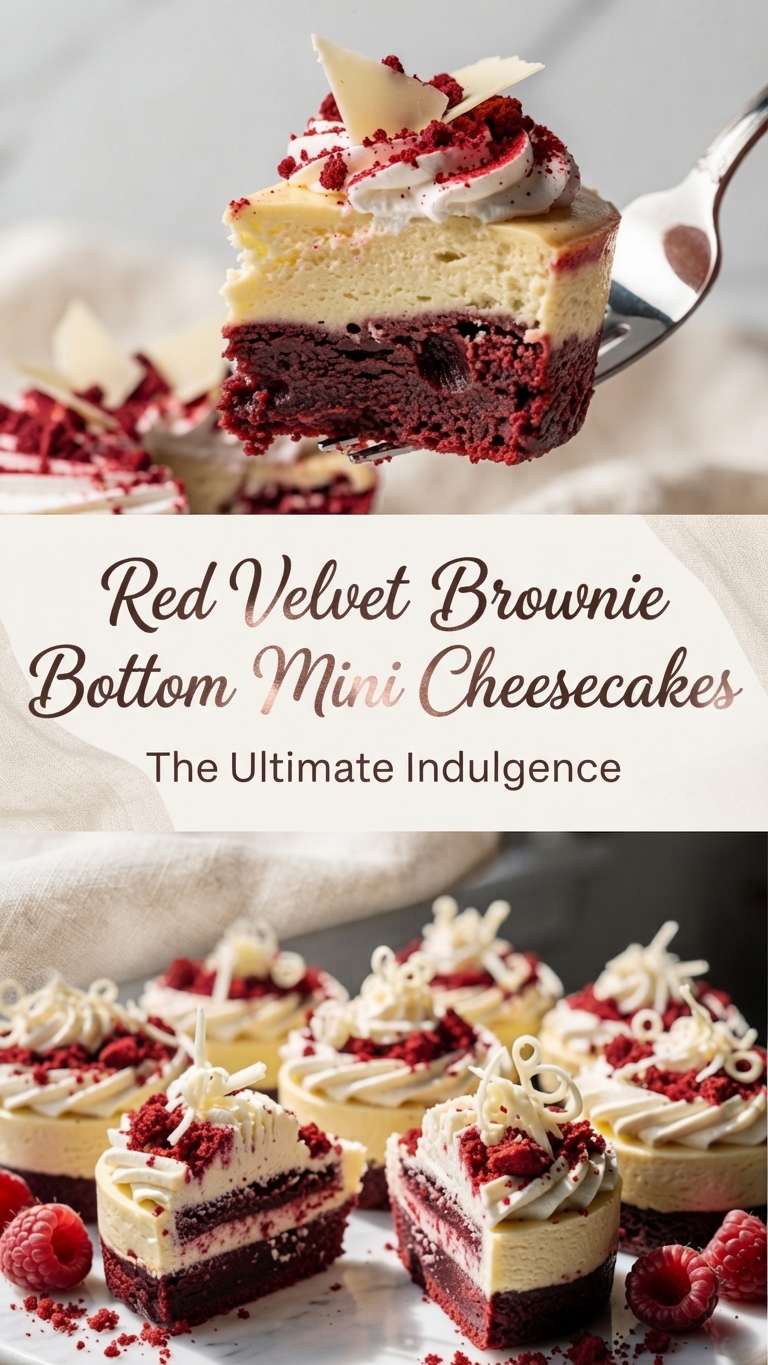
Red Velvet Brownie-Bottom Mini Cheesecakes
These Red Velvet Brownie-Bottom Mini Cheesecakes are the ultimate marriage of two classic desserts. A rich, fudgy red velvet brownie layer forms the base, topped with a velvety smooth vanilla cheesecake. These delightful individual portions are perfect for parties, holidays, or whenever you need a decadent treat. The vibrant red and white contrast makes them visually stunning, and the combination of textures—chewy brownie and creamy cheesecake—is simply irresistible. Garnish with a swirl of cream cheese frosting and white chocolate curls for an elegant finish.
Yields: 12 mini cheesecakes
Prep time: 30 minutes
Bake time: 35 minutes
Chill time: 4 hours (minimum)
Ingredients
For the Red Velvet Brownie Base:
-
½ cup (1 stick) unsalted butter, melted and slightly cooled
-
¾ cup granulated sugar
-
1 large egg, at room temperature
-
1 teaspoon vanilla extract
-
1 tablespoon red food coloring (liquid or gel)
-
½ cup all-purpose flour
-
2 tablespoons unsweetened cocoa powder
-
¼ teaspoon salt
For the Cheesecake Filling:
-
2 packages (8 oz each) full-fat cream cheese, softened to room temperature
-
½ cup granulated sugar
-
2 large eggs, at room temperature
-
1 teaspoon vanilla extract
-
1 tablespoon all-purpose flour
-
¼ cup full-fat sour cream, at room temperature
For the Garnish (Optional):
-
¾ cup heavy whipping cream, chilled
-
4 oz cream cheese, softened
-
½ cup powdered sugar
-
1 teaspoon vanilla extract
-
White chocolate shavings or curls
-
Fresh raspberries
Instructions
Prepare the Red Velvet Brownie Base:
-
Preheat & Prep: Preheat your oven to 325°F (165°C). Line a standard 12-cup muffin tin with paper liners.
-
Mix Wet Ingredients: In a large bowl, whisk together the melted butter and granulated sugar until well combined. Add the egg and vanilla extract, whisking until smooth. Stir in the red food coloring until the desired shade is reached.
-
Add Dry Ingredients: Add the flour, cocoa powder, and salt to the wet ingredients. Gently fold the mixture with a spatula until just combined; do not overmix.
-
Divide & Bake: Evenly distribute the brownie batter among the 12 muffin cups (about 1-1.5 tablespoons per cup). Use the back of a spoon or your fingers to gently press the batter into an even layer in the bottom of each liner.
-
Blind Bake: Bake the brownie bases for 10-12 minutes, or until they are set around the edges but still slightly soft in the center. Remove from the oven and let them cool slightly while you prepare the cheesecake filling.
Prepare the Cheesecake Filling:
-
Cream the Cheese: In a large bowl, using a hand mixer or a stand mixer fitted with the paddle attachment, beat the softened cream cheese and granulated sugar on medium-high speed until completely smooth and creamy, scraping down the sides of the bowl as needed (about 2-3 minutes).
-
Add Eggs & Flavorings: Add the eggs one at a time, mixing well after each addition. Mix in the vanilla extract, flour, and sour cream until just combined. Be careful not to overmix the batter, which can cause cracks.
-
Fill Cups: Evenly spoon the cheesecake batter over the partially baked brownie bases in the muffin tin (about 3 tablespoons per cup, filling almost to the top).
Bake and Chill:
-
Bake: Return the muffin tin to the 325°F (165°C) oven. Bake for 20-25 minutes, or until the cheesecake edges are set but the centers are still slightly jiggly.
-
Cool Gradually: Turn off the oven and open the oven door slightly. Let the cheesecakes cool inside the cooling oven for 30 minutes. This gradual temperature change helps prevent cracking.
-
Cool at Room Temp: Remove the muffin tin from the oven and place it on a wire rack. Let the cheesecakes cool completely to room temperature in the pan.
-
Chill: Once cooled, cover the muffin tin loosely with plastic wrap and transfer it to the refrigerator. Chill for at least 4 hours, preferably overnight, until firm and set.
Garnish and Serve:
-
Make the Frosting: In a medium bowl, beat the softened cream cheese, powdered sugar, and vanilla extract until smooth. In a separate chilled bowl, whip the heavy cream until stiff peaks form. Gently fold the whipped cream into the cream cheese mixture until combined. Transfer the frosting to a piping bag fitted with a large star tip.
-
Frost and Decorate: Carefully remove the chilled mini cheesecakes from the muffin tin, lifting them out by the paper liners. Pipe a decorative swirl of frosting onto the top of each cheesecake. Garnish with white chocolate curls and a fresh raspberry.
-
Serve: Serve chilled.
Tips for Success
-
Room Temperature Ingredients: Ensure your cream cheese, eggs, and sour cream are at room temperature. This is crucial for a smooth, lump-free cheesecake batter and helps the filling emulsify properly.
-
Don’t Overmix: Overmixing the cheesecake batter incorporates too much air, which can cause the cheesecakes to puff up and then crack as they cool. Mix only until each ingredient is just incorporated.
-
Cool Slowly: The slow cooling process (in the turned-off oven, then at room temperature, then in the fridge) is the secret to preventing cracks. Don’t rush it.
-
Clean Cuts: If you want to serve the cheesecakes cut in half (as pictured), use a sharp, thin-bladed knife. Dip the knife in hot water and wipe it dry between each cut to ensure clean, neat edges.
Storage and Reheating
-
Storage: Store the mini cheesecakes (frosted or unfrosted) in an airtight container in the refrigerator for up to 5 days.
-
Freezing: The mini cheesecakes can be frozen, unfrosted, for up to 1 month. Tightly wrap the cooled muffin tin (or individual cheesecakes) in plastic wrap and then foil. Thaw overnight in the refrigerator before serving or garnishing.
Serving Suggestions
These mini cheesecakes are perfect for any occasion:
-
Holiday Parties: The red and white color scheme makes them ideal for Christmas or Valentine’s Day.
-
Dessert Tables: Their individual size makes them a great addition to a large spread.
-
Coffee Break: Enjoy one as an indulgent afternoon pick-me-up.
Closing
These Red Velvet Brownie-Bottom Mini Cheesecakes are a show-stopping dessert that is surprisingly simple to make. By combining a fudgy brownie base with a creamy cheesecake top, you get the best of both worlds in one delightful bite. Perfect for sharing or for savoring all by yourself, this recipe is sure to become a favorite. Enjoy the process and the delicious results!