
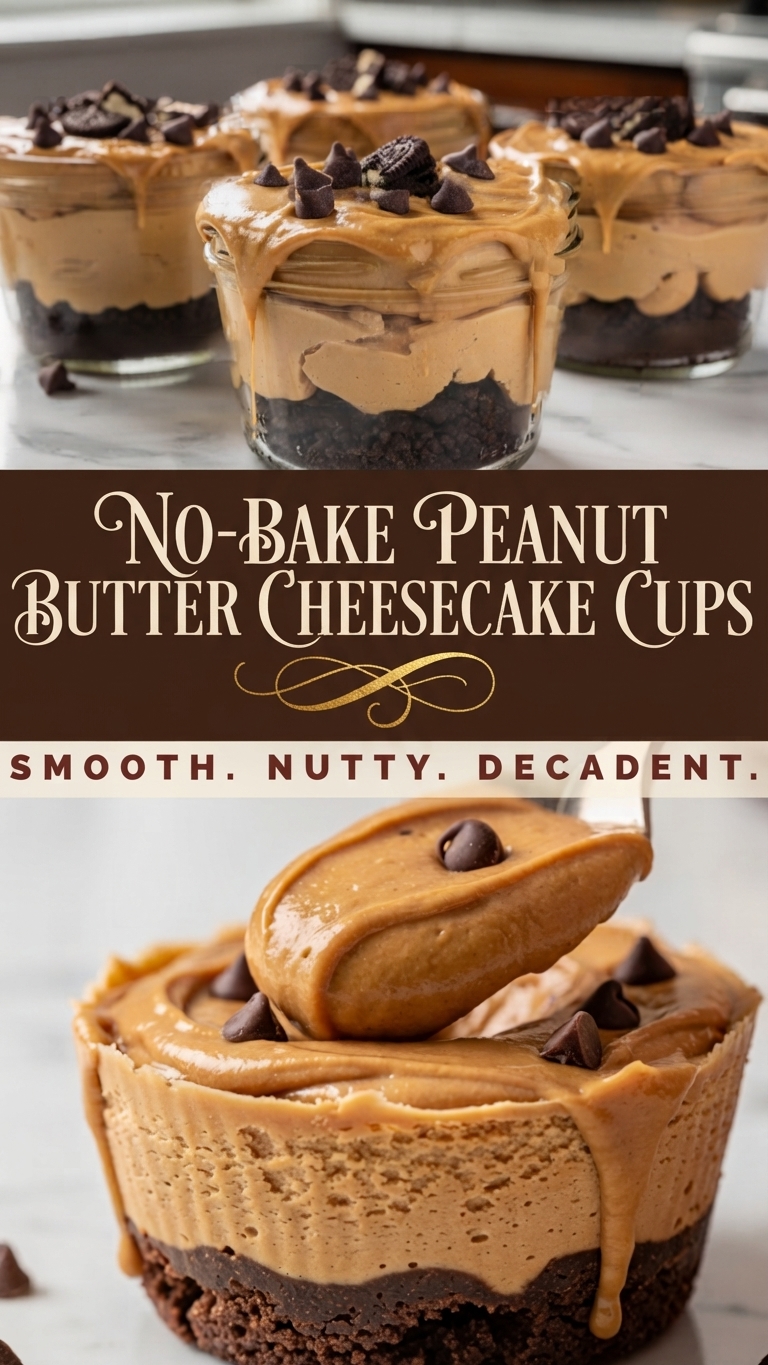
No-Bake Peanut Butter Cheesecake Cups

Indulge in the ultimate creamy, nutty treat with these decadent No-Bake Peanut Butter Cheesecake Cups. Perfect for satisfying a sweet craving without ever turning on the oven, this recipe combines a rich, chocolatey cookie crust with a luscious, cloud-like peanut butter cheesecake filling. Whether you’re making them for a quick weeknight dessert or as elegant treats for a party, these cups are sure to be a crowd-pleaser.
The beauty of this recipe lies in its simplicity and customizable nature. You can prepare them in individual jars for a portable, shareable dessert or in cupcake liners for easy serving. Each bite offers the perfect balance of salty and sweet, with a velvety texture that melts in your mouth.
Ingredients
For the Crust:
-
1 ½ cups (165g) chocolate sandwich cookie crumbs (from about 15-18 cookies)
-
3 tablespoons (42g) unsalted butter, melted
For the Peanut Butter Filling:
-
16 oz (450g) cream cheese, softened to room temperature
-
1 cup (260g) creamy peanut butter
-
¾ cup (90g) powdered sugar, sifted
-
1 teaspoon vanilla extract
-
1 cup (240ml) heavy whipping cream, chilled
For the Topping (Optional):
-
Chocolate chips
-
Crushed chocolate sandwich cookies
-
A drizzle of melted peanut butter
Instructions
Prepare the Crust:
-
Crush Cookies: Place the chocolate sandwich cookies (including the cream filling) in a food processor and pulse until you have fine crumbs. Alternatively, place them in a sealed plastic bag and crush them with a rolling pin.
-
Combine: In a small bowl, stir together the cookie crumbs and melted butter until the crumbs are evenly moistened.
-
Press into Jars/Liners: Divide the crumb mixture evenly among 8-10 small jars or a cupcake tin lined with paper liners. Use the back of a small spoon or your fingers to firmly press the crust mixture into the bottom of each jar or liner.
-
Chill: Place the jars or cupcake tin in the refrigerator to chill while you prepare the filling.
Make the Peanut Butter Filling:
-
Whip the Cream: In a large, chilled bowl, use an electric mixer (hand mixer or stand mixer) to whip the heavy cream on medium-high speed until stiff peaks form. This should take about 3-5 minutes. Be careful not to over-whip. Set the whipped cream aside in the refrigerator.
-
Cream Cheese Mixture: In a separate large bowl, beat the softened cream cheese until smooth and creamy, about 1-2 minutes. Add the creamy peanut butter and mix until fully combined and smooth, scraping down the sides of the bowl as needed.
-
Add Sugar and Vanilla: Add the sifted powdered sugar and vanilla extract to the cream cheese mixture. Beat on low speed until the sugar is incorporated, then increase to medium speed and mix until smooth and fluffy.
-
Fold: Gently fold the reserved whipped cream into the peanut butter mixture in two or three additions. Use a rubber spatula to gently fold until just combined and no streaks of cream remain. Be gentle so you don’t deflate the whipped cream.
Assemble and Chill:
-
Fill Cups: Spoon or pipe the peanut butter cheesecake filling evenly over the chilled crusts in the jars or cupcake liners. Smooth the tops with an offset spatula or the back of a spoon.
-
Final Chill: Cover the jars or cupcake tin with plastic wrap and refrigerate for at least 4 hours, or preferably overnight, to allow the cheesecake cups to set completely.
Serve:
-
Garnish: Before serving, garnish with your favorite toppings, such as extra chocolate chips, crushed cookies, or a drizzle of melted peanut butter.
-
Enjoy: If using cupcake liners, carefully remove the liners before serving. Serve chilled and enjoy every decadent bite!
Tips for Success
-
Use Room Temperature Cream Cheese: Ensure your cream cheese is truly at room temperature to avoid lumps in your filling. If it’s still cold, it won’t mix smoothly.
-
Chill Your Cream and Bowl: For the lightest, fluffiest whipped cream, make sure your heavy cream is well-chilled and your bowl and beaters are also cold.
-
Don’t Over-Mix: Once you start mixing the cream cheese and peanut butter, be careful not to over-mix, as this can cause the filling to become dense or separate. Gently folding in the whipped cream is key.
-
Piping for a Cleaner Look: For a beautiful, professional look, use a large piping bag (with or without a tip) to pipe the filling into the jars or liners.
-
Flavor Variation: Feel free to use different cookie crusts. Graham crackers or peanut butter cookies would also work wonderfully.
Storage and Reheating
-
Storage: Keep the cheesecake cups covered in the refrigerator. They will stay fresh for up to 5 days.
-
Freezing: These cups freeze beautifully. For best results, freeze them before adding toppings. Once set, cover them tightly with plastic wrap or place them in an airtight container and freeze for up to 3 months. Thaw overnight in the refrigerator before serving.
Serving Suggestions
These No-Bake Peanut Butter Cheesecake Cups are perfect for any occasion. Here are a few ways to serve them:
-
As a Dessert Board: Arrange the cups on a wooden board surrounded by extra toppings like fresh berries, pretzels, or spoons for dipping.
-
In a Lunchbox: Pack a jar for a delightful midday treat.
-
For a Party: Prepare them in small shot glasses or mini jars for individual, bite-sized desserts.
Conclusion
This recipe for No-Bake Peanut Butter Cheesecake Cups proves that you don’t need an oven to create a show-stopping dessert. The combination of a crunchy chocolate base and a light, airy peanut butter filling is simply irresistible. With minimal effort and a bit of chilling time, you can treat yourself, your family, and your friends to a dessert that is both comforting and sophisticated. Make a batch today and experience the perfect harmony of creamy peanut butter and rich chocolate!