
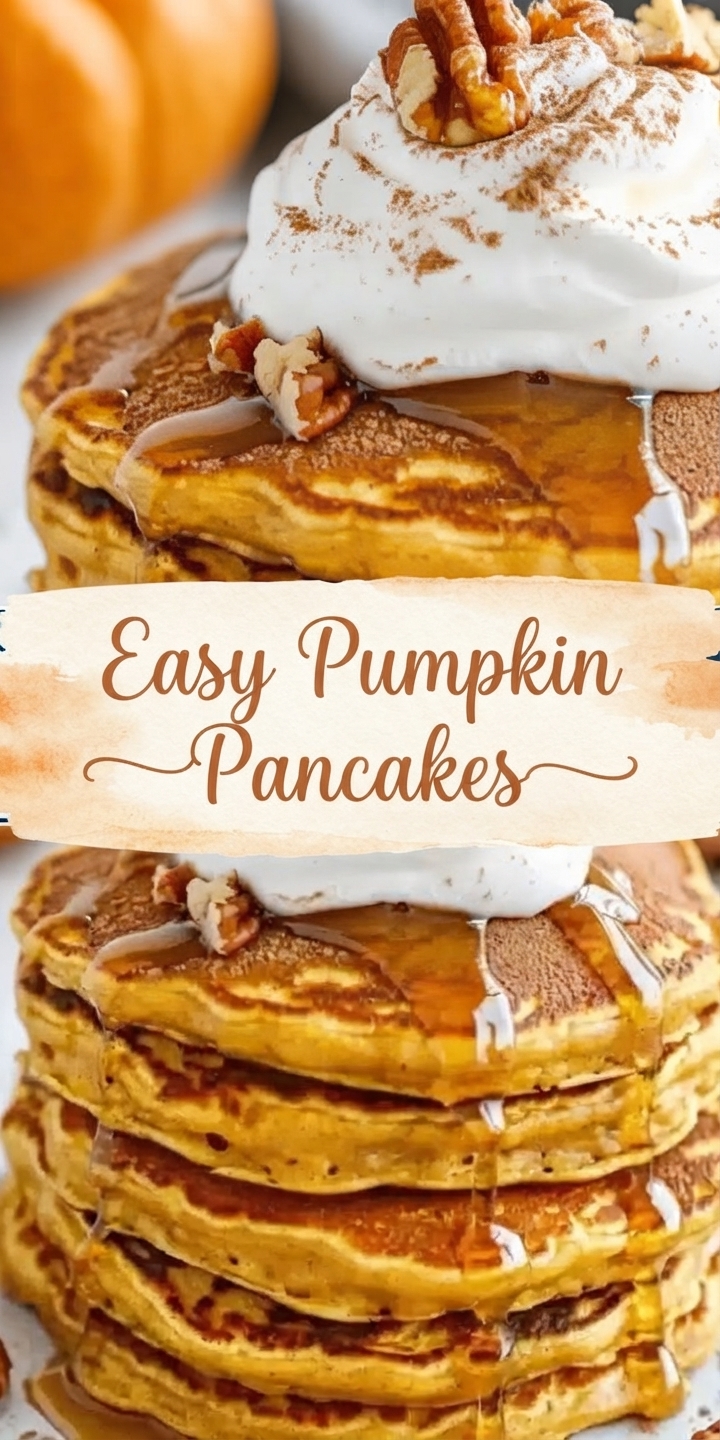
Easy Pumpkin Pancakes
Welcome the cozy flavors of autumn to your breakfast table with this recipe for the fluffiest, most flavorful pumpkin pancakes. This quick and easy recipe combines the warmth of pumpkin puree and aromatic spices like cinnamon, nutmeg, and ginger to create a stack that is pure comfort food.
These pumpkin pancakes are wonderfully moist, lightly spiced, and perfectly golden brown. They are an ideal breakfast or brunch option on a crisp fall morning. Drizzle them with warm maple syrup, top with a generous dollop of freshly whipped cream, and sprinkle with crunchy chopped pecans for the ultimate seasonal treat.
Whether you’re hosting a holiday brunch or simply craving a taste of autumn, this recipe delivers consistent, delicious results that everyone will love. Best of all, they come together quickly, so you can spend less time in the kitchen and more time enjoying your meal.

Ingredients
To make these delicious pumpkin pancakes, you will need the following pantry staples and fresh ingredients:
For the Pumpkin Pancakes:
-
Flour: 1 ½ cups all-purpose flour (or a 1:1 gluten-free blend, if preferred)
-
Sugar: 3 tablespoons brown sugar, packed (light or dark)
-
Baking Powder: 2 teaspoons baking powder
-
Salt: ½ teaspoon salt
-
Pumpkin Pie Spice: 1 ½ teaspoons pumpkin pie spice (or a mix of 1 tsp cinnamon, ¼ tsp nutmeg, and ¼ tsp ginger)
-
Milk: 1 ¼ cups milk (dairy or non-dairy, such as almond or oat milk)
-
Pumpkin Puree: 1 cup pumpkin puree (ensure it’s 100% pure pumpkin, not pumpkin pie filling)
-
Egg: 1 large egg
-
Butter: 3 tablespoons unsalted butter, melted and slightly cooled
-
Vanilla Extract: 1 teaspoon vanilla extract
For Serving:
-
Maple Syrup, warmed
-
Whipped Cream (store-bought or homemade)
-
Pecans, chopped
Instructions
Follow these simple steps to create your perfect stack of pumpkin pancakes:
1. Combine Dry Ingredients
In a large mixing bowl, whisk together the all-purpose flour, brown sugar, baking powder, salt, and pumpkin pie spice until well combined. Ensure there are no lumps in the brown sugar.
2. Mix Wet Ingredients
In a separate medium bowl, whisk together the pumpkin puree, milk, egg, melted butter, and vanilla extract until smooth and fully incorporated.
3. Make the Batter
Pour the wet ingredients into the dry ingredients. Gently fold the mixture together using a spatula or a large spoon just until the flour is moistened. Crucial Tip: Do not overmix the batter. A few small lumps are perfectly acceptable and will ensure the pancakes remain light and fluffy. Overmixing will lead to dense, tough pancakes.
4. Heat the Griddle
Preheat a non-stick skillet, electric griddle, or cast-iron pan over medium heat. Once hot, lightly brush the surface with melted butter or coat it with non-stick cooking spray.
5. Cook the Pancakes
Pour the batter onto the heated griddle, using about ¼ cup of batter for each pancake. Cook for 2 to 3 minutes, or until the edges look set and bubbles begin to form and pop on the surface of the pancake.
6. Flip and Serve
Carefully flip the pancakes using a thin spatula. Cook for an additional 1 to 2 minutes on the other side, or until they are golden brown and cooked through. Transfer the cooked pancakes to a warm plate. Repeat with the remaining batter, greasing the griddle as needed between batches.
7. Garnish and Enjoy
Serve the pumpkin pancakes immediately, stacked high. Top each stack generously with freshly whipped cream, a sprinkle of cinnamon, a scattering of chopped pecans, and a generous pour of warm maple syrup.
Tips for Success
-
Use Real Pumpkin Puree: Always use 100% pure pumpkin puree, not pumpkin pie filling, which is pre-sweetened and spiced.
-
Don’t Overmix the Batter: This is the most important rule for fluffy pancakes. Mix only until the ingredients are just combined.
-
Rest the Batter: For an even fluffier result, let the batter rest on the counter for about 10 to 15 minutes after mixing. This allows the baking powder to activate fully.
-
Adjust Batter Consistency: If the batter seems too thick, thin it out by adding a tablespoon of milk at a time. If it’s too thin, add a tablespoon of flour.
-
Keep Pancakes Warm: To keep pancakes warm while cooking the rest of the batch, place them on a wire rack set over a baking sheet in a warm oven (around 200°F / 95°C). Avoid stacking them directly, as they will steam and become soggy.
Serving Suggestions
These pumpkin pancakes are hearty and flavorful on their own, but they pair wonderfully with complementary sides for a complete autumn breakfast feast:
-
Savory Side: Serve alongside crispy maple-glazed breakfast sausage patties or links for a classic sweet and savory combination.
-
Fruit: Freshly sliced apples or pears, lightly sautéed with a touch of cinnamon, make a beautiful and tasty accompaniment.
-
Beverage: Pair with a hot mug of spiced apple cider, a pumpkin spice latte, or a freshly brewed cup of coffee.
Storage and Reheating
These pancakes are great for making ahead or for saving leftovers.
-
Refrigerator: Allow leftover pancakes to cool completely. Stack them with parchment paper between each pancake to prevent sticking, then place them in an airtight container or resealable plastic bag. Store in the refrigerator for up to 4 days.
-
Freezer: For longer storage, freeze the cooled, separated pancakes on a baking sheet until solid. Transfer them to a freezer-safe bag or container and freeze for up to 2 months.
-
Reheating: Reheat refrigerated pancakes in the toaster or in a microwave for 20–30 seconds. To reheat frozen pancakes, place them directly in the toaster on a low setting, or warm them in a 350°F (175°C) oven for 5–7 minutes until heated through.
Closing
We hope this recipe for Easy Pumpkin Pancakes brings a touch of warmth and joy to your kitchen this fall. It’s a simple, delicious way to celebrate the season. If you try this recipe, please let us know how it turned out and don’t forget to bookmark this page for all your future pumpkin breakfast cravings. Happy cooking!