
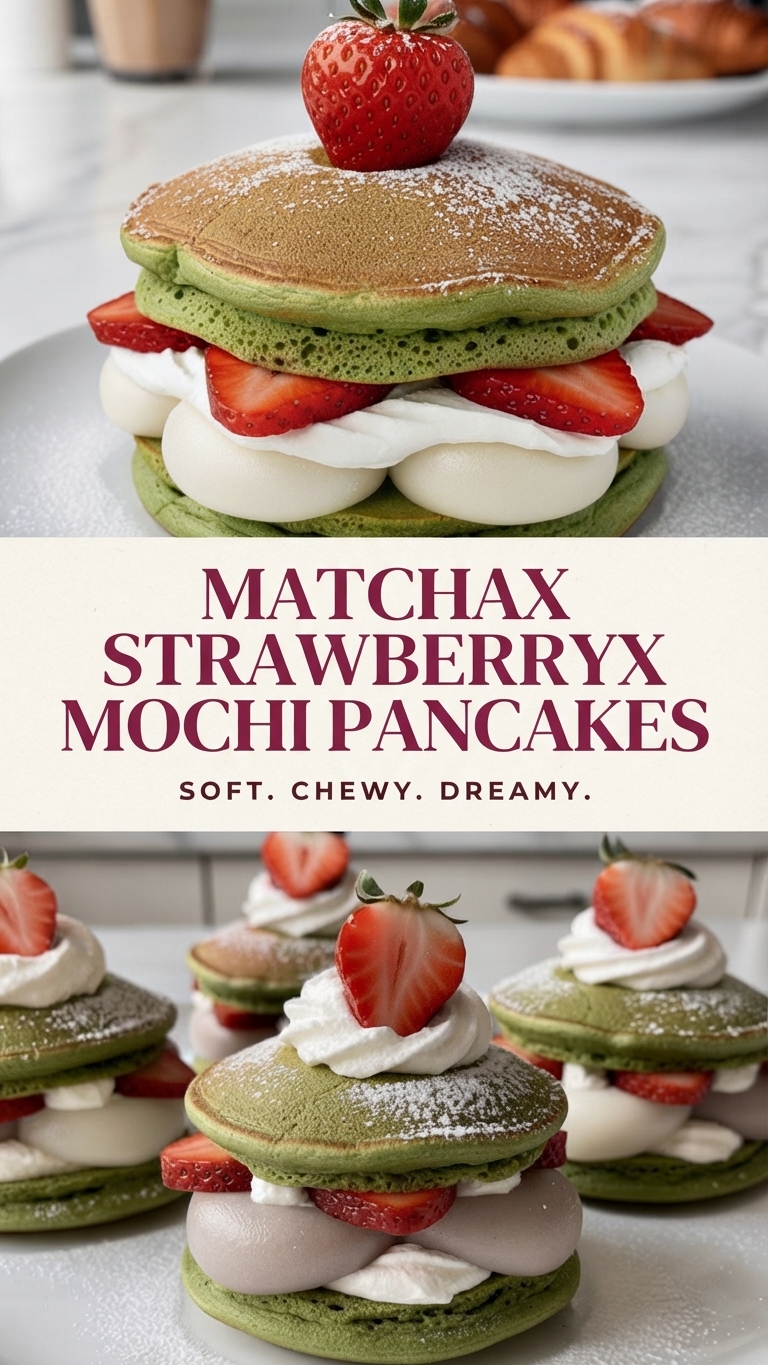
Matcha Strawberry Mochi Pancake Stacks
Elevate your breakfast or brunch with these stunning Matcha Strawberry Mochi Pancake Stacks. This recipe combines the earthy, vibrant flavor of Japanese matcha green tea with fluffy pancakes, fresh strawberries, and delightful, chewy bites of soft mochi. The combination of textures—from the pillowy pancakes and sweet berries to the distinct, satisfying chew of the mochi—creates a truly dreamy dessert-for-breakfast experience. Inspired by modern Japanese café creations, this dish is surprisingly easy to assemble at home, making it perfect for special occasions or a luxurious weekend treat.
Ingredients
For the Matcha Pancake Batter:
-
1 ½ cups all-purpose flour
-
2 tablespoons high-quality culinary-grade matcha powder
-
2 tablespoons granulated sugar
-
1 tablespoon baking powder
-
½ teaspoon salt
-
1 large egg, lightly beaten
-
1 ¼ cups whole milk (or non-dairy alternative like almond or oat milk)
-
3 tablespoons unsalted butter, melted and cooled
-
1 teaspoon vanilla extract
For the Filling and Topping:
-
1 pint (about 2 cups) fresh strawberries, hulled and thinly sliced
-
1 cup heavy whipping cream
-
2 tablespoons powdered sugar
-
1 teaspoon vanilla extract
-
10-12 pre-made soft mochi balls (store-bought or homemade), halved horizontally
-
Powdered sugar, for dusting
Instructions
Prepare the Mochi and Whipped Cream:
-
Mochi Prep: If using store-bought mochi spheres, slice each one in half horizontally using a sharp, slightly wet knife. Set aside on a plate lined with parchment paper to prevent sticking.
-
Whipped Cream: In a chilled mixing bowl, add the heavy whipping cream, powdered sugar, and vanilla extract. Using a hand mixer or a stand mixer with a whisk attachment, beat the cream on medium-high speed until stiff peaks form. Be careful not to over-beat. Transfer the whipped cream to a piping bag fitted with a large star tip, or keep it in the bowl. Refrigerate until ready to assemble.
Make the Matcha Pancakes:
-
Dry Ingredients: In a large mixing bowl, sift together the all-purpose flour, matcha powder, granulated sugar, baking powder, and salt. Sifting is crucial for removing any matcha clumps and ensuring a smooth batter.
-
Wet Ingredients: In a separate medium bowl, whisk together the beaten egg, milk, melted butter, and vanilla extract until combined.
-
Combine: Pour the wet ingredients into the dry ingredients. Gently mix with a spatula or whisk just until combined. Do not over-mix; a few small lumps are perfectly fine. Over-mixing will result in tough, dense pancakes. Let the batter rest for 5-10 minutes.
-
Cook: Preheat a large, non-stick skillet or griddle over medium-low heat. Lightly brush with melted butter or oil.
-
Pour Batter: For each pancake, pour about ¼ cup of batter onto the skillet. You can make 3-4 pancakes at a time, depending on the size of your pan.
-
Flip: Cook for 2-3 minutes, or until small bubbles appear on the surface and the edges look set. Gently flip the pancakes and cook for another 1-2 minutes, or until cooked through and lightly golden brown.
-
Keep Warm: Transfer the cooked pancakes to a baking sheet lined with parchment paper and keep them warm in a low-temperature oven (around 200°F / 95°C) while you cook the remaining batter.
Assemble the Stacks:
-
Individual Stacks: To assemble, place one matcha pancake on a serving plate.
-
First Layer: Pipe or spoon a generous amount of whipped cream onto the center of the pancake. Arrange a single layer of sliced strawberries over the cream. Top the strawberries with 3-4 halved mochi pieces, pressing them gently into the cream.
-
Second Pancake: Carefully place a second matcha pancake on top of the first layer.
-
Second Layer: Repeat the process: pipe another layer of whipped cream, followed by more sliced strawberries, and finally, 3-4 more halved mochi pieces.
-
Top Pancake: Finish the stack by placing a third matcha pancake on top.
-
Garnish: Top the final pancake with a final swirl of whipped cream and one whole, fresh strawberry (hulled or with the green leafy top intact). Dust the entire stack generously with powdered sugar.
-
Repeat: Repeat the assembly process with the remaining ingredients to create 3-4 stunning stacks.
Tips for Success
-
Quality Matcha: The flavor and color of your pancakes heavily depend on the quality of the matcha powder. Invest in a good culinary-grade matcha for the best results.
-
Sift the Matcha: Always sift the matcha powder with the other dry ingredients. This eliminates lumps and ensures a smooth, evenly colored batter.
-
Don’t Over-mix: A few lumps in the batter are normal. Over-mixing develops gluten, leading to tough, rubbery pancakes instead of light and fluffy ones.
-
Low and Slow Heat: Matcha pancakes can brown quickly before cooking through. Use medium-low heat to ensure they cook evenly without burning.
-
Mochi Handling: If making mochi from scratch, dust your hands and tools with cornstarch or potato starch (katakuriko) to prevent sticking. Store-bought mochi is a great time-saver and works perfectly in this recipe.
Storage and Reheating
-
Pancakes: Cooked pancakes can be stored in an airtight container in the refrigerator for up to 3 days. Reheat individual pancakes in a toaster or microwave for 20-30 seconds until warm.
-
Assembly: These stacks are best assembled and served immediately. The mochi can become hard if refrigerated, and the whipped cream will deflate over time.
Serving Suggestions
-
Serve immediately after assembly for the best texture contrast.
-
Pair with a cup of hot matcha latte or a refreshing iced strawberry matcha latte to complement the flavors.
-
A drizzle of warmed maple syrup or strawberry sauce can be added for extra sweetness, though the powdered sugar and fresh fruit are often sufficient.
Closing
This Matcha Strawberry Mochi Pancake Stack is more than just breakfast; it’s a celebration of flavor and texture. From the soft, chewy mochi to the creamy fruit filling and fluffy green tea pancakes, every bite is a delightful surprise. Whether you’re treating yourself to a weekend indulgence or hosting a fancy brunch, this recipe is guaranteed to impress. Enjoy the process and the delicious results!