Introduction
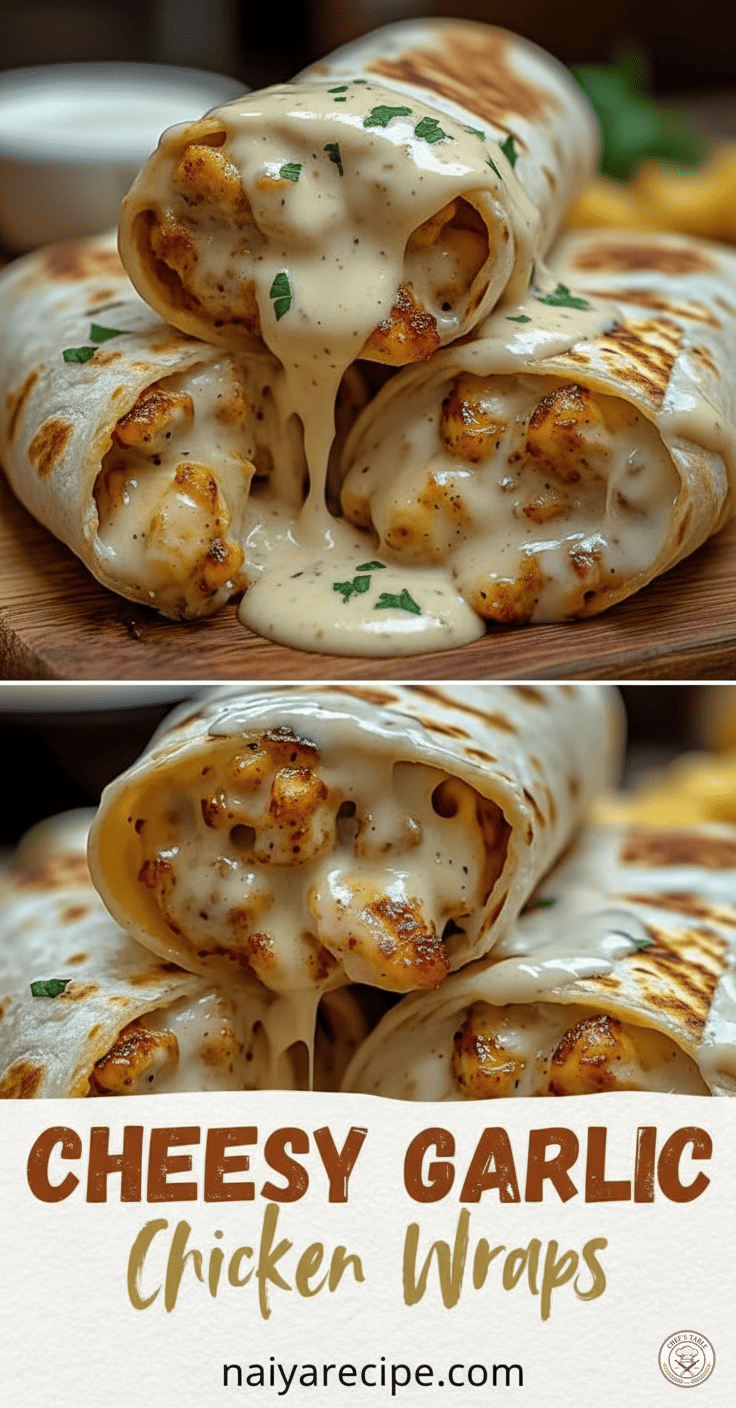
In the culinary world, there are dishes that are merely satisfying, and then there are those that ignite a spark of joy with every single bite. Today, we’re diving deep into the latter category with a recipe that promises to become a cherished staple in your kitchen: Cheesy Garlic Chicken Wraps. Forget bland, forget boring – these wraps are an explosion of flavor and texture, perfectly balancing succulent chicken, rich garlic, and the irresistible pull of melted cheese, all encased in a soft tortilla. Whether you’re a seasoned home cook or just starting your culinary journey, this recipe is designed for ease, adaptability, and guaranteed deliciousness. Get ready to elevate your weeknight meals and impress your friends and family with a dish that’s as comforting as it is exciting.
The Magic Behind the Wraps: Why They’re So Good
What makes these Cheesy Garlic Chicken Wraps truly stand out? It’s a symphony of elements working in perfect harmony.
1. The Chicken: We start with tender, juicy chicken pieces. The secret here is not just in the cooking, but in the seasoning. Each piece is lovingly coated in a blend of aromatic spices and herbs, ensuring that every morsel is packed with flavor. When cooked to perfection, the chicken develops a beautiful golden-brown crust, adding a delightful textural contrast to the creamy interior of the wrap.
2. The Garlic Infusion: Garlic is the undisputed star of this show. We’re talking about a generous amount of fresh garlic, expertly incorporated to create a fragrant, pungent, and utterly addictive base. This isn’t just a hint of garlic; it’s a celebration of its robust flavor, which permeates every component of the dish without overpowering it.
3. The Cheese Factor: Let’s be honest, few things are as universally loved as melted cheese. For these wraps, we opt for a blend of cheeses that melt beautifully, creating a gooey, stretchy, and incredibly satisfying filling. The cheese not only adds richness and creaminess but also acts as a binder, holding all the delicious components together in a harmonious embrace.
4. The Tortilla: The humble tortilla plays a crucial role, providing a soft, pliable, and convenient vessel for all the deliciousness within. A lightly toasted tortilla adds another layer of texture and warmth, making each bite an experience to savor.
5. The Creamy Sauce: Often, the “cheesy” aspect comes from a delectable, creamy sauce that envelops the chicken and garlic. This sauce is typically a simple yet ingenious creation, often dairy-based and seasoned to perfection, enhancing the overall richness and moisture of the filling.
Ingredients You’ll Need
Creating these culinary masterpieces requires a selection of fresh, high-quality ingredients. Here’s what you’ll want to have on hand:
- For the Chicken:
- 500g (approximately 1.1 lbs) boneless, skinless chicken breasts or thighs, cut into 1-inch cubes
- 2 tablespoons olive oil or a neutral cooking oil
- 1 teaspoon paprika (smoked paprika for an extra layer of flavor)
- 1/2 teaspoon dried oregano
- 1/2 teaspoon onion powder
- 1/4 teaspoon black pepper
- Salt to taste
- For the Garlic Sauce/Filling:
- 4-6 cloves fresh garlic, minced (adjust to your garlic preference!)
- 2 tablespoons unsalted butter or a plant-based alternative
- 2 tablespoons all-purpose flour (or a gluten-free alternative)
- 1.5 cups milk (dairy or non-dairy, such as unsweetened almond or soy milk)
- 1.5 cups shredded cheese (a blend of mozzarella and cheddar works wonderfully, or Monterey Jack for extra meltiness)
- 1/4 cup fresh parsley, chopped (for garnish, optional)
- For Assembly:
- 8-10 large flour tortillas (burrito-sized)
Step-by-Step Instructions
Let’s get cooking! Follow these simple steps to bring your Cheesy Garlic Chicken Wraps to life.
Step 1: Prepare and Cook the Chicken
- Cube the Chicken: If you haven’t already, cut your boneless, skinless chicken breasts or thighs into uniform 1-inch cubes. This ensures even cooking.
- Season the Chicken: In a medium bowl, toss the chicken cubes with 2 tablespoons of olive oil, paprika, dried oregano, onion powder, black pepper, and salt. Make sure each piece is well coated.
- Cook the Chicken: Heat a large skillet or frying pan over medium-high heat. Once hot, add the seasoned chicken in a single layer. Avoid overcrowding the pan; you might need to cook the chicken in batches. Cook for 5-7 minutes, flipping occasionally, until the chicken is golden brown and cooked through. The internal temperature should reach 74°C (165°F). Remove the cooked chicken from the skillet and set aside.
Step 2: Prepare the Cheesy Garlic Sauce
- Melt the Butter and Sauté Garlic: In the same skillet (no need to clean it – those browned bits add flavor!), melt 2 tablespoons of butter over medium heat. Add the minced garlic and cook for about 1 minute until fragrant. Be careful not to burn the garlic, as it can turn bitter.
- Make a Roux: Sprinkle 2 tablespoons of all-purpose flour over the melted butter and garlic. Whisk continuously for 1-2 minutes to create a smooth paste, or “roux.” This will thicken your sauce.
- Add Milk: Gradually pour in 1.5 cups of milk, whisking constantly to prevent lumps. Continue to whisk as the sauce comes to a gentle simmer and thickens. This usually takes 3-5 minutes.
- Incorporate Cheese: Once the sauce has thickened, reduce the heat to low. Add the shredded cheese, stirring constantly until it has completely melted and the sauce is smooth and creamy. Taste the sauce and adjust salt and pepper if needed.
- Combine with Chicken: Return the cooked chicken to the skillet with the cheesy garlic sauce. Stir everything together until the chicken is thoroughly coated in the sauce. This is your delicious filling!
Step 3: Assemble the Wraps
- Warm the Tortillas: Warm your flour tortillas slightly. You can do this by heating them in a dry skillet for 15-20 seconds per side, microwaving them for 10-15 seconds, or wrapping them in a damp paper towel and microwaving for 30 seconds. Warm tortillas are more pliable and less likely to tear.
- Fill the Tortillas: Lay a warm tortilla flat on a clean surface. Spoon a generous amount of the cheesy garlic chicken mixture onto the center of the tortilla, leaving some space around the edges.
- Fold the Wraps: To fold a burrito-style wrap:
- Fold in the opposite sides of the tortilla over the filling.
- Then, fold up the bottom edge of the tortilla tightly over the filling.
- Roll the tortilla up from the bottom, keeping it snug, until you reach the top.
- Repeat: Continue filling and folding the remaining tortillas until all the chicken mixture is used.
Step 4: Finish and Serve (Optional but Recommended)
- Lightly Toast the Wraps: For an extra layer of flavor and texture, you can lightly toast the assembled wraps. Heat a clean, dry skillet over medium heat. Place the wraps seam-side down in the skillet and cook for 2-3 minutes per side, until golden brown and slightly crispy. This also helps to seal the wraps and ensures the cheese inside is extra melty.
- Garnish and Serve: Garnish your Cheesy Garlic Chicken Wraps with fresh chopped parsley, if desired. Serve immediately and enjoy the warm, comforting goodness!
Pro Tips for Perfection
- Don’t Skimp on Garlic: The recipe calls for 4-6 cloves, but if you’re a true garlic lover, feel free to add more! Freshly minced garlic makes all the difference.
- Cheese Choice Matters: While mozzarella and cheddar are great, experiment with other melting cheeses like Monterey Jack, provolone, or even a hint of gruyere for a more sophisticated flavor profile.
- Even Chicken Pieces: Cutting your chicken into uniform pieces ensures that all the chicken cooks at the same rate, preventing some pieces from being overcooked while others are still raw.
- Warm Tortillas are Key: This step is crucial for easy rolling and preventing tears. A cold tortilla will crack.
- Spice it Up: If you like a little heat, consider adding a pinch of red pepper flakes to your chicken seasoning or directly into the cheesy garlic sauce.
- Make Ahead: You can prepare the cheesy garlic chicken filling ahead of time and store it in an airtight container in the refrigerator for up to 2-3 days. Reheat gently on the stovetop or in the microwave before assembling the wraps.
- Freezing: These wraps can be frozen! Assemble them without the final toasting step. Wrap individually in cling film, then foil, and place in a freezer-safe bag. To reheat, unwrap and bake from frozen at 180°C (350°F) for 20-30 minutes, or until heated through and golden.
Serving Suggestions
Cheesy Garlic Chicken Wraps are incredibly versatile and can be served in many ways:
- Simple & Delicious: They are hearty enough to be a meal on their own.
- Side Salad: Pair them with a crisp green salad tossed with a light vinaigrette to balance the richness.
- Tomato Soup: A classic combination, especially on a chilly evening. The fresh tang of tomato soup cuts through the richness of the wraps beautifully.
- Fresh Salsa or Guacamole: For a fresh, vibrant kick, offer a side of homemade tomato salsa or creamy guacamole for dipping.
- Roasted Vegetables: A side of roasted broccoli, asparagus, or bell peppers can add nutritional value and another layer of flavor.
- Coleslaw: A crunchy, tangy coleslaw can be a fantastic contrast to the warm, soft wraps.
Why These Wraps Are a Game-Changer
These Cheesy Garlic Chicken Wraps aren’t just another recipe; they’re a solution for busy weeknights, a crowd-pleaser for casual gatherings, and a comforting treat when you need something satisfying. They offer:
- Speed: From start to finish, you can have these on the table in under 30-40 minutes.
- Flavor: The combination of savory chicken, pungent garlic, and creamy cheese is simply irresistible.
- Customization: Easily adaptable to your taste preferences and what you have on hand.
- Versatility: Perfect for lunch, dinner, or even a hearty snack.
- Kid-Friendly: The mild, cheesy flavor appeals to even the pickiest eaters.
Conclusion
There you have it – the complete guide to making the most incredible Cheesy Garlic Chicken Wraps. This recipe is a testament to how simple ingredients, handled with care and a little bit of love, can transform into something truly extraordinary. So, next time you’re wondering what to make for dinner, reach for this recipe. You’ll be rewarded with a meal that’s bursting with flavor, incredibly satisfying, and destined to become a regular feature in your culinary repertoire. Enjoy the process, savor every bite, and share the joy of these amazing wraps with those you love. Happy cooking!