
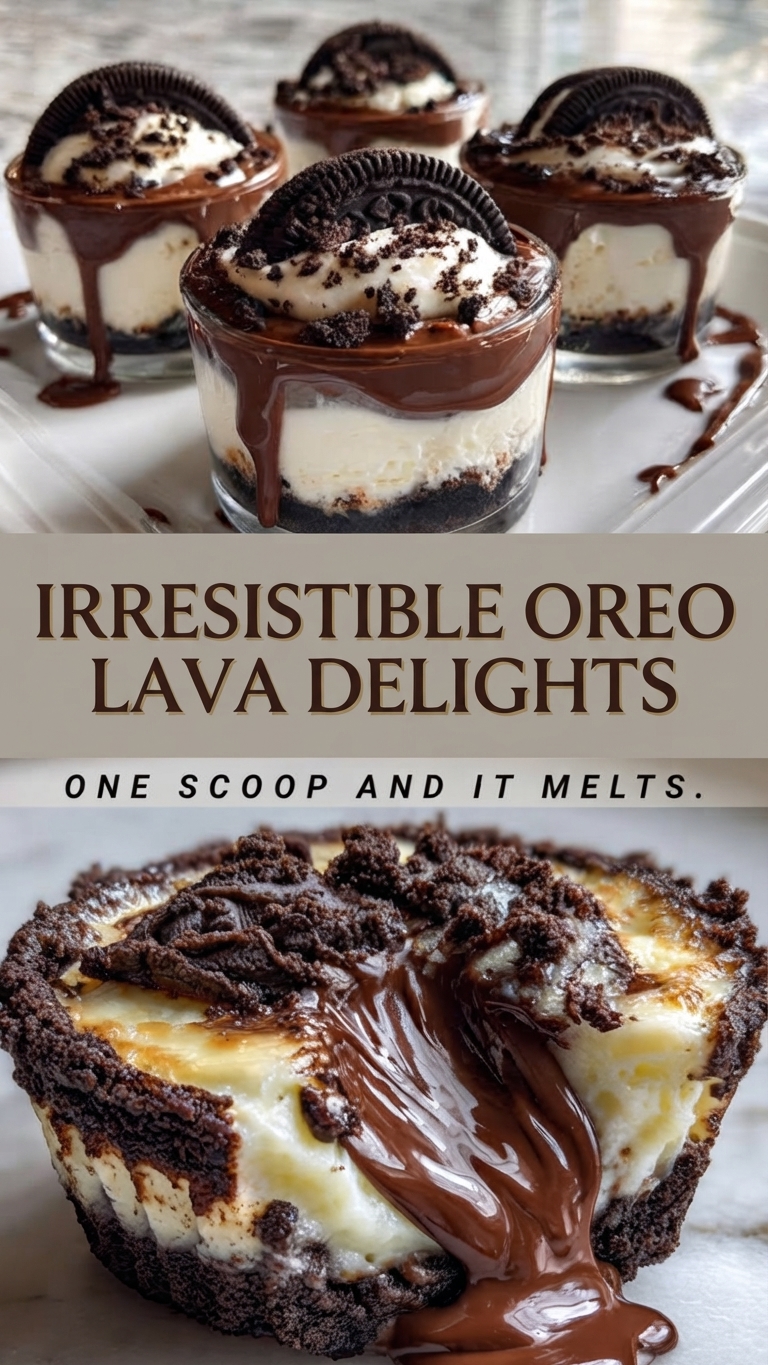
Irresistible Oreo Lava Delights: The Ultimate Chocolate Cream Dessert
Prepare yourself for a dessert experience that is nothing short of decadent. These Irresistible Oreo Lava Delights are a dream come true for chocolate lovers, combining the crunch of chocolate sandwich cookies with a luxuriously creamy cheesecake filling and a cascade of warm chocolate sauce.
The magic happens when you take that first bite—the cool, creamy cheesecake gives way to a warm, molten center, creating a symphony of textures and temperatures. This recipe is designed for those moments when only an ultra-rich, intensely chocolatey treat will do. And the best part? It’s simpler to make than it looks, making it perfect for impressing guests or treating yourself to a gourmet dessert night at home. Let’s get into how to create this masterpiece.
Ingredients
For the Chocolate Cookie Crust:
-
24 chocolate sandwich cookies (such as Oreos), cream filling removed
-
6 tablespoons (85g) unsalted butter, melted
For the Cream Cheese Filling:
-
16 oz (450g) full-fat cream cheese, softened to room temperature
-
1/2 cup (100g) granulated sugar
-
2 large eggs, at room temperature
-
1 teaspoon pure vanilla extract
-
1 tablespoon all-purpose flour
-
A pinch of salt
For the Chocolate Lava Center:
-
1/2 cup (120ml) heavy cream
-
4 oz (115g) high-quality semi-sweet chocolate, finely chopped
Garnish (Optional but Recommended):
-
Whipped cream
-
Crushed chocolate sandwich cookies
Numbered Instructions
Part 1: Prepare the Crust
-
Preheat & Prep: Preheat your oven to 325°F (165°C). Prepare a standard 6-cup muffin tin by lining it with paper or silicone liners.
-
Crush Cookies: Place the 24 cookies (cream removed) in a food processor and pulse until they form fine crumbs. Alternatively, place them in a sealed plastic bag and crush them thoroughly with a rolling pin.
-
Combine & Press: In a small bowl, mix the cookie crumbs with the melted butter until the mixture is evenly moistened. Spoon about 2 tablespoons of the crumb mixture into the bottom of each lined muffin cup. Use the bottom of a small glass or your fingers to firmly press the crumbs into an even layer.
-
Bake Crust: Bake the crusts for 5 minutes to set them. Remove from the oven and let them cool on a wire rack while you prepare the filling.
Part 2: Prepare the Cream Cheese Filling
-
Beat Cream Cheese: In a large bowl using a hand mixer or a stand mixer fitted with the paddle attachment, beat the softened cream cheese on medium speed until completely smooth and creamy, about 1–2 minutes. Scrape down the sides and bottom of the bowl.
-
Add Sugar: Add the granulated sugar and beat on medium speed until fully incorporated.
-
Incorporate Eggs: Add the eggs one at a time, beating well after each addition. Mix in the vanilla extract, all-purpose flour, and salt, mixing only until everything is just combined. Be careful not to overmix.
-
Fill Cups: Spoon or pipe the cream cheese filling evenly over the cooled crusts, filling each cup almost to the top.
Part 3: Create the Lava Center
-
Heat Cream: In a small saucepan over medium-low heat, bring the heavy cream just to a simmer (do not let it boil).
-
Melt Chocolate: Remove the saucepan from the heat and add the finely chopped chocolate. Let the mixture sit undisturbed for 5 minutes to melt the chocolate.
-
Stir to Ganache: After 5 minutes, gently whisk the mixture starting from the center in small, concentric circles. Continue whisking until it is perfectly smooth, glossy, and combined into a rich ganache.
-
Add Lava: Carefully drop 1–2 teaspoons of the chocolate ganache directly into the center of each cream cheese-filled cup. It will naturally sink slightly into the batter.
Part 4: Bake and Serve
-
Bake: Bake the muffin tin at 325°F (165°C) for 20–25 minutes. The cheesecake edges should be set and look slightly puffy, but the centers should still have a slight jiggle.
-
Cool Down: Remove the tin from the oven and allow the treats to cool in the pan for at least 20 minutes. This cooling process is crucial for the texture.
-
Final Touches: Once slightly cooled, carefully remove each treat from the muffin tin. For the full experience, they should be served while still warm so the center remains molten. If you prefer, top each one with a dollop of whipped cream and an extra sprinkle of crushed cookie crumbs.
Tips
-
Room Temperature Ingredients: Ensure your cream cheese and eggs are truly at room temperature. This prevents lumps in the batter and ensures a smooth, crack-free cheesecake.
-
Don’t Overbake: The key to the “lava” effect is not overbaking. The center should be jiggly when you remove it from the oven; it will continue to set slightly as it cools.
-
Perfect Pan Release: For easy removal, use quality paper liners or, even better, silicone liners which pop right off.
-
Finely Chop Chocolate: For the ganache, finely chop the chocolate so it melts evenly and quickly in the hot cream without seizing.
Storage and Reheating
-
Storage: These treats are best enjoyed fresh and warm. If you have leftovers, store them in an airtight container in the refrigerator for up to 3 days.
-
Reheating: To restore the molten center, gently reheat individual treats in the microwave for 15–20 seconds on high power. Watch closely to prevent the cheesecake from overheating.
Serving Suggestions
-
The Classic: Serve warm with a generous swirl of whipped cream and a final dusting of cookie crumbs.
-
A La Mode: For an extra indulgent dessert, place a warm Oreo Lava Delight in a bowl alongside a scoop of vanilla bean ice cream. The contrast of hot and cold is divine.
-
Coffee Pair: Enjoy this rich chocolate treat with a freshly brewed cup of strong coffee or an espresso to balance the sweetness.
Closing
You have just mastered a truly special dessert. The Irresistible Oreo Lava Delights are a testament to the power of simple ingredients combining to create something spectacular. Whether you are sharing these with family, serving them at a dinner party, or just enjoying a quiet moment of indulgence, we know you’ll love every single warm, gooey, and incredibly chocolatey bite. So grab a spoon, dig in, and let the chocolate lava melt away. Enjoy!