
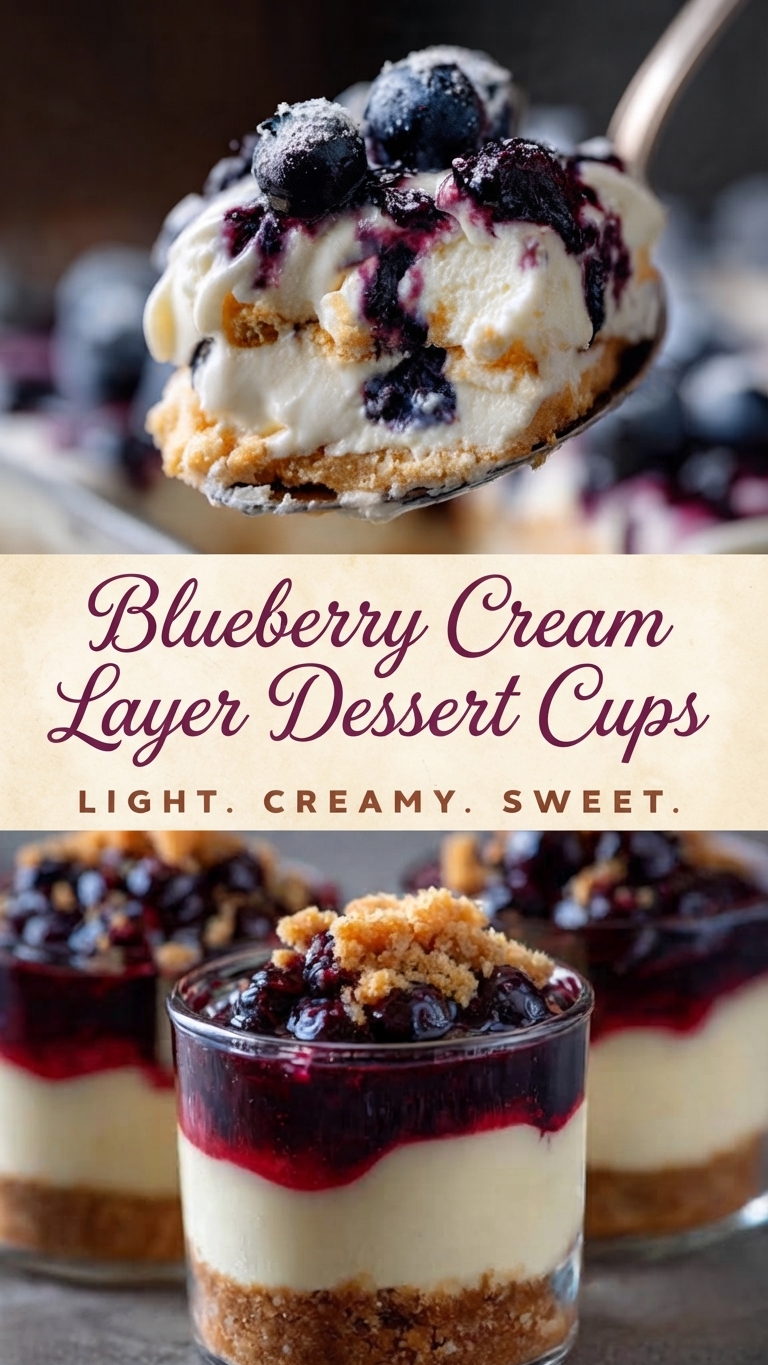
No-Bake Blueberry Cream Layer Dessert Cups
Prep time: 20 minutes | Chill time: 2 hours | Servings: 4-6
Introduction
Experience the perfect symphony of textures and flavors with these delightful No-Bake Blueberry Cream Layer Dessert Cups. These individual treats are a dream for dessert lovers, combining a buttery, golden crumb base, a rich and velvety whipped cream cheese layer, and a vibrant, sweet-tart blueberry topping. It’s an elegant yet incredibly simple recipe that comes together quickly, requiring no oven time at all. Whether you’re hosting a summer dinner party, need a quick weeknight treat, or want a make-ahead dessert that impresses, these cups are the ideal choice. The layers are distinct, beautiful, and absolutely delicious.
Ingredients
For the Crust:
-
1 ½ cups (150g) graham cracker crumbs (about 10-12 full sheets)
-
6 tablespoons (85g) unsalted butter, melted
-
2 tablespoons granulated sugar
For the Cream Layer:
-
16 oz (450g) full-fat cream cheese, softened to room temperature
-
¾ cup (95g) powdered sugar, sifted
-
1 teaspoon pure vanilla extract
-
1 cup (240ml) heavy whipping cream, very cold
For the Blueberry Topping:
-
2 cups (300g) fresh or frozen blueberries
-
¼ cup (50g) granulated sugar
-
2 tablespoons water
-
1 tablespoon cornstarch
-
1 teaspoon fresh lemon juice
-
¼ teaspoon lemon zest (optional)
Instructions
Step 1: Prepare the Crust
-
In a medium bowl, combine the graham cracker crumbs, 2 tablespoons of granulated sugar, and the melted butter. Stir with a fork until all the crumbs are evenly moistened and resemble wet sand.
-
Divide the crumb mixture evenly among 4 to 6 small dessert cups or glasses (about 2-3 tablespoons per cup).
-
Firmly press the crumbs into the bottom of each cup to create an even, compact layer. You can use the back of a spoon or a small tamper. Set the cups aside while you prepare the filling.
Step 2: Prepare the Cream Layer
-
In a large mixing bowl, using a hand mixer or a stand mixer fitted with the paddle attachment, beat the softened cream cheese on medium speed until completely smooth and creamy, about 2-3 minutes. Scrape down the sides of the bowl as needed.
-
Add the sifted powdered sugar and vanilla extract to the cream cheese. Beat on low speed until combined, then increase to medium speed and mix until smooth and fluffy (about 1-2 minutes). Set aside.
-
In a separate, chilled bowl, use a clean whisk or hand mixer to beat the cold heavy whipping cream on medium-high speed until stiff peaks form. This means when you lift the beater, the cream holds its shape firmly.
-
Gently fold about one-third of the whipped cream into the cream cheese mixture to lighten it. Then, gently fold in the remaining whipped cream in two additions, being careful not to deflate the air you’ve whipped in. Fold until the mixture is evenly combined and no streaks remain.
-
Evenly divide the cream cheese mixture among the prepared crust-filled cups (about ½ cup per cup). You can spoon it in or use a piping bag for neater layers.
-
Gently tap the cups on the counter to settle the cream layer and smooth the top with the back of a spoon or an offset spatula.
Step 3: Prepare the Blueberry Topping
-
In a small saucepan, combine 1 ½ cups of the blueberries, ¼ cup sugar, water, lemon juice, and lemon zest (if using).
-
Place the saucepan over medium heat and bring the mixture to a simmer. Cook, stirring occasionally, until the berries start to burst and release their juices, about 5-7 minutes.
-
In a small bowl, whisk together the cornstarch and 1 tablespoon of water until smooth to create a slurry.
-
While stirring the simmering blueberries constantly, slowly pour in the cornstarch slurry. Continue to simmer and stir for another 1-2 minutes, or until the sauce thickens significantly and turns glossy.
-
Remove the saucepan from the heat. Stir in the remaining ½ cup of fresh (or frozen) blueberries. This adds texture and bursts of fresh flavor.
-
Let the blueberry topping cool completely at room temperature, then transfer it to the refrigerator to chill slightly.
Step 4: Assemble and Chill
-
Once the blueberry topping is cool, spoon it generously over the cream layer in each dessert cup.
-
Cover the cups loosely with plastic wrap or lids and refrigerate for at least 2 hours, or ideally overnight. Chilling allows the flavors to meld and the layers to set perfectly.
Tips
-
For a Smoother Cream Layer: Ensure your cream cheese is truly at room temperature before mixing to avoid lumps.
-
For a Crunchier Crust: After pressing the crumbs into the cups, briefly chill the crust layer in the refrigerator or freezer while you prepare the other components.
-
Variations: Feel free to substitute the graham cracker crumbs with Biscoff cookies, vanilla wafers, or even shortbread cookies for a different flavor profile. You can also use raspberries, blackberries, or a mix of berries for the topping.
-
Make Ahead: These dessert cups can be fully assembled and stored in the refrigerator for up to 2 days, making them ideal for stress-free entertaining. The crust may soften slightly over time.
Storage and Reheating
-
Storage: Store any leftover covered dessert cups in the refrigerator. They are best enjoyed within 2-3 days. The blueberry topping will keep the fruit fresh and vibrant.
-
Reheating: These cups are intended to be served chilled and do not require reheating.
Serving Suggestions
These dessert cups are stunning on their own, but for an extra special presentation, garnish each cup just before serving with:
-
A few fresh blueberries.
-
A small sprig of fresh mint.
-
A light dusting of powdered sugar.
-
A dollop of freshly whipped cream.
Serve them with a small spoon to capture every delicious layer.
Closing
Enjoy creating (and devouring!) these beautiful, light, and luscious Blueberry Cream Layer Dessert Cups. They prove that incredible desserts don’t require complex techniques or hours in the kitchen. With their bright colors and balanced flavors, they are sure to become a new favorite recipe for every occasion. Happy no-baking!