
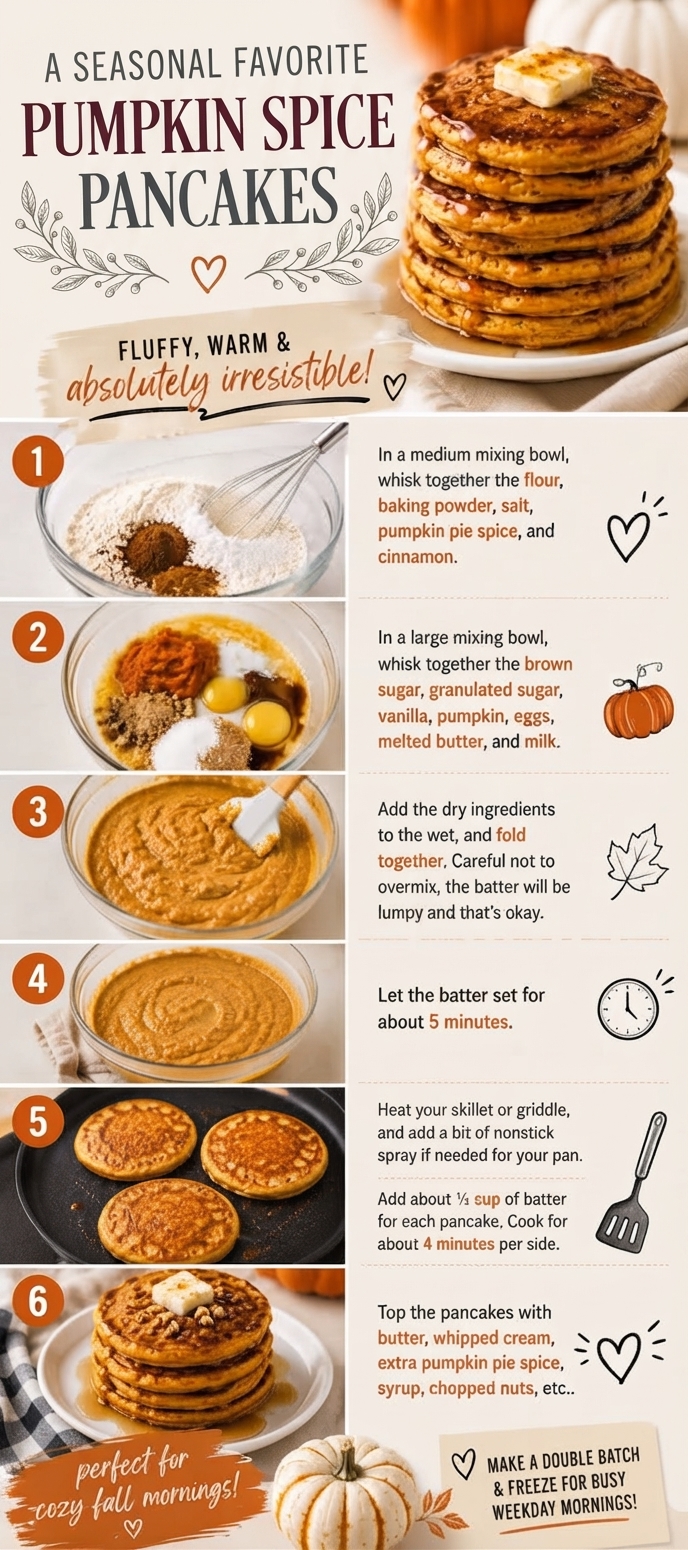
The Ultimate Fluffy Pumpkin Spice Pancakes
These pumpkin spice pancakes are the quintessential taste of autumn. They are exceptionally fluffy, warmly spiced, and incredibly irresistible. Featuring real pumpkin puree and a blend of cozy fall spices, this recipe transforms a classic breakfast into a seasonal celebration. It’s the perfect way to make a cozy fall morning or a busy weekday extra special.
Ingredients
To create this stack of seasonal joy, you will need the following ingredients, organized by category:
Dry Ingredients
-
1 ½ cups all-purpose flour
-
2 teaspoons baking powder
-
1 teaspoon salt
-
2 teaspoons pumpkin pie spice
-
½ teaspoon ground cinnamon
Wet Ingredients
-
1 cup whole milk (or your preferred dairy alternative)
-
1 cup pumpkin puree (make sure it is 100% pure pumpkin, not pumpkin pie filling)
-
2 large eggs
-
¼ cup packed light or dark brown sugar
-
¼ cup granulated sugar
-
2 tablespoons unsalted butter, melted and slightly cooled
-
2 teaspoons vanilla extract
For Cooking and Toppings
-
Nonstick cooking spray or butter for the griddle
-
Butter, for serving
-
Warm maple syrup, for serving
-
Whipped cream (optional)
-
Chopped nuts, such as pecans or walnuts (optional)
-
An extra sprinkle of pumpkin pie spice (optional)
Step-by-Step Instructions
This recipe is straightforward and comes together quickly. Follow these numbered instructions for perfect pumpkin pancakes every time:
-
Combine the Dry Ingredients: In a medium-sized mixing bowl, whisk together the flour, baking powder, salt, pumpkin pie spice, and cinnamon until well combined and aerated. This ensures the leavening agent and spices are evenly distributed.
-
Whisk the Wet Ingredients: In a separate large mixing bowl, add the whole milk, pumpkin puree, eggs, brown sugar, granulated sugar, melted butter, and vanilla extract. Whisk vigorously for about 1–2 minutes, until the mixture is uniform and the sugars are mostly dissolved. The mixture should look smooth and vibrant.
-
Mix the Batter: Pour the dry ingredient mixture into the bowl with the wet ingredients. Use a spatula to gently fold the dry ingredients into the wet ingredients. Crucial Step: Do not overmix. Mix only until the ingredients are just combined. A few small lumps are perfectly fine and, in fact, desirable. Overmixing will lead to dense, tough pancakes.
-
Let the Batter Rest: Allow the batter to rest, undisturbed, on the counter for approximately 5–10 minutes. This brief rest period allows the flour to fully hydrate and the baking powder to begin activating, which is key to achieving the fluffiest texture. You might see a few small bubbles form on the surface during this time.
-
Cook the Pancakes: Heat a large skillet or electric griddle over medium-low heat. Lightly coat the surface with nonstick cooking spray or a small amount of butter. Once hot, pour about ¼ cup of the batter onto the griddle for each pancake. Cook for about 4 minutes on the first side. You will know they are ready to flip when the edges look set and bubbles begin to form and pop on the uncooked surface. Carefully flip the pancakes and cook for an additional 4 minutes, or until they are golden brown on the bottom and cooked through.
-
Serve: Remove the cooked pancakes from the griddle and serve them immediately while warm. Stack them high and top with a pat of butter and a generous pour of warm maple syrup. For the ultimate treat, add a dollop of whipped cream, a sprinkle of chopped pecans or walnuts, and an extra dusting of pumpkin pie spice.
Tips for Success
-
Measure Flour Correctly: The best way to measure flour is by spooning it into the measuring cup and leveling it off with a knife. Scooping directly from the bag can compact the flour, resulting in dry pancakes.
-
Room Temperature Ingredients: For a smoother batter that cooks more evenly, bring your eggs and milk to room temperature before starting.
-
Control the Heat: If your pancakes are burning on the outside before cooking through in the middle, your griddle is too hot. Lower the heat slightly. A medium-low setting is usually best for a golden-brown exterior.
-
Do Not Press: Avoid the temptation to press down on the pancakes with your spatula while they are cooking. This flattens them and removes the air pockets that make them fluffy.
Storage and Reheating
These pancakes are excellent for making ahead.
-
Refrigerator: Allow the leftover pancakes to cool completely to room temperature. Stack them with parchment or wax paper between each pancake to prevent sticking and place them in an airtight container or a sealed freezer bag. They will keep in the refrigerator for up to 5 days.
-
Freezer: To freeze, cool the pancakes completely, stack with parchment paper, and place in a freezer-safe bag. They can be frozen for up to 2 months.
-
Reheating:
-
From Refrigeration: Reheat individual pancakes in the microwave for 20–30 seconds, or in a toaster on a low setting. You can also warm them in a dry skillet over low heat.
-
From Frozen: Reheat directly from the freezer in a toaster on the defrost setting, or in the microwave for 45–60 seconds.
-
Serving Suggestions
These pumpkin spice pancakes are a meal on their own, but they pair beautifully with classic breakfast sides. For a complete brunch spread, serve them alongside crispy hash browns, fresh fruit salad, or sausage links. For beverage pairings, they are wonderful with a mug of hot coffee, a spiced apple cider, or a homemade pumpkin spice latte.
Make It a Double Batch
This recipe is perfect for meal prep. We highly recommend making a double or triple batch on the weekend. Follow the freezer instructions above, and you will have a delicious, homemade breakfast ready to go for those busy weekday mornings. Simply grab a pancake or two from the freezer and reheat them for a quick and satisfying start to your day.
Closing
We hope you enjoy making and eating these fluffy pumpkin spice pancakes. They are a comforting and delicious way to welcome the autumn season and are sure to become a new family favorite. Happy cooking!