
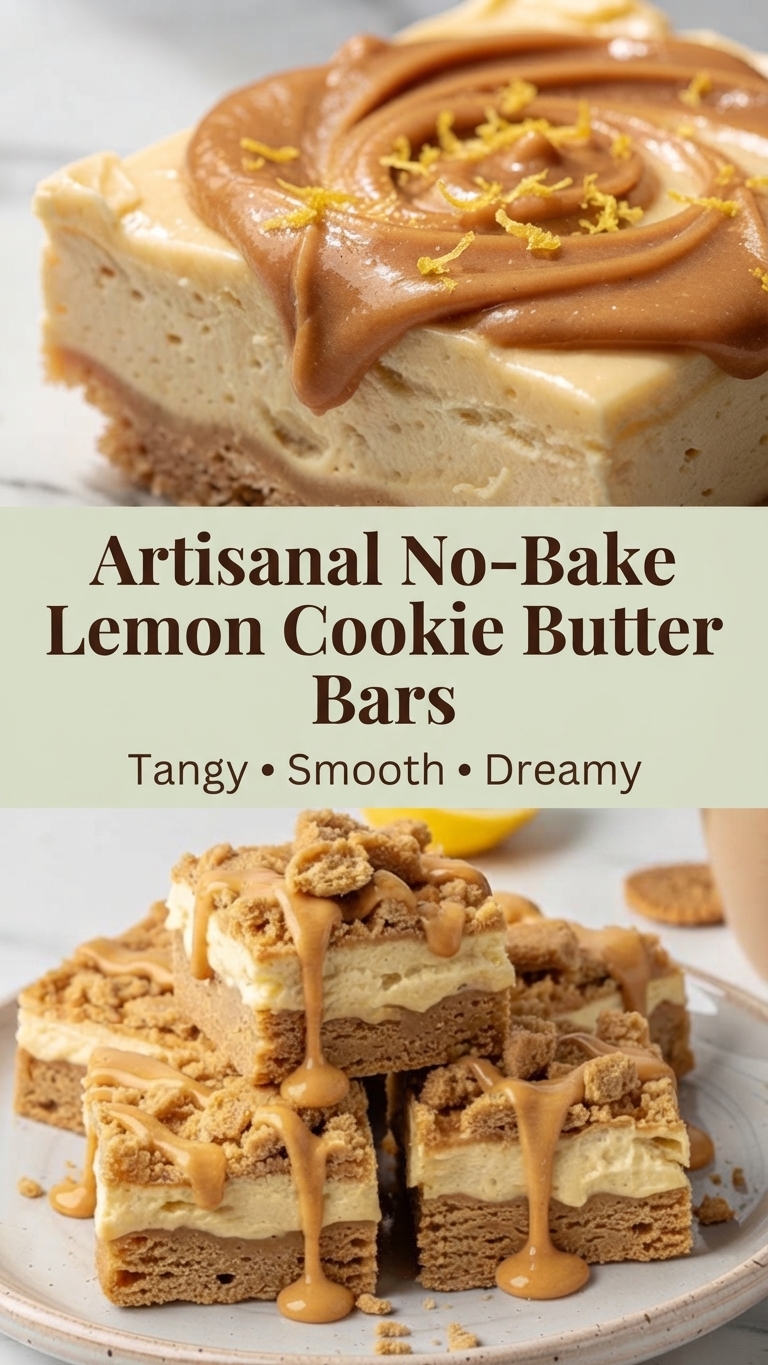
Artisanal No-Bake Lemon Cookie Butter Bars: Tangy, Smooth, and Dreamy
Indulgence meets simplicity in this recipe for No-Bake Lemon Cookie Butter Bars. These bars are a celebration of contrasting textures and flavors: a crisp, spiced cookie base, a luxuriously smooth and tangy lemon cheesecake filling, and a decadent, melted cookie butter topping. Best of all, this recipe requires absolutely no oven time, making it the perfect dessert for warm weather or when you need a show-stopping treat without the fuss.
The combination of bright lemon and rich, caramelized cookie butter is truly inspired. The lemon cuts through the sweetness of the cookie butter, creating a balanced flavor profile that is both refreshing and comforting. Whether you’re hosting a dinner party, looking for a unique potluck contribution, or simply craving a sophisticated sweet, these bars are sure to impress.
This recipe is designed to be straightforward, but the results are undeniably artisanal. We’ll walk you through each step, from crushing the cookies for the base to achieving that perfect, glossy swirl of cookie butter on top. Get ready to fall in love with your new favorite no-bake dessert.
Ingredients
For the Crust:
-
2 cups (approx. 240g) spiced cookie crumbs (such as Speculoos or Biscoff)
-
6 tablespoons (85g) unsalted butter, melted
For the Lemon Filling:
-
16 oz (450g) cream cheese, softened to room temperature
-
1/2 cup (100g) granulated sugar
-
1/3 cup (80ml) fresh lemon juice
-
1 tablespoon lemon zest
-
1 teaspoon vanilla extract
-
1 cup (240ml) heavy cream, cold
For the Topping:
-
1/2 cup (130g) creamy cookie butter spread (such as Biscoff or Trader Joe’s Speculoos Cookie Butter)
-
Extra cookie crumbs and fresh lemon zest for garnish (optional)
Instructions
Prepare the Crust:
-
Line an 8×8 inch square baking pan with parchment paper, leaving an overhang on two sides for easy removal.
-
In a medium bowl, combine the spiced cookie crumbs and melted butter. Mix until the crumbs are evenly moistened and resemble wet sand.
-
Pour the crumb mixture into the prepared pan and press it firmly and evenly into the bottom using the back of a measuring cup or your fingers.
-
Place the pan in the refrigerator or freezer to chill while you prepare the filling.
Make the Lemon Filling:
-
In a large mixing bowl, beat the softened cream cheese and granulated sugar together with an electric mixer (hand mixer or stand mixer) on medium speed until completely smooth and creamy, about 2-3 minutes. Scrape down the sides of the bowl as needed.
-
Add the fresh lemon juice, lemon zest, and vanilla extract. Continue to mix on medium speed until fully incorporated and the mixture is smooth.
-
In a separate, chilled bowl, use a whisk or an electric mixer to whip the cold heavy cream until stiff peaks form. Be careful not to over-whip it into butter.
-
Gently fold the whipped cream into the lemon-cream cheese mixture in two or three separate additions using a large spatula. Fold until the mixture is uniform in color and no streaks of whipped cream remain. Do not stir vigorously, as you want to maintain the airiness of the whipped cream.
Assemble the Bars:
-
Remove the chilled crust from the refrigerator/freezer.
-
Pour the lemon filling over the crust and spread it into an even layer using an offset spatula or the back of a spoon.
-
Place the pan back in the refrigerator and chill for at least 6 hours, or preferably overnight, until the filling is completely set.
Add the Topping and Serve:
-
Once the bars are fully set, prepare the cookie butter topping. Place the cookie butter spread in a small, microwave-safe bowl. Microwave on 50% power in 15-second intervals, stirring in between, until the spread is melted and pourable (it should be fluid but not boiling hot).
-
Remove the bars from the refrigerator using the parchment paper overhangs and place them on a cutting board.
-
Drizzle or pour the melted cookie butter over the top of the chilled cheesecake layer. You can spread it into a thin, even layer or create a decorative swirl using a spoon or toothpick.
-
(Optional) Sprinkle with extra cookie crumbs and fresh lemon zest for an added decorative touch and pop of color.
-
For clean cuts, use a sharp knife dipped in hot water and wiped dry before each slice. Cut into 16 squares.
Tips for Success
-
Room Temperature Cream Cheese: Ensure your cream cheese is truly softened to room temperature before mixing. This is crucial for a lump-free, ultra-smooth filling.
-
Chilled Heavy Cream: Conversely, your heavy cream must be very cold to whip up properly. Chill both the cream and your bowl/whisk beforehand.
-
Don’t Rush the Chill Time: Patience is key for no-bake desserts. Chilling for the full time ensures the filling sets firmly, allowing for clean slices.
-
Melted Cookie Butter Consistency: You want the cookie butter to be just melted enough to pour and spread easily, but not so hot that it begins to melt the cheesecake layer.
-
Clean Cuts: For the neatest squares, wipe your knife blade clean and re-dip it in hot water between each slice.
Storage and Reheating
-
Storage: Store the bars in an airtight container in the refrigerator for up to 5 days. They are best enjoyed chilled.
-
Freezing: These bars can also be frozen for up to 3 months. Place the cut bars in a single layer on a baking sheet to freeze solid, then transfer them to a freezer-safe container or bag with parchment paper between layers. Thaw in the refrigerator overnight before serving. (The topping may become slightly brittle after freezing but will soften upon thawing).
Serving Suggestions
These bars are elegant enough to stand on their own, but they also pair beautifully with:
-
A dollop of freshly whipped cream.
-
A side of fresh raspberries or blueberries to complement the lemon flavor.
-
A cup of hot coffee or tea to balance the sweetness.
Closing
These Artisanal No-Bake Lemon Cookie Butter Bars are a testament to the fact that incredible flavor doesn’t require complicated techniques or hours in the kitchen. With a perfectly spiced base, a tangy lemon cloud, and a rich cookie butter finish, this recipe is guaranteed to become a go-to for any occasion. We hope you enjoy making—and most importantly, eating—this delightful treat. Happy no-baking!