
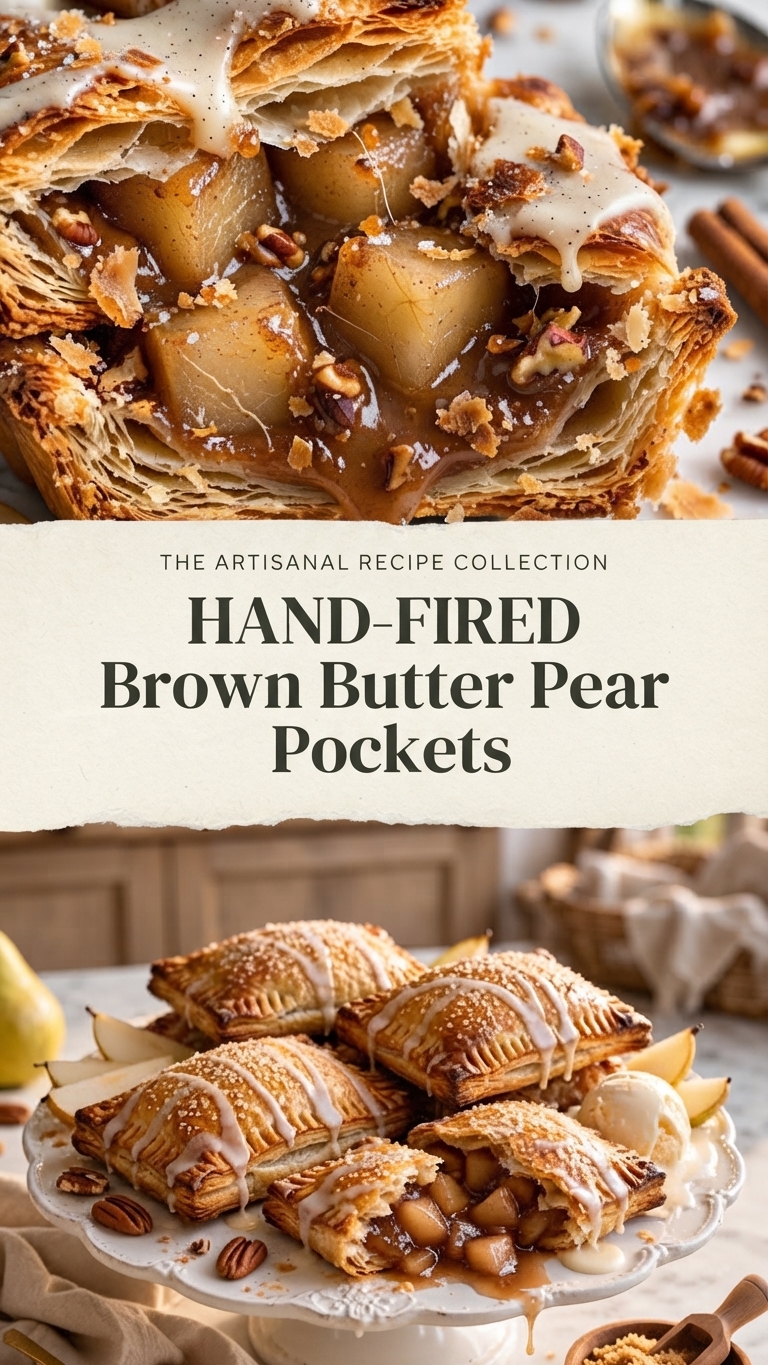
Brown Butter Pear Hand Tarts
Buttery. Jammy. Cozy.
There are few things more comforting than the smell of baking pears and cinnamon, especially when wrapped in layers of flaky, golden pastry. These Brown Butter Pear Hand Tarts take the classic cozy flavors of fall and elevate them with the nutty depth of browned butter. The filling is a perfectly spiced, jammy mixture of diced pears and toasted pecans, enveloped in a shatteringly crisp puff pastry. Drizzled with a simple vanilla bean glaze and finished with a sprinkle of coarse sugar, these tarts are an irresistible treat perfect for breakfast, brunch, or a cozy dessert.
These hand tarts are designed for sharing. The recipe makes about 8 to 10 individual tarts, making them ideal for serving at gatherings or for stocking the freezer with a quick, decadent treat. The use of store-bought, high-quality all-butter puff pastry makes this recipe accessible without sacrificing flavor, ensuring a bakery-quality result every time.
Ingredients
For the Brown Butter Pear Filling:
-
3 ripe but firm Bosc or Bartlett pears, peeled, cored, and diced into small, uniform 1/2-inch cubes (about 2 1/2 cups)
-
1/2 cup (1 stick / 113g) unsalted butter
-
1/3 cup (66g) packed light brown sugar
-
2 tablespoons granulated sugar
-
1 tablespoon fresh lemon juice (prevents browning and brightens flavor)
-
1 teaspoon ground cinnamon
-
1/4 teaspoon ground nutmeg
-
1/4 teaspoon ground cardamom (optional, but recommended)
-
A pinch of fine sea salt
-
1/2 cup (55g) toasted pecans, roughly chopped
-
1 tablespoon cornstarch, dissolved in 1 tablespoon cold water (for thickening)
For the Tarts:
-
2 sheets (approx. 1 lb / 450g total) all-butter puff pastry, thawed overnight in the refrigerator
-
1 large egg (for egg wash)
-
1 teaspoon milk or heavy cream
-
Coarse sparkling sugar (like turbinado or demerara), for sprinkling
For the Vanilla Bean Glaze:
-
1 cup (120g) powdered sugar, sifted
-
2–3 tablespoons milk, half-and-half, or heavy cream
-
1 teaspoon vanilla bean paste (or 1/2 teaspoon vanilla extract)
Instructions
Step 1: Prepare the Brown Butter Pear Filling
-
Brown the Butter: Place the stick of butter in a light-colored saucepan over medium heat. Melt the butter, then swirl the pan occasionally as it begins to foam and crackle. Continue cooking until the crackling subsides and you see golden-brown specks form at the bottom of the pan. You will smell a nutty aroma. Immediately remove the pan from the heat and pour the brown butter into a heatproof bowl to stop the cooking.
-
Cook the Pears: To the same saucepan (no need to wipe it out), add the diced pears, brown sugar, granulated sugar, lemon juice, cinnamon, nutmeg, cardamom (if using), and salt. Stir to combine.
-
Simmer: Place the pan over medium heat. Bring the mixture to a simmer and cook, stirring occasionally, for 8–10 minutes, or until the pears have softened slightly but still hold their shape, and a syrupy liquid has formed.
-
Thicken the Filling: Stir the dissolved cornstarch slurry again and add it to the bubbling pear mixture. Cook for an additional 1–2 minutes, stirring constantly, until the filling has thickened significantly and is jammy.
-
Cool: Remove from heat and stir in the toasted pecans. Transfer the filling to a shallow dish or bowl and let it cool completely to room temperature. For faster cooling, you can refrigerate it once it’s no longer steaming hot. It is crucial that the filling is completely cool before assembling the tarts, or the pastry will become soggy.
Step 2: Assemble the Hand Tarts
-
Preheat and Prepare: Preheat your oven to 400°F (200°C). Line two large baking sheets with parchment paper.
-
Prepare the Pastry: On a lightly floured surface, unfold one sheet of thawed puff pastry. Gently roll it out with a rolling pin to smooth out the creases and enlarge it slightly, aiming for a rectangle approximately 10×12 inches.
-
Cut the Pastry: Cut the pastry rectangle into 8 even squares (each about 5×3 inches). Repeat with the second sheet of pastry, giving you 16 squares total.
-
Fill the Tarts: Place 8 of the pastry squares on the prepared baking sheets, spaced apart. Spoon 2–3 tablespoons of the cooled pear filling onto the center of each of these 8 squares, leaving a 1/2-inch border around the edges.
-
Seal the Tarts: In a small bowl, whisk together the egg and milk to create an egg wash. Lightly brush the egg wash onto the 1/2-inch border of the pastry squares with the filling. Place a second pastry square on top of each filled square.
-
Crimp: Use the tines of a fork to press firmly around all four edges of each tart, sealing the top and bottom layers together. This creates a decorative pattern and prevents the filling from leaking.
-
Final Prep: Brush the tops of all the assembled hand tarts with the remaining egg wash. Use a sharp paring knife to cut 2 or 3 small slits or a decorative vent pattern (like a leaf or star) in the top of each tart to allow steam to escape. Generously sprinkle the tops with coarse sparkling sugar.
Step 3: Bake and Glaze
-
Bake: Bake the tarts in the preheated oven for 20–25 minutes, or until the pastry is deeply golden brown, puffed, and crisp. Rotate the baking sheets halfway through the baking time for even browning.
-
Cool: Transfer the baked tarts to a wire rack to cool for at least 15–20 minutes before glazing.
-
Make the Glaze: While the tarts are cooling, prepare the glaze. In a medium bowl, whisk together the sifted powdered sugar, 2 tablespoons of milk, and vanilla bean paste until smooth. Add more milk, one teaspoon at a time, until you reach a drizzling consistency.
-
Glaze the Tarts: Drizzle the vanilla bean glaze over the warm (not hot) tarts. Let the glaze set for at least 10 minutes before serving.
Tips for Success
-
Don’t Skimp on the Brown Butter: Browning the butter adds an essential nutty, caramelized flavor that defines these tarts. Watch it carefully so it doesn’t burn, but let it develop those deep golden specks.
-
Cool the Filling Completely: This is the most important step. If the filling is warm when it touches the pastry, the butter in the pastry will melt, resulting in flat, greasy, and soggy tarts instead of flaky ones.
-
Don’t Overfill: While it’s tempting to pack in the filling, overfilling will make the tarts difficult to seal and more likely to burst open during baking.
-
Keep Pastry Cold: Work with one sheet of puff pastry at a time, keeping the other refrigerated. If the pastry becomes too soft or sticky while you are assembling the tarts, return the entire baking sheet to the refrigerator for 10 minutes to firm up the butter.
Serving Suggestions
These