Baked apples are a quintessential dessert, a warm hug in a bowl that evokes feelings of comfort and nostalgia. They’re surprisingly simple to make, yet the result is an elegant and incredibly flavorful treat that’s perfect for any occasion, from a cozy weeknight dessert to a festive holiday gathering. Imagine biting into a tender, sweet apple, infused with warm spices and a rich, gooey caramel-nut topping. It’s pure bliss, and with this recipe, you’ll be able to create that perfect experience right in your own kitchen.
This recipe focuses on bringing out the natural sweetness and tender texture of the apples, enhanced by a delightful filling and topping that complements without overpowering. We’ll explore the best apples to use, the secrets to a perfectly tender bake, and how to achieve that irresistible caramel-nut glaze. So, let’s dive in and discover how to make these perfect baked apples.
The Heart of the Matter: Choosing the Right Apples
The foundation of a great baked apple is, of course, the apple itself. Not all apples are created equal when it comes to baking. You want an apple that will hold its shape during the baking process, softening to a tender consistency without turning into mush. It should also have a good balance of sweetness and tartness to provide a complex flavor profile that stands up to the rich filling.
Here are some of the best apple varieties for baking:
- Honeycrisp: A fantastic all-rounder, Honeycrisp apples are known for their crisp texture and balanced sweet-tart flavor. They hold their shape beautifully and become wonderfully tender when baked.
- Fuji: Sweet and firm, Fuji apples also bake well and maintain a good texture. Their natural sweetness means you might adjust the added sugar slightly.
- Granny Smith: If you prefer a tarter baked apple, Granny Smith is an excellent choice. Its firm texture is ideal for baking, and its tartness provides a lovely contrast to the sweet filling. You might want to increase the sugar in your filling if using Granny Smiths.
- Braeburn: These apples offer a nice balance of sweet and tart with a firm flesh that holds up well during baking.
- Gala: While slightly softer than some other varieties, Gala apples still work well, especially if you prefer a very tender baked apple. They are quite sweet, so keep that in mind for your sugar adjustments.
For this recipe, I recommend using a medium to large-sized apple, as it will provide a generous portion and be easier to core and fill. Aim for apples that are uniform in size so they bake evenly.
The Essential Tools
You don’t need a lot of fancy equipment for baked apples, but a few key tools will make the process much smoother:
- Apple Corer: While you can use a small knife, an apple corer makes quick work of removing the core, creating a perfect cavity for your filling.
- Baking Dish: A shallow baking dish or pie plate will work perfectly. Choose one that’s large enough to hold all your apples comfortably without crowding them.
- Small Mixing Bowl: For preparing your filling.
- Measuring Cups and Spoons: For accurate ingredient measurements.
- Pastry Brush (Optional): For brushing the apples with butter, though your fingers or a spoon can also work.
Crafting the Irresistible Filling and Topping
The magic of baked apples lies not just in the apple itself, but in the delightful filling and topping that transforms it into a decadent dessert. Our recipe features a rich, sweet, and nutty mixture that seeps into the apple as it bakes, creating layers of flavor and texture.
The Filling Ingredients:
- Butter (Unsalted): Melted butter forms the base, helping to carry the flavors and keep the filling moist.
- Brown Sugar: Provides a deep, caramel-like sweetness. Light or dark brown sugar will work.
- Cinnamon: The quintessential apple spice. Its warm, inviting aroma and flavor are essential.
- Nutmeg: A hint of nutmeg adds another layer of warmth and complexity to the spice blend.
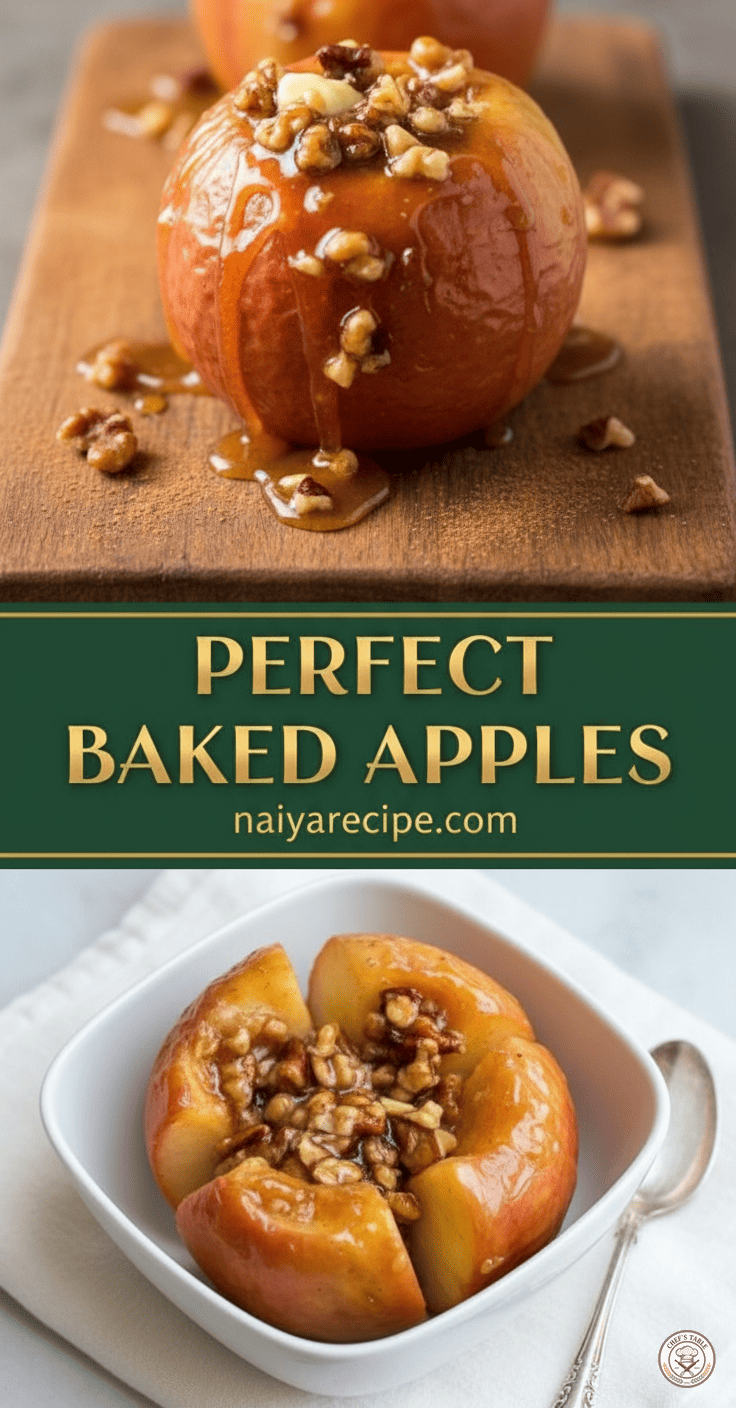
- Chopped Nuts: Walnuts or pecans are excellent choices. They add a wonderful crunch and earthy flavor that complements the sweetness of the apple. Toasting them lightly before chopping can enhance their flavor even further, but it’s not strictly necessary.
- A Pinch of Salt: Just a tiny pinch helps to balance the sweetness and bring out all the flavors.
- Rolled Oats (Optional): A small amount of rolled oats can be added to the filling for extra texture and a slightly heartier feel. This is completely optional.
Preparing the Filling:
In a small bowl, combine the melted butter, brown sugar, cinnamon, nutmeg, salt, and chopped nuts. Mix everything together until it’s well combined and forms a thick, paste-like consistency. If you’re adding oats, stir them in now. This mixture is going to be incredibly fragrant and enticing – try not to eat it all before it makes it into the apples!
The Baking Process: Step-by-Step Perfection
Now that we have our perfectly chosen apples and our delicious filling, it’s time to bring it all together and bake them to golden perfection.
Step 1: Preheat and Prepare
Preheat your oven to 375°F (190°C). Lightly grease your baking dish to prevent sticking and make for easier cleanup.
Step 2: Prepare the Apples
Wash your apples thoroughly. Using an apple corer, carefully core each apple, making sure not to go all the way through the bottom. You want to leave about a 1/2-inch intact at the base to hold in the filling. If you don’t have an apple corer, you can use a small paring knife to carefully cut around the core and scoop it out. The goal is to create a cavity large enough to generously fill.
Once cored, you can optionally peel a strip of skin around the top of each apple, about an inch wide. This helps the apple soften evenly and prevents the skin from bursting too much. However, it’s not strictly necessary, and leaving the skin on provides extra fiber and nutrients.
Step 3: Fill the Apples
Place the cored apples in your prepared baking dish. Carefully spoon the prepared filling mixture into the cavity of each apple, pressing it down gently but firmly. Don’t be shy – really pack it in there! Any extra filling can be spooned around the base of the apples in the baking dish; it will melt into a delicious sauce.
Step 4: The Finishing Touch (Optional, but Recommended)
For extra moisture and flavor, you can pour about 1/4 cup of hot water into the bottom of the baking dish around the apples. This creates steam in the oven, helping the apples to cook more evenly and preventing them from drying out. You can also add a tablespoon of butter to the water for extra richness.
Step 5: Bake to Perfection
Cover the baking dish loosely with aluminum foil. This helps to steam the apples and prevents the topping from browning too quickly. Bake for 30-45 minutes, or until the apples are tender when pierced with a fork. The baking time will vary depending on the size and variety of your apples.
After 30 minutes, remove the foil and continue baking for another 10-15 minutes, or until the topping is bubbly and lightly caramelized, and the apples are fully tender. The exact time will depend on your oven and the desired tenderness. You want them soft, but still holding their shape.
Step 6: Rest and Serve
Once baked, carefully remove the baking dish from the oven. Let the baked apples rest for 5-10 minutes before serving. This allows the juices to redistribute and the filling to set slightly.
Serving Suggestions
Perfect baked apples are absolutely delicious on their own, but they also lend themselves beautifully to various accompaniments that can elevate them into an even more luxurious dessert.
- A Scoop of Vanilla Bean Ice Cream: The classic pairing! The cold, creamy ice cream melts slightly into the warm, spiced apples, creating a heavenly contrast.
- A Dollop of Whipped Cream: Light and airy, whipped cream adds a touch of elegance and complements the richness of the apples.
- A Drizzle of Caramel Sauce: If you want to take the caramel flavor up a notch, an extra drizzle of homemade or store-bought caramel sauce is always a good idea.
- A Sprinkle of Extra Cinnamon or Nutmeg: For an added aromatic touch.
- Yogurt (Plain or Vanilla): For a slightly healthier take, a dollop of plain or vanilla yogurt provides a tangy counterpoint.
- Custard or Crème Anglaise: For a truly sophisticated dessert, serve with a warm vanilla custard.
Tips for Success
- Don’t Overcrowd the Pan: Give your apples a little breathing room in the baking dish to ensure even cooking.
- Adjust Sweetness to Taste: Depending on the sweetness of your apples and your personal preference, feel free to slightly adjust the amount of brown sugar in the filling.
- Experiment with Spices: While cinnamon and nutmeg are traditional, feel free to experiment with other warming spices like allspice or a tiny pinch of ground cloves.
- Make Ahead: Baked apples can be prepared ahead of time and gently reheated in the oven or microwave. They are best served warm.
- Storage: Leftover baked apples can be stored in an airtight container in the refrigerator for up to 3-4 days.
Why Baked Apples are a Must-Try
Baked apples are more than just a dessert; they’re an experience. They fill your home with the most incredible aroma of cinnamon and baked apples, instantly making any space feel warm and inviting. They are naturally wholesome, especially when compared to many other desserts, and can be easily customized to fit various dietary preferences.
Whether you’re looking for a simple yet elegant dessert for a dinner party, a comforting treat on a chilly evening, or a way to use up an abundance of fresh apples, these perfect baked apples are sure to become a cherished recipe in your repertoire. They are a testament to the fact that sometimes, the simplest ingredients, when combined with a little care and warmth, can create the most extraordinary culinary delights.
So, gather your ingredients, preheat your oven, and prepare to be enchanted by the timeless charm and deliciousness of perfect baked apples. Enjoy every warm, tender, and spiced bite!