There’s something incredibly comforting about a warm, flaky chicken pot pie. It evokes memories of home, family gatherings, and the simple joy of a hearty meal. This isn’t just any chicken pot pie; this is the Ultimate Homemade Chicken Pot Pie, designed to bring unparalleled comfort and flavor to your table. Forget the frozen versions; once you taste this, you’ll understand why making it from scratch is always worth the effort.
The Heart of Comfort Food
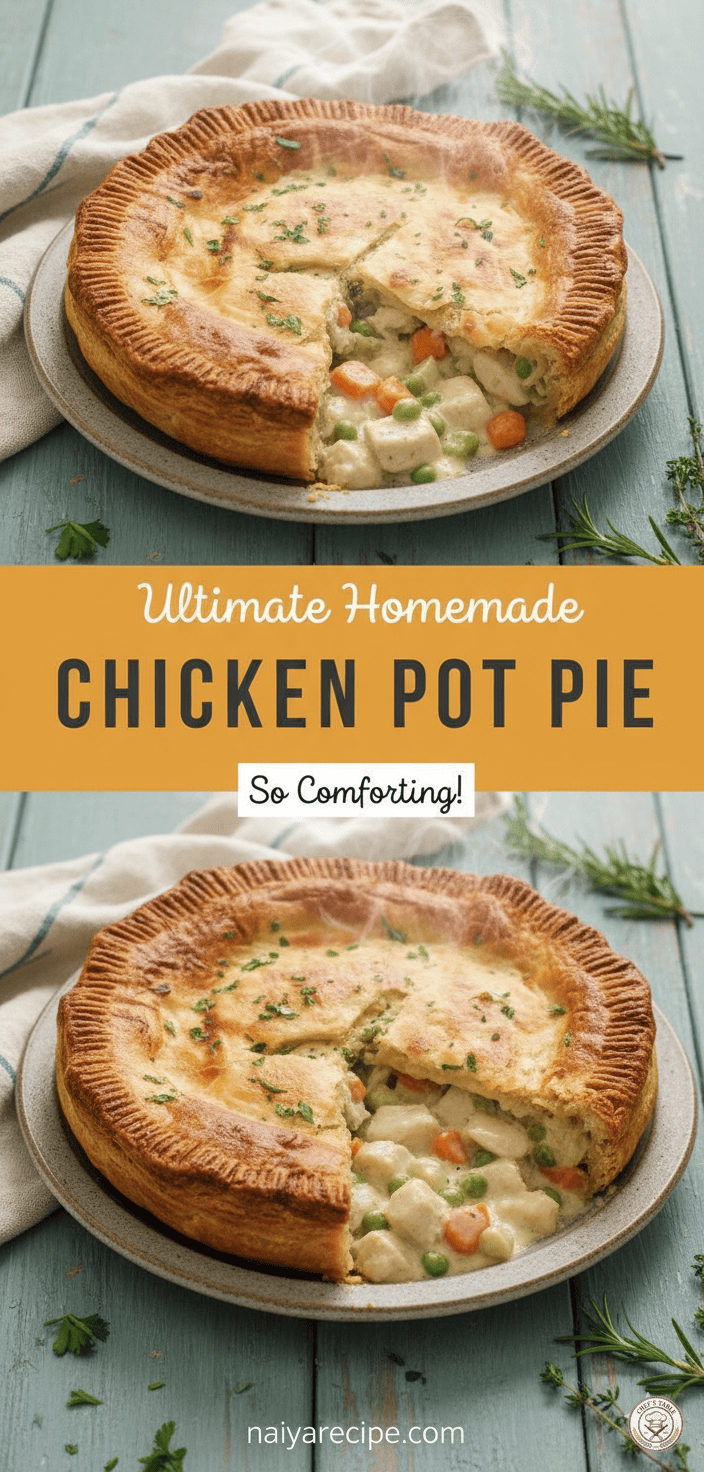
Chicken pot pie holds a special place in the pantheon of comfort foods. It’s a dish that transcends seasons, though it shines brightest on a chilly evening, promising warmth from the inside out. The magic lies in the contrast: a golden, crisp, buttery crust giving way to a rich, creamy filling packed with tender chicken and an assortment of wholesome vegetables. Each bite is a harmonious blend of textures and tastes, a true embrace for the soul.
Our journey to the ultimate chicken pot pie begins with understanding what makes it truly exceptional. It’s not just about throwing ingredients together; it’s about building layers of flavor, ensuring every component plays its part perfectly. From the choice of chicken to the freshness of the vegetables and the secret to a truly flaky crust, we’ll guide you through each step.
What Makes This Recipe “Ultimate”?
Many pot pie recipes exist, but ours stands out for several reasons:
- Flavorful Filling: We don’t just rely on cream; we build a deeply savory base that complements the chicken and vegetables without overpowering them.
- Perfectly Cooked Chicken: The chicken is tender, juicy, and never dry, thanks to careful preparation.
- Vibrant Vegetables: A colorful mix of vegetables adds not only flavor and nutrition but also a delightful textural contrast.
- Flaky, Golden Crust: This is paramount. A truly “ultimate” pot pie demands a crust that is both tender and crisp, with that characteristic golden hue.
- Homemade Goodness: Every element is made from scratch, ensuring freshness and allowing you to control the quality of ingredients.
The Ingredients: Quality Matters
To achieve the ultimate result, start with the best possible ingredients.
For the Filling:
- Chicken: Boneless, skinless chicken breasts or thighs are ideal. Thighs offer a richer flavor and tend to stay moister.
- Vegetables: A classic combination includes carrots, peas, and celery. Feel free to add corn, green beans, or even some diced potatoes for extra heartiness.
- Aromatics: Onions and garlic form the foundation of our flavor base.
- Broth: High-quality chicken broth is crucial for a savory and robust filling. Low-sodium is often preferred to control salt levels.
- Cream/Milk: Heavy cream or a combination of milk and a touch of cream will give the filling its luxurious richness.
- Thickener: All-purpose flour is used to create a roux, which thickens the sauce to the perfect consistency.
- Herbs: Fresh parsley, thyme, and rosemary add a wonderful aromatic depth. Dried herbs can be used in a pinch, but fresh always elevate the flavor.
- Seasoning: Salt, black pepper, and a pinch of nutmeg complete the flavor profile.
For the Crust:
- All-Purpose Flour: The base of our pastry.
- Cold Butter: Absolutely essential for a flaky crust. Cold butter creates steam pockets during baking, resulting in those beautiful layers.
- Ice Water: Keeps the butter cold and helps bind the dough without developing too much gluten.
- Salt: Enhances the flavor of the crust.
Crafting the Perfect Pot Pie: Step-by-Step
Creating this masterpiece is a labor of love, but each step is straightforward and rewarding.
Part 1: Preparing the Chicken
The key to tender chicken is not to overcook it. We’ll pre-cook it gently to ensure it’s succulent.
- Dice the Chicken: Cut the boneless, skinless chicken into bite-sized pieces, about 1/2 to 3/4 inch cubes. This ensures even cooking and makes it easier to eat.
- Sauté (Optional but Recommended): In a large skillet or Dutch oven, heat a tablespoon of olive oil over medium heat. Add the diced chicken and cook until lightly browned on all sides and just cooked through. Remove the chicken from the pan and set aside. This step adds an extra layer of flavor from the browning, known as the Maillard reaction. If you’re using leftover cooked chicken (like rotisserie chicken), you can skip this step and add it directly to the filling later.
Part 2: Making the Flavorful Filling
This is where the magic truly happens, building a rich and aromatic sauce.
- Sauté Aromatics: In the same skillet or Dutch oven (add a little more oil if needed), add the diced onions and celery. Cook over medium heat until softened and translucent, about 5-7 minutes.
- Add Garlic and Carrots: Stir in the minced garlic and diced carrots. Cook for another 3-5 minutes, allowing the carrots to slightly soften and the garlic to become fragrant. Be careful not to burn the garlic.
- Create the Roux: Sprinkle the flour over the cooked vegetables. Stir constantly for 1-2 minutes, allowing the flour to cook out its raw taste. This creates a roux, which will thicken our sauce.
- Deglaze and Thicken: Slowly whisk in the chicken broth, a little at a time, making sure to scrape up any browned bits from the bottom of the pan. Continue whisking until the mixture is smooth and begins to thicken.
- Add Cream and Seasonings: Stir in the heavy cream (or milk/cream mixture), fresh herbs (parsley, thyme, rosemary), salt, black pepper, and a pinch of nutmeg. Bring the mixture to a gentle simmer, stirring occasionally, until it reaches your desired thickness. The sauce should be rich and velvety, but not overly thick at this stage, as it will continue to thicken in the oven.
- Combine with Chicken and Peas: Return the cooked chicken to the skillet. Add the frozen peas (no need to thaw) and any other desired cooked vegetables (like corn or green beans). Stir gently to combine all the ingredients in the creamy sauce. Taste and adjust seasonings as needed. Remove the filling from the heat.
Part 3: Crafting the Flaky Crust
A homemade crust truly elevates this pot pie. While store-bought crusts can work in a pinch, taking the time to make your own is incredibly rewarding.
- Cut the Butter: Cut very cold butter into small cubes, about 1/2 inch. This is crucial for flakiness.
- Combine Dry Ingredients: In a large bowl, whisk together the all-purpose flour and salt.
- Cut in the Butter: Add the cold butter cubes to the flour mixture. Using a pastry blender, two knives, or your fingertips, cut the butter into the flour until the mixture resembles coarse crumbs with some pea-sized pieces of butter remaining. The less you handle the butter, the flakier your crust will be.
- Add Ice Water: Gradually add ice water, one tablespoon at a time, mixing gently until the dough just comes together. Be careful not to overmix; stop as soon as the dough forms a cohesive ball. You might not need all the water.
- Chill the Dough: Divide the dough in half, flatten each half into a disc, wrap tightly in plastic wrap, and refrigerate for at least 30 minutes. This allows the gluten to relax and the butter to firm up, making it easier to roll.
Part 4: Assembling and Baking the Pot Pie
The final steps bring all the components together for a grand finish.
- Preheat Oven: Preheat your oven to 400°F (200°C).
- Roll Out Dough: On a lightly floured surface, roll out one disc of chilled dough into a 12-inch circle. Carefully transfer it to a 9-inch pie dish, allowing the edges to overhang.
- Fill the Pie: Pour the cooled chicken and vegetable filling into the pie crust-lined dish. Spread evenly.
- Top Crust: Roll out the second disc of dough into an 11-inch circle. Place it over the filling.
- Seal and Crimp: Trim the edges of both crusts to about 1/2 inch overhang. Fold the top crust edge under the bottom crust edge, then crimp the edges together using your fingers or a fork to seal securely. This prevents the filling from bubbling out.
- Vent the Pie: Cut several slits in the top crust to allow steam to escape during baking. You can also get creative with cut-outs for a decorative touch.
- Egg Wash (Optional but Recommended): For a golden, glossy finish, whisk an egg with a tablespoon of water or milk to create an egg wash. Brush this lightly over the top crust.
- Bake: Place the pie on a baking sheet (to catch any potential drips) and bake for 30-40 minutes, or until the crust is deeply golden brown and the filling is bubbly. If the crust starts to brown too quickly, you can loosely tent it with aluminum foil.
- Cool: Allow the chicken pot pie to cool for at least 10-15 minutes before serving. This allows the filling to set properly, making it easier to slice and serve without it running everywhere.
Tips for Success
- Don’t Overwork the Dough: Overworking the pastry dough develops gluten, leading to a tough crust instead of a flaky one. Handle it as little as possible.
- Keep Ingredients Cold: For the flakiest crust, ensure your butter and water are as cold as possible.
- Cool the Filling: Before adding the filling to the pie crust, make sure it has cooled down significantly. Hot filling can melt the butter in the bottom crust, making it soggy.
- Adjust Vegetables: Feel free to customize the vegetables based on your preferences or what’s in season. Just ensure they are cut into similar sizes for even cooking.
- Make Ahead: Both the filling and the pie dough can be made a day in advance. Store the filling in the refrigerator and the dough discs wrapped in plastic.
- Freezing Instructions: Chicken pot pie freezes beautifully! Once completely cooled, wrap the entire pie tightly in plastic wrap and then foil. It can be frozen for up to 3 months. To reheat, thaw overnight in the refrigerator and then bake at 350°F (175°C) until heated through and the crust is crisp.
Serving Suggestions
This Ultimate Homemade Chicken Pot Pie is a complete meal in itself. However, it pairs wonderfully with a simple green salad dressed with a light vinaigrette to cut through the richness. A side of cranberry sauce or a fresh fruit salad can also provide a refreshing contrast.
Conclusion
There’s a profound satisfaction that comes from pulling a golden, bubbling chicken pot pie out of the oven, its aroma filling your kitchen with warmth and promise. This Ultimate Homemade Chicken Pot Pie recipe isn’t just about food; it’s about creating an experience, a moment of comfort and joy to share with loved ones. It’s a testament to the power of homemade meals to nourish both body and soul. So gather your ingredients, follow these steps, and prepare to embark on a culinary journey that culminates in the most comforting, delicious chicken pot pie you’ve ever tasted. Enjoy every savory, flaky bite!
For more delightful recipes and cooking tips, visit naiyarecipe.com.