Are you ready to embark on a culinary journey that will tantalize your taste buds and leave you craving more? Look no further than the humble yet magnificent Philly Cheese Steak Joe. This isn’t just a sandwich; it’s an experience, a symphony of flavors and textures that come together in perfect harmony. And the best part? You can create this masterpiece right in your own kitchen with our simply homemade recipe.
The Philly Cheese Steak Joe is a beloved classic, a comforting and hearty meal that has captivated food lovers for generations. While its origins might point to the vibrant streets of Philadelphia, our version brings that iconic taste directly to your home, with a touch of simplicity and an abundance of flavor. Forget the complicated steps and the long list of exotic ingredients. We’re all about making delicious food accessible and enjoyable for everyone.
This recipe is designed for the home cook who appreciates good food without the fuss. Whether you’re a seasoned chef or just starting your culinary adventures, you’ll find these instructions easy to follow and incredibly rewarding. We’ve focused on creating a flavor profile that is robust, savory, and utterly satisfying, ensuring every bite is a delightful explosion of taste.
The Heart of the Joe: Our Savory Beef Filling
At the core of any great Philly Cheese Steak Joe is a fantastic beef filling, and ours is truly something special. We’re talking about finely ground beef, cooked to perfection and infused with a medley of aromatic vegetables and spices. This isn’t just plain ground beef; it’s a flavor bomb that will have your family asking for seconds, and probably thirds!
Ingredients for the Beef Filling:
- 1 tablespoon olive oil
- 1 large onion, finely chopped
- 2 green bell peppers, diced
- 2 cloves garlic, minced
- 1.5 pounds lean ground beef
- 1 teaspoon smoked paprika
- 1 teaspoon onion powder
- 1/2 teaspoon garlic powder
- 1/2 teaspoon black pepper
- 1/4 teaspoon cayenne pepper (optional, for a little kick)
- 1/2 cup beef broth
- 1 tablespoon soy sauce (ensure it’s halal if dietary restrictions apply)
- 1 tablespoon tomato paste
- Salt to taste
Crafting the Perfect Filling – Step-by-Step:
- Sauté the Aromatics: Heat the olive oil in a large skillet or Dutch oven over medium heat. Add the chopped onions and green bell peppers. Sauté for about 7-10 minutes, or until they are softened and translucent. This step is crucial for building a flavorful base. The natural sweetness of the onions and the freshness of the bell peppers will infuse into the oil, setting the stage for the beef.
- Add the Garlic: Stir in the minced garlic and cook for another minute until fragrant. Be careful not to burn the garlic, as this can impart a bitter taste. The garlic adds a pungent, savory depth that is essential to the overall flavor profile.
- Brown the Beef: Push the vegetables to one side of the skillet and add the ground beef. Break up the beef with a spoon and cook until it’s nicely browned and no pink remains. This typically takes about 8-10 minutes. Drain off any excess fat that accumulates during this process. A lean ground beef helps minimize this, but it’s always good practice to remove any rendered fat to prevent the filling from becoming greasy.
- Season with Spices: Once the beef is browned, stir in the smoked paprika, onion powder, garlic powder, black pepper, and cayenne pepper (if using). Cook for another minute, stirring constantly, to toast the spices. Toasting spices releases their aromatic compounds, intensifying their flavor and making them more fragrant.
- Deglaze and Simmer: Pour in the beef broth and soy sauce, scraping the bottom of the pan to loosen any browned bits. These “fond” bits are packed with flavor and will add richness to your sauce. Stir in the tomato paste. Bring the mixture to a gentle simmer, then reduce the heat to low, cover, and let it cook for at least 15-20 minutes. This slow simmer allows the flavors to meld beautifully, creating a rich and complex sauce. If you have more time, let it simmer for 30 minutes to an hour for an even deeper flavor.
- Adjust Seasoning: Taste the filling and adjust salt as needed. Remember, you can always add more salt, but you can’t take it away!
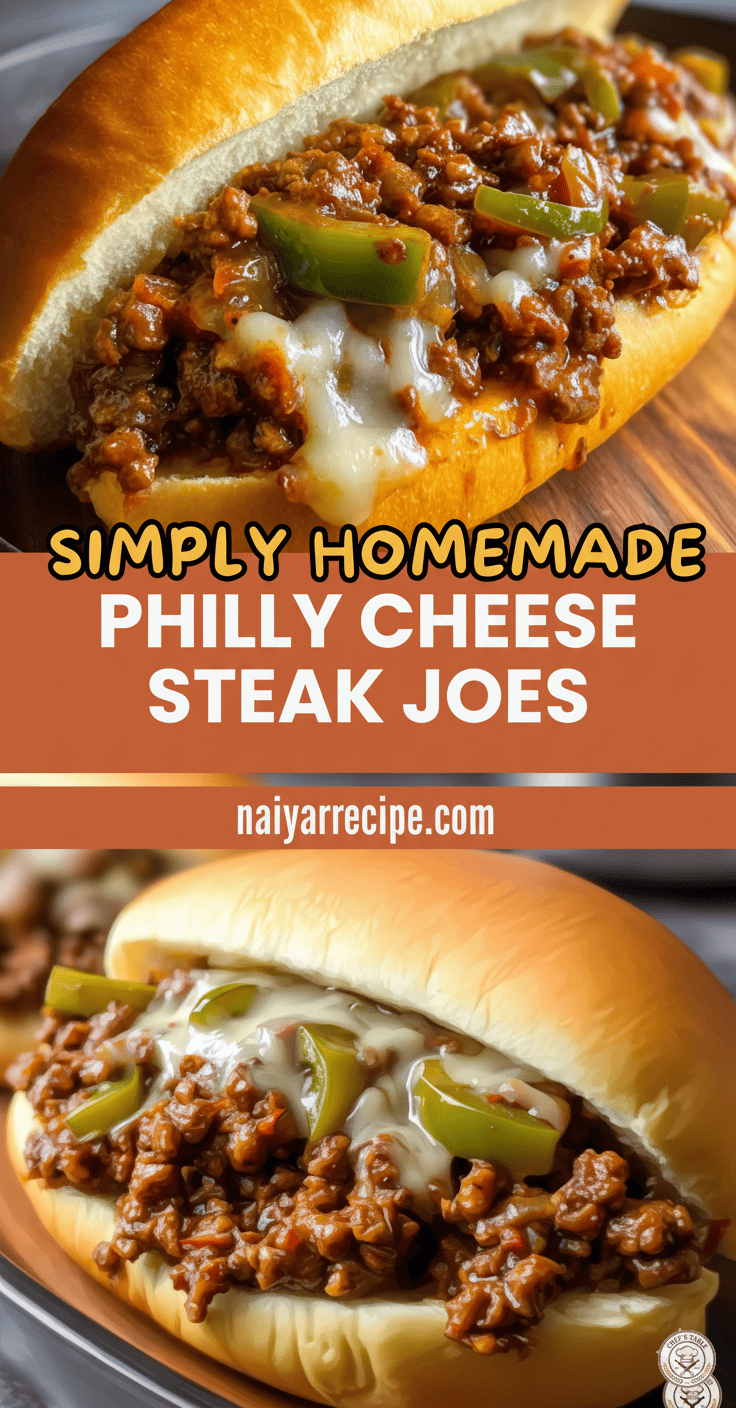
The Cheesy Embrace: Melting Perfection
What’s a Philly Cheese Steak Joe without the cheese? It’s the “cheese” in “Philly Cheese Steak,” after all! The melting cheese is what brings everything together, adding a creamy, gooey texture that perfectly complements the savory beef filling.
Cheese Selection:
For an authentic Philly experience, provolone cheese is often the go-to. Its mild, slightly tangy flavor and excellent melting properties make it an ideal choice. However, if you prefer something with a bit more zing, cheddar cheese can also be a delicious option. American cheese is another classic for its unparalleled meltability and creamy texture. Feel free to experiment with your favorite melting cheese!
Applying the Cheese:
Once your beef filling is perfectly simmered and ready, it’s time for the cheese.
- Individual Portions: For the best melt and distribution, spoon the hot beef filling into your hoagie rolls first.
- Lay the Cheese: Immediately after adding the filling, lay slices of your chosen cheese over the top of the hot beef. The residual heat from the filling will begin to melt the cheese beautifully.
- Optional Broiling: For an extra gooey, slightly browned cheese topping, you can place the open-faced sandwiches under a preheated broiler for 1-2 minutes. Watch carefully to prevent burning! This step is optional but highly recommended for that irresistible, bubbly cheese crust.
The Foundation: Choosing the Right Roll
The roll is more than just a vessel; it’s an integral part of the Philly Cheese Steak Joe experience. A great roll provides the perfect textural contrast to the soft, savory filling and ensures that every bite holds together.
Ideal Roll Characteristics:
- Soft Interior: A soft, yielding interior is essential for soaking up all the delicious juices from the beef filling.
- Slightly Chewy Exterior: A little chewiness on the outside prevents the roll from becoming soggy too quickly and adds a satisfying bite.
*Hoagie or Sub Rolls