There’s something incredibly comforting about a warm, cheesy casserole emerging from the oven, its golden-brown crust promising a creamy, decadent interior. While macaroni and cheese holds a special place in many hearts, today we’re elevating that classic with a slight twist: introducing Hearty Baked Shells & Cheese. This recipe takes the familiar flavors you love and presents them in a way that feels both gourmet and incredibly approachable, perfect for a cozy family dinner or a delightful potluck dish.
Baked shells and cheese isn’t just a meal; it’s an experience. It evokes memories of home, warmth, and shared laughter around the dinner table. The beauty of this dish lies in its simplicity and its ability to be customized, yet even in its most basic form, it delivers a satisfying burst of flavor and texture that is hard to resist. This recipe focuses on creating a rich, velvety cheese sauce that perfectly coats every shell, ensuring each bite is a harmonious blend of creamy pasta and savory cheese.
The Foundation: Choosing Your Shells
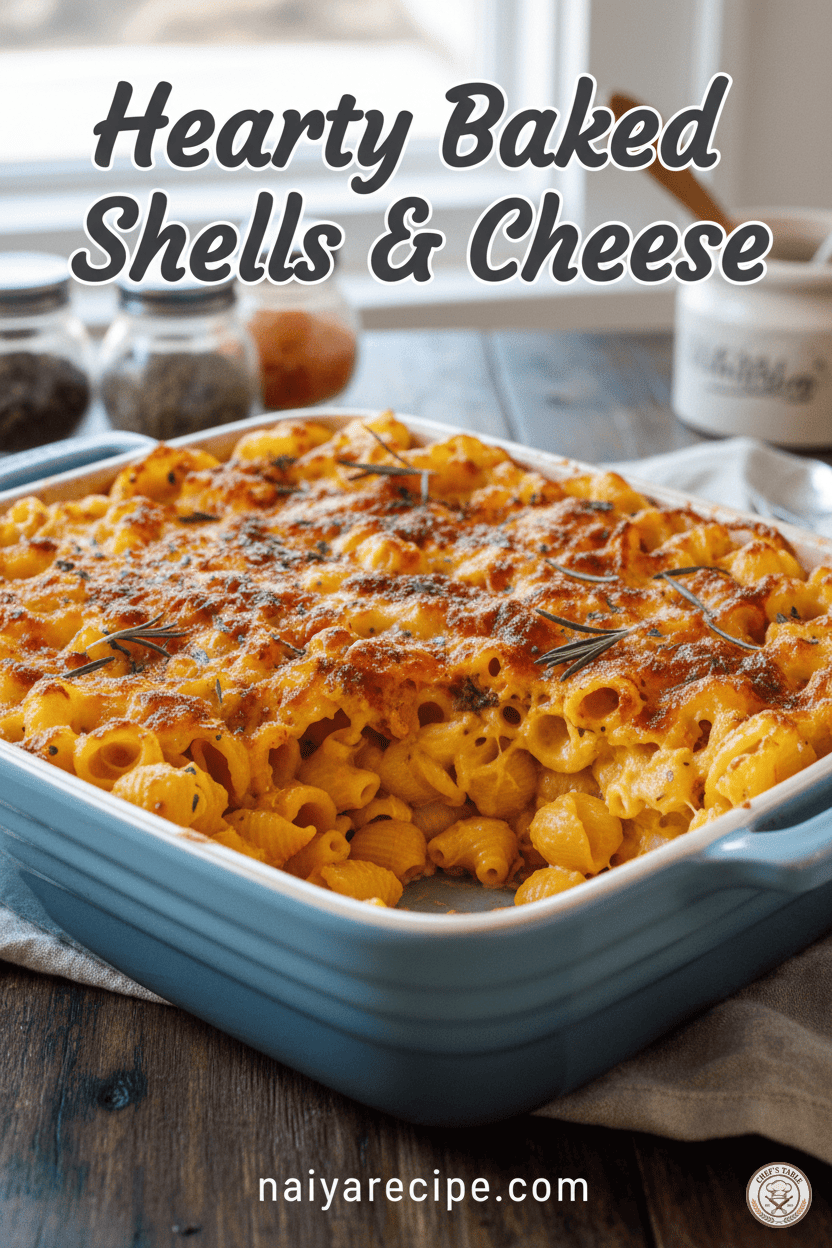
While elbows are traditional for mac and cheese, using medium shell pasta (conchiglie) offers a fantastic advantage. The concave shape of the shells acts like tiny cups, cradling the luscious cheese sauce within. This means every single piece of pasta is thoroughly coated, delivering an even more intense burst of cheesy goodness with each mouthful. When selecting your pasta, opt for a good quality brand that holds its shape well during baking. Overcooked pasta can become mushy, so be sure to cook your shells al dente, meaning they still have a slight bite to them. Remember, they will continue to cook in the oven, absorbing more of that glorious sauce.
Crafting the Perfect Cheese Sauce
The heart of any great baked cheese pasta dish is, undoubtedly, its cheese sauce. Our aim here is a sauce that is smooth, rich, and incredibly flavorful, without being overly heavy. We achieve this through a classic béchamel base, which is then transformed into a Mornay sauce with the addition of cheese.
Start with the Roux: A roux is a mixture of butter and flour, cooked together to form a thickening agent. This is crucial for a smooth sauce, preventing lumps and providing a luxurious body. Melt unsalted butter in a heavy-bottomed pot over medium heat. Once melted, whisk in an equal amount of all-purpose flour. Cook this mixture for about 1-2 minutes, stirring constantly. You want a pale, golden roux, not dark brown, as a darker roux can impart a nutty flavor that might not be desired in a classic cheese sauce. The cooking process for the roux helps to cook out the raw flour taste, which is essential for a delicious sauce.
Gradually Add Milk: Once your roux is ready, it’s time to gradually whisk in your milk. Whole milk is recommended for the creamiest results, but 2% milk can also work. The key is to add the milk slowly, a little at a time, whisking vigorously after each addition to ensure a lump-free sauce. As the milk heats and combines with the roux, it will begin to thicken. Continue stirring and cooking until the sauce reaches a consistency thick enough to coat the back of a spoon. Be patient with this step; rushing it can lead to a lumpy sauce.
The Cheese Factor: Now for the star of the show – the cheese! For a truly exceptional shells and cheese, a blend of cheeses is ideal. Sharp cheddar is a classic choice, offering a robust, tangy flavor. Complement this with a milder cheese like Monterey Jack for creaminess and a good melt, or Gruyère for a touch of nutty sophistication. Avoid pre-shredded cheeses if possible. While convenient, they often contain anti-caking agents that can make your sauce slightly grainy. Grate your own cheese from a block for the smoothest, most flavorful result.
Once your sauce has thickened, remove it from the heat before stirring in the shredded cheese. Adding cheese to boiling hot milk can cause it to become stringy or separate. Stir until all the cheese has melted into the sauce, creating a velvety smooth consistency. Season generously with salt, freshly ground black pepper, and a pinch of nutmeg. Nutmeg might seem like an unusual addition, but it beautifully enhances the flavor of cheese in creamy sauces, adding a subtle warmth without being overpowering. A touch of dry mustard powder can also elevate the cheesiness without making the sauce taste like mustard.
Assembling and Baking Your Masterpiece
Once your shells are cooked al dente and your cheese sauce is perfectly smooth, it’s time to bring it all together. Drain the pasta thoroughly and add it directly to the cheese sauce. Stir gently to ensure every shell is generously coated.
The Baking Dish: Choose a baking dish that is appropriately sized for your quantity. A 9×13 inch baking dish is typically perfect for a family-sized portion. Lightly grease the dish to prevent sticking.
Layering for Perfection (Optional but Recommended): For an extra layer of flavor and a beautiful presentation, consider layering. Spread half of the cheesy shells mixture into the prepared baking dish. Sprinkle with a little extra shredded cheese. Then, add the remaining cheesy shells and top with more shredded cheese. This creates pockets of extra gooey cheese throughout the casserole and helps form that desirable golden crust on top.
The Topping: While the internal cheese sauce provides ample flavor, a crispy, golden topping adds wonderful texture. A simple topping of panko breadcrumbs mixed with a tablespoon of melted butter and a pinch of dried herbs (like rosemary or thyme) works wonders. Sprinkle this evenly over the top of the cheese and shells. As it bakes, the breadcrumbs will toast to a beautiful golden brown, providing a delightful crunch that contrasts perfectly with the creamy interior.
Baking Instructions: Preheat your oven to 375°F (190°C). Bake the shells and cheese for 25-35 minutes, or until the topping is golden brown and bubbly. If you notice the topping browning too quickly, you can loosely cover the dish with aluminum foil for the last 10-15 minutes of baking.
Tips for Success
- Don’t Overcook the Pasta: Al dente is key! Remember, it will continue to cook in the oven.
- Grate Your Own Cheese: It makes a huge difference in the smoothness and flavor of the sauce.
- Whisk Vigorously: When adding milk to the roux, whisk constantly to prevent lumps.
- Season Generously: Don’t forget salt, pepper, and that secret pinch of nutmeg.
- Rest Before Serving: Let the baked shells and cheese rest for 5-10 minutes after removing it from the oven. This allows the sauce to set slightly, making it easier to serve and preventing it from being too runny.
Variations and Add-Ins
While this recipe is fantastic on its own, it’s also wonderfully versatile. Here are a few ideas to customize your Hearty Baked Shells & Cheese:
- Herbaceous Delight: Incorporate fresh herbs into the cheese sauce. Fresh thyme, rosemary, or chives finely chopped would add a beautiful aromatic touch.
- Spice it Up: For a bit of a kick, add a pinch of cayenne pepper or a dash of hot sauce to the cheese sauce.
- Vegetable Boost: Wilted spinach, sautéed mushrooms, or roasted bell peppers can be folded into the pasta mixture before baking for added nutrients and flavor.
- Protein Power: For a more substantial meal, consider adding cooked, shredded chicken or ground turkey to the mix. Ensure any added protein is fully cooked before combining with the shells and cheese.
- Smoky Flavor: A tiny amount of smoked paprika can lend a lovely smoky depth to the cheese sauce without needing any meat products.
Serving Suggestions
Hearty Baked Shells & Cheese is a satisfying meal on its own, but it also pairs beautifully with a fresh, crisp green salad tossed in a light vinaigrette to cut through the richness. Steamed green beans or roasted broccoli would also make excellent companions, adding a touch of vibrant color and freshness to your plate.
The Joy of Homemade
In a world where convenience often takes precedence, there’s immense satisfaction in creating a dish from scratch that brings so much joy. This Hearty Baked Shells & Cheese recipe is a testament to the power of simple, wholesome ingredients combined with a little love and patience. The aroma wafting from your kitchen as it bakes, the golden crust, the bubbling cheese – these are the hallmarks of a truly comforting meal. So, gather your ingredients, follow these steps, and prepare to delight your family and friends with a dish that is sure to become a cherished favorite. Enjoy the process, and savor every delicious bite!
You can find more delightful recipes and culinary inspiration at naiyarecipe.com.