There’s something incredibly comforting about the smell of apples and cinnamon baking in the oven. It instantly brings to mind cozy autumn evenings, family gatherings, and the simple joys of homemade treats. While a classic apple pie is always a hit, sometimes you need something a little less fuss, something that can be easily shared, and something that disappears from the plate just as quickly as it appeared. Enter the humble, yet utterly delightful, Easy Apple Crisp Bars.
These bars take all the beloved flavors and textures of a traditional apple crisp – the tender, spiced apples, the buttery, crumbly oat topping – and transform them into a convenient, portable, and incredibly satisfying bar form. No need for pie plates, no tricky crusts to roll out. Just a simple press-in base, a generous layer of apple filling, and a wonderfully crunchy topping. They are perfect for bake sales, potlucks, lunchboxes, or simply as a well-deserved treat with your afternoon tea or coffee.
The Magic of Apples
At the heart of any great apple dessert are, of course, the apples themselves. Choosing the right variety can make a significant difference in the final texture and flavor of your bars. For baking, you want apples that hold their shape well and offer a good balance of sweetness and tartness.
Some excellent choices include:
- Granny Smith: These are a classic for a reason. Their tartness provides a fantastic contrast to the sweet crumble topping and they maintain their structure beautifully when baked.
- Honeycrisp: Known for their crisp texture and balanced sweet-tart flavor, Honeycrisps are a versatile apple that bakes wonderfully.
- Fuji: Sweet and firm, Fuji apples also hold up well to baking and contribute a lovely sweetness.
- Braeburn: These apples offer a good blend of sweet and tart with a firm texture, making them ideal for baking.
- Gala: A sweeter option that softens nicely without becoming mushy.
You can also use a combination of apples to create a more complex flavor profile. For instance, pairing a tart Granny Smith with a sweeter Honeycrisp can give you the best of both worlds. For this recipe, we’re keeping it simple with 4 cups of peeled and chopped apples, allowing you the flexibility to choose your favorite or whatever is in season. Make sure to peel them to avoid any tough skins in your soft filling, and chop them into roughly 1/2 to 3/4-inch pieces so they cook evenly.
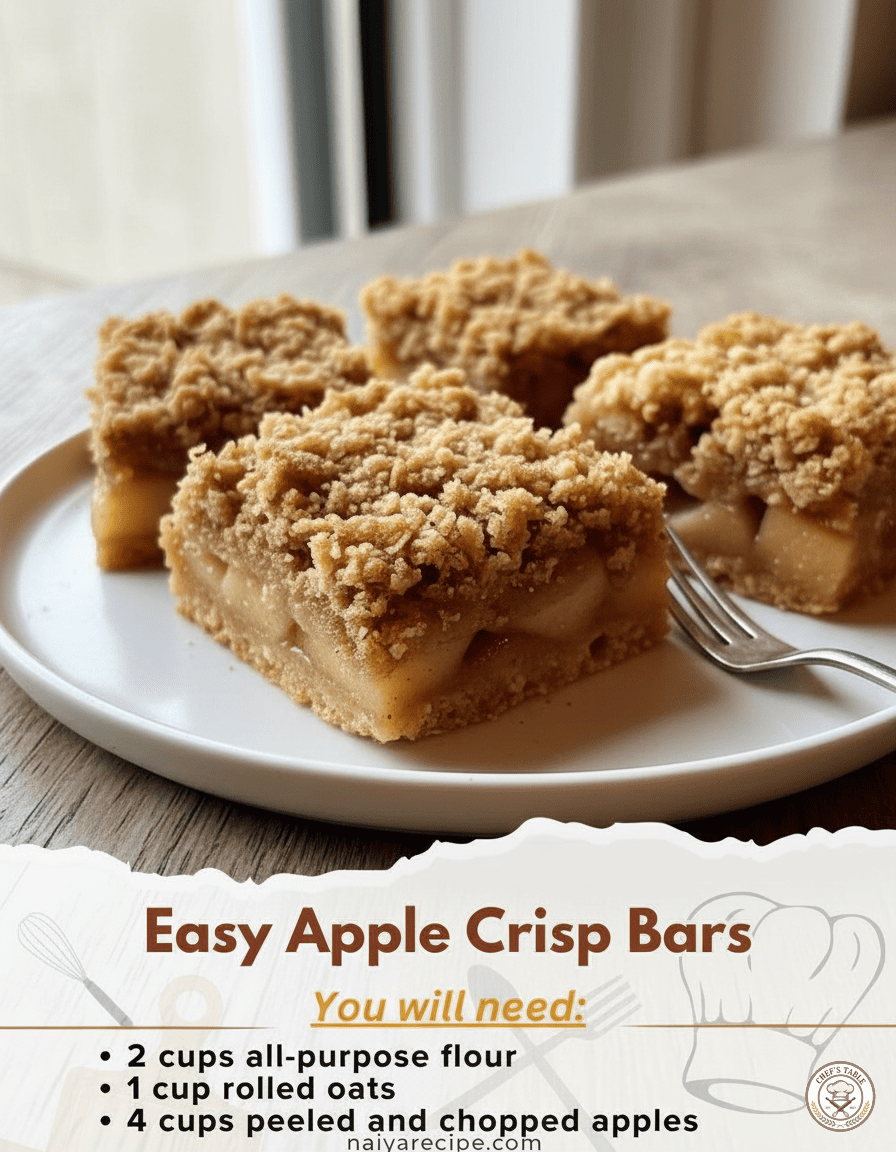
The Anatomy of a Perfect Bar
An outstanding apple crisp bar has three distinct, yet harmonious, layers: a firm, buttery base, a luscious fruit filling, and a golden, crumbly topping.
The Base: Our recipe starts with a simple yet sturdy base made from flour, sugar, and butter. This layer provides the foundation for the entire bar, offering a slight chewiness that contrasts beautifully with the soft apples and crisp topping. The key here is to mix it until just combined and press it firmly into your baking pan. This ensures it won’t crumble apart when you cut and serve the bars. A light sprinkle of cinnamon in the base can also add an extra layer of warmth.
The Apple Filling: This is where the magic happens. Our 4 cups of peeled and chopped apples will be gently spiced with cinnamon, which is practically apple’s best friend in the culinary world. A touch of sugar will draw out the natural juices from the apples, creating a tender, syrupy filling that is both sweet and fragrant. You might also consider adding a tiny pinch of nutmeg or a dash of allspice for a more complex spice profile, but cinnamon alone is perfectly wonderful.
The Crisp Topping: Ah, the glorious crisp topping! This is arguably the most anticipated part of any apple crisp. Our topping combines all-purpose flour, rolled oats, sugar, and cold butter. The oats are crucial here; they provide that signature chewy-crisp texture that distinguishes a crisp from a crumble. When mixing, you want to cut the cold butter into the dry ingredients until coarse crumbs form. This method ensures that the butter slowly melts during baking, creating pockets of steam that result in that irresistibly crumbly, golden-brown texture. Don’t overmix; chunky crumbs are what you’re after.
Bringing It All Together: A Step-by-Step Guide
The beauty of these bars lies in their straightforward assembly.
Step 1: Prepare Your Pan. Lightly grease and flour an 8×8 or 9×9 inch baking pan, or line it with parchment paper, leaving an overhang on the sides. The parchment paper method is highly recommended as it makes lifting the baked bars out of the pan incredibly easy, allowing for neat cutting.
Step 2: Make the Base. In a medium bowl, combine your flour, sugar, and a pinch of salt. Cut in the cold butter (diced into small pieces) using a pastry blender, your fingertips, or a fork until the mixture resembles coarse crumbs. Press this mixture evenly and firmly into the bottom of your prepared baking pan. You can use the bottom of a flat glass or a measuring cup to get it really compact. Bake this base for about 10-12 minutes until lightly golden. This par-baking step helps create a sturdy foundation that won’t get soggy from the apple filling.
Step 3: Prepare the Apple Filling. While the base is par-baking, combine your peeled and chopped apples with sugar and ground cinnamon in a large bowl. Toss gently to ensure the apples are evenly coated.
Step 4: Create the Crisp Topping. In a separate bowl, combine the all-purpose flour, rolled oats, brown sugar (or granulated sugar, but brown sugar adds a lovely caramel note), and a pinch of salt. Cut in the cold butter until coarse crumbs form. You want some pea-sized pieces of butter remaining, as these will create pockets of crispness.
Step 5: Assemble and Bake. Once the base is par-baked, spread the apple mixture evenly over the warm crust. Then, sprinkle the oat topping generously and evenly over the apples. Return the pan to the oven and bake for another 35-45 minutes, or until the apples are tender when pierced with a fork and the topping is golden brown and delightfully crisp.
Step 6: Cool Completely. This is perhaps the most crucial step for perfectly structured bars. It’s tempting to dig in right away, but cooling allows the apple filling to set and the bars to firm up, making them much easier to cut cleanly. Let them cool in the pan on a wire rack for at least 2-3 hours, or even longer. For best results, you can even chill them in the refrigerator for an hour once they’ve cooled down to room temperature.
Serving Suggestions and Variations
These Easy Apple Crisp Bars are absolutely divine on their own, but a few additions can elevate them to an even more decadent dessert:
- A scoop of vanilla bean ice cream: The classic pairing! The cold, creamy ice cream melting into the warm, spiced apple bars is pure bliss.
- A dollop of freshly whipped cream: Light and airy, whipped cream adds a touch of elegance and balances the richness of the bars.
- A drizzle of caramel sauce: For those who love extra sweetness, a swirl of homemade or store-bought caramel sauce is a fantastic addition.
- A sprinkle of chopped nuts: Pecans or walnuts can be added to the crisp topping for an extra layer of crunch and nutty flavor.
- Different fruits: While apple is classic, you can experiment with other fruits like pears, peaches, or even a mix of berries. Just adjust sugar levels based on the sweetness of the fruit.
Storage Tips
- Room Temperature: Store leftover apple crisp bars in an airtight container at room temperature for up to 2-3 days.
- Refrigeration: For longer storage, you can keep them in the refrigerator for up to 5 days.
- Freezing: These bars freeze wonderfully! Once completely cooled, cut them into individual portions and wrap them tightly in plastic wrap, then place them in an airtight freezer-safe container or bag. They can be frozen for up to 3 months. Thaw at room temperature or gently reheat in the oven.
Why You’ll Love This Recipe
This recipe isn’t just about making a delicious dessert; it’s about creating memories and enjoying the simple pleasures of baking. Here’s why these Easy Apple Crisp Bars will become a staple in your kitchen:
- Simplicity: With straightforward ingredients and easy-to-follow steps, even novice bakers can achieve perfect results.
- Flavor: The harmonious blend of sweet apples, warm cinnamon, and buttery oats is undeniably comforting and satisfying.
- Versatility: Perfect for any occasion, from a casual weeknight dessert to a special gathering.
- Make-Ahead Friendly: You can prepare these in advance, making entertaining a breeze.
- Crowd-Pleaser: Everyone loves apple crisp, and these bars offer all the goodness in a convenient, handheld form.
So, the next time you’re craving a taste of fall, or just a deliciously easy dessert, reach for this recipe. Gather your ingredients, enjoy the process, and prepare to delight your taste buds with these irresistible Easy Apple Crisp Bars. They’re a testament to the fact that sometimes, the simplest recipes yield the most rewarding results. Happy baking!