Korean cuisine has captivated taste buds worldwide with its vibrant flavors, unique ingredients, and comforting warmth. Among the myriad of delightful dishes, Korean Soy Garlic Chicken Thighs stand out as a truly exceptional creation. This dish offers a perfect blend of savory, sweet, and subtly spicy notes, creating an unforgettable culinary experience that’s both easy to prepare and incredibly satisfying. Whether you’re a seasoned chef or a home cook looking to explore new flavors, this recipe promises to be a fantastic addition to your repertoire.
The Allure of Korean Flavors
What makes Korean food so incredibly appealing? It’s a symphony of contrasting elements that come together in perfect harmony. Think about the spicy kick of gochujang, the savory depth of soy sauce, the pungent aroma of garlic, and the nutty richness of sesame oil. These core ingredients form the backbone of many Korean dishes, including our featured chicken thighs. The beauty lies in their ability to transform simple ingredients into something extraordinary.
This particular recipe for Korean Soy Garlic Chicken Thighs is a testament to the power of these fundamental flavors. It’s a dish that boasts a crispy exterior, tender and juicy interior, all coated in a sticky, glistening sauce that is utterly irresistible. The balance of salty soy sauce with a touch of sweetness, combined with a generous amount of fresh garlic, creates a depth of flavor that will leave you craving more.
Why Chicken Thighs? The Unsung Hero of Poultry
While chicken breasts are often the go-to for many recipes, chicken thighs are the unsung heroes of poultry, especially in dishes like this. Thighs are naturally more flavorful and forgiving than breasts. Their slightly higher fat content keeps them moist and tender even when cooked at higher temperatures, making them ideal for developing that beautiful caramelized crust without drying out.
For this Korean Soy Garlic Chicken, the chicken thighs absorb the marinade beautifully, infusing every bite with the complex flavors of the sauce. The result is a succulent, flavorful piece of chicken that practically melts in your mouth, perfectly complemented by the sticky, garlicky glaze.
The Secret to the Perfect Soy Garlic Glaze
The heart of this dish lies in its exquisite soy garlic glaze. It’s a simple yet powerful concoction that elevates the chicken from ordinary to extraordinary. Here’s a breakdown of the key components and why they work so well:
- Soy Sauce: The foundation of the glaze, providing essential umami and saltiness. Opt for a good quality soy sauce for the best flavor.
- Fresh Garlic: A generous amount of minced garlic is crucial. It imparts a pungent, aromatic flavor that is quintessential to Korean cuisine. Don’t be shy with the garlic!
- Honey or Maple Syrup: A touch of sweetness is necessary to balance the savory notes of the soy sauce and the sharpness of the garlic. Honey offers a classic rich sweetness, while maple syrup provides a slightly different, equally delicious, caramel-like undertone.
- Sesame Oil: A drizzle of toasted sesame oil adds a nutty aroma and deepens the overall flavor profile. It’s a finishing touch that truly brings everything together.
- Rice Vinegar: A splash of rice vinegar adds a subtle tang, cutting through the richness and brightening the flavors.
- Ginger: While optional for some, fresh grated ginger adds a warm, spicy note that complements the garlic beautifully and enhances the aromatic complexity of the sauce.
- Red Pepper Flakes (Optional): For those who enjoy a hint of heat, red pepper flakes provide a gentle warmth without overpowering the other flavors. Adjust to your preference.
The magic happens when this glaze is reduced, thickening into a glossy, sticky coating that clings to every piece of chicken. The caramelization of the sugars in the glaze creates an incredible depth of flavor and a beautiful sheen.
Step-by-Step Guide to Crafting Your Korean Soy Garlic Chicken Thighs
Making this dish is surprisingly straightforward, yielding impressive results. Here’s a detailed guide to help you create culinary magic in your own kitchen:
Ingredients You’ll Need:
- 1.5 – 2 pounds boneless, skinless chicken thighs, cut into bite-sized pieces
- 2 tablespoons cornstarch (for coating)
- Vegetable oil or other neutral oil for frying
For the Soy Garlic Glaze:
- 1/2 cup soy sauce
- 1/4 cup honey or maple syrup
- 2 tablespoons minced fresh garlic (about 4-5 cloves)
- 1 tablespoon grated fresh ginger (optional)
- 1 tablespoon rice vinegar
- 1 teaspoon toasted sesame oil
- 1/2 teaspoon red pepper flakes (optional, adjust to taste)
- 1/4 cup water or unsalted chicken broth
- 1 tablespoon cornstarch (for thickening the sauce)
For Garnish (Optional):
- Toasted sesame seeds
- Sliced green onions
Instructions:
- Prepare the Chicken: Pat the chicken thighs dry with paper towels. This step is crucial for achieving a crispy exterior. Cut the chicken into uniform bite-sized pieces. In a medium bowl, toss the chicken pieces with 2 tablespoons of cornstarch until each piece is lightly coated. The cornstarch will help create a crispy crust when fried and lock in moisture.
- Make the Glaze: In a separate bowl, whisk together the soy sauce, honey (or maple syrup), minced garlic, grated ginger (if using), rice vinegar, toasted sesame oil, and red pepper flakes (if using). In a small separate bowl, whisk together the 1/4 cup water or broth with 1 tablespoon of cornstarch until smooth. This is your cornstarch slurry for thickening the sauce later.
- Fry the Chicken: Heat about 2-3 tablespoons of vegetable oil in a large skillet or non-stick pan over medium-high heat. Once the oil is hot, carefully add the chicken pieces in a single layer, ensuring not to overcrowd the pan. You may need to cook the chicken in batches.
- Cook Until Golden and Crispy: Fry the chicken for about 4-6 minutes per side, or until golden brown, crispy, and cooked through. The internal temperature should reach 165°F (74°C). Remove the cooked chicken from the pan and place it on a plate lined with paper towels to drain any excess oil. Repeat with the remaining chicken if cooking in batches.
- Simmer the Glaze: Carefully drain any excess oil from the skillet, leaving just about a tablespoon or so. Reduce the heat to medium. Pour the prepared soy garlic glaze mixture into the skillet. Bring it to a gentle simmer, stirring constantly.
- Thicken the Sauce: Once the glaze is simmering, give your cornstarch slurry a quick whisk again (as cornstarch can settle) and slowly pour it into the simmering glaze while continuously stirring. Continue to cook and stir until the sauce thickens and becomes glossy, usually within 1-2 minutes. It should be thick enough to coat the back of a spoon.
- Combine Chicken and Glaze: Return the crispy fried chicken to the skillet with the thickened glaze. Toss gently to ensure every piece of chicken is thoroughly coated in the luscious, sticky sauce.
- Serve Immediately: Transfer the Korean Soy Garlic Chicken Thighs to a serving platter. Garnish with toasted sesame seeds and freshly sliced green onions, if desired.
Serving Suggestions: What to Pair with Your Chicken
Korean Soy Garlic Chicken Thighs are incredibly versatile and pair well with a variety of side dishes. Here are some popular and delicious suggestions:
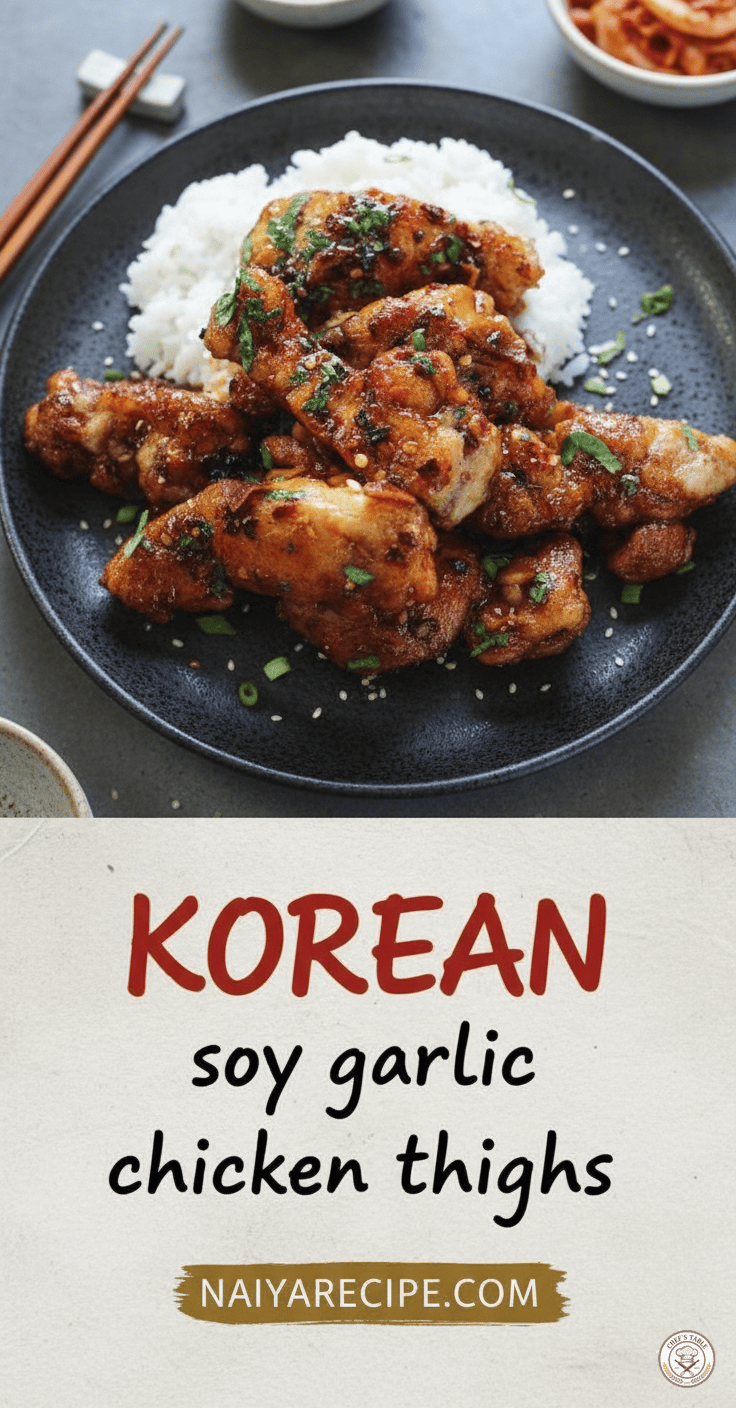
- Steamed Rice: The classic accompaniment. A bed of fluffy white rice is perfect for soaking up all the extra sauce and provides a comforting balance to the rich chicken.
- Kimchi: No Korean meal is complete without kimchi! The fermented spicy cabbage offers a fantastic tangy contrast to the savory chicken.
- Simple Green Salad: A fresh, crisp green salad with a light vinaigrette can provide a refreshing counterpoint to the rich chicken.
- Blanched or Sautéed Vegetables: Lightly blanched broccoli, asparagus, or green beans with a dash of sesame oil and soy sauce make a healthy and delicious side.
- Cucumber Salad: A quick cucumber salad dressed with rice vinegar, a touch of sugar, and sesame oil offers a refreshing crunch.
Tips for Success: Achieving Perfection
- Don’t Overcrowd the Pan: When frying the chicken, cook in batches if necessary. Overcrowding will lower the oil temperature, leading to steamed rather than crispy chicken.
- Pat Chicken Dry: This step is crucial! Excess moisture prevents browning and crisping.
- Adjust Sweetness and Spice: Feel free to adjust the amount of honey/maple syrup and red pepper flakes in the glaze to suit your personal preference.
- Taste and Adjust: Always taste your sauce before combining with the chicken. This allows you to adjust seasonings as needed.
- Fresh Garlic and Ginger: While powdered versions can be used in a pinch, fresh garlic and ginger make a significant difference in the flavor of the glaze.
- Use a Good Quality Soy Sauce: A low-sodium soy sauce is a good choice if you’re watching your sodium intake, but ensure it’s a brand you enjoy the taste of.
The Versatility of This Dish
Beyond serving it with rice, Korean Soy Garlic Chicken Thighs can be enjoyed in various ways:
- As a Protein in Bowls: Add it to grain bowls with quinoa or brown rice, roasted vegetables, and a drizzle of extra sauce.
- Lettuce Wraps: Serve the chicken in crisp lettuce cups for a light and refreshing meal.
- Sandwiches or Wraps: Shred the leftover chicken and use it in sandwiches or wraps for a flavorful lunch.
- Meal Prep: This dish reheats well, making it excellent for meal prepping. Store it in an airtight container for up to 3-4 days in the refrigerator.
The Takeaway
Korean Soy Garlic Chicken Thighs are more than just a meal; they are an experience. They embody the delicious complexity and comforting nature of Korean cuisine, offering a harmonious blend of flavors that will delight your palate. With this detailed recipe and tips, you are well-equipped to create a dish that is sure to become a cherished favorite in your home. So gather your ingredients, fire up your stove, and embark on this wonderful culinary journey. Enjoy every sticky, savory, garlicky bite!