Are you ready to discover a dessert that’s ridiculously easy to make, incredibly delicious, and perfect for any occasion? Look no further than these sensational 2-Ingredient Apple Pie Cups! Forget complicated crusts and lengthy baking times; this recipe strips apple pie down to its delightful core, delivering all the comforting flavors you love in a convenient, bite-sized package. Whether you’re a seasoned baker or a complete novice, these little cups are guaranteed to impress with minimal effort.
Why You’ll Fall in Love with These Apple Pie Cups
Simplicity at Its Best: As the title suggests, you only need two main ingredients. This isn’t a trick, it’s pure culinary magic designed to save you time and stress.
Crowd-Pleaser: These individual portions are perfect for parties, potlucks, or a cozy family dessert. Everyone gets their own little pie, making serving a breeze.
Versatile: While fantastic on their own, these cups can be dressed up with a scoop of ice cream, a dollop of whipped cream, or a drizzle of caramel for an extra touch of indulgence.
Kid-Friendly: Both in making and eating! Kids will love helping assemble these simple treats, and they’ll definitely love devouring them.
Comfort in Every Bite: The warm, spiced apple filling encased in a tender, flaky cup brings a sense of nostalgic comfort that’s hard to beat.
The Two Magical Ingredients (and Optional Enhancements!)
Before we dive into the method, let’s talk about the stars of our show:
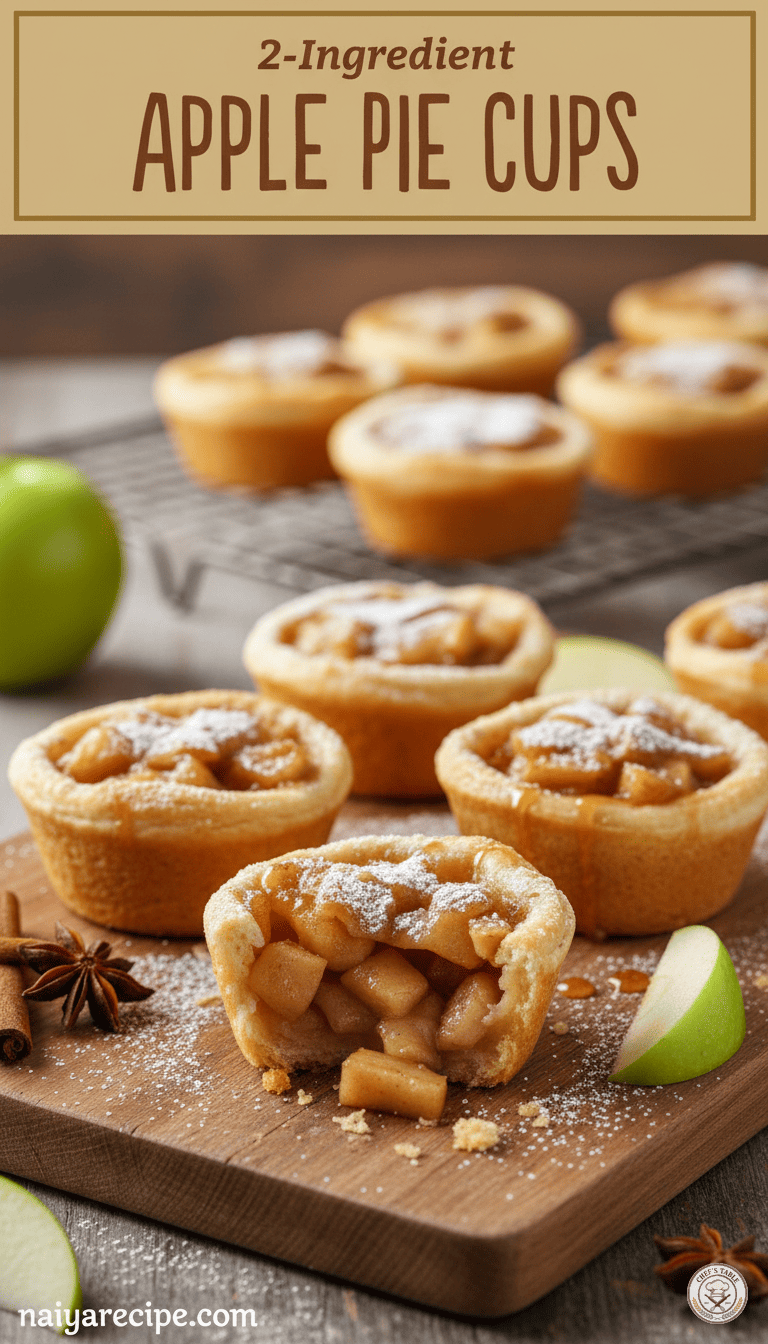
- Refrigerated Crescent Roll Dough: This is our secret weapon for an instant, perfectly flaky crust. It’s incredibly versatile and takes all the hard work out of making pastry from scratch.
- Canned Apple Pie Filling: Pre-made and perfectly spiced, this filling is ready to go, saving you a significant amount of time and effort. Look for a good quality brand for the best flavor.
Optional Enhancements (Highly Recommended for Extra Flavor!):
While technically a 2-ingredient recipe, a few pantry staples can elevate these pie cups from great to absolutely divine.
- Ground Cinnamon: A little extra sprinkle over the apple filling before baking enhances that classic apple pie aroma and taste.
- Nutmeg or Allspice: A pinch can add another layer of warmth and complexity to your apple filling.
- Turbinado Sugar or Brown Sugar: A light sprinkle on top of the crescent dough before baking can add a lovely crunch and caramelized sweetness.
- Powdered Sugar (for dusting): A final dusting after baking makes these look extra special and adds a touch more sweetness.
- Caramel Sauce: A drizzle of warm caramel sauce over the finished pie cups is always a welcome addition.
Let’s Get Baking! The Step-by-Step Guide
Ready to create some dessert magic? Here’s how to make these incredibly easy 2-Ingredient Apple Pie Cups.
Yields: 8-16 cups (depending on how you cut the crescent dough)
Prep time: 10 minutes
Bake time: 12-15 minutes
Equipment You’ll Need:
- Muffin tin (standard 12-cup)
- Cutting board or clean work surface
- Small bowl (optional, for mixing spices)
- Spoon
- Cooling rack
Ingredients:
- 1 (8-ounce) can refrigerated crescent roll dough
- 1 (21-ounce) can apple pie filling
Optional Ingredients for Enhancements:
- ½ teaspoon ground cinnamon
- ¼ teaspoon ground nutmeg (optional)
- 2 tablespoons turbinado sugar or brown sugar (optional)
- Powdered sugar, for dusting (optional)
Instructions:
- Preheat Your Oven: Start by preheating your oven to 375°F (190°C). If you’re using a dark or non-stick muffin tin, you might want to reduce the temperature by about 25°F to prevent over-browning. Lightly grease your muffin tin with cooking spray, even if it’s non-stick, to ensure easy removal.
- Prepare the Crescent Dough: Open the can of crescent roll dough. Unroll the dough carefully onto a clean, lightly floured work surface or a cutting board. You’ll see perforations that divide the dough into triangles. Gently press the perforations together to form one large rectangle of dough. This creates a more cohesive “crust” for your pie cups.
- Cut the Dough: Now, you have a couple of options for cutting the dough, depending on the size of pie cups you prefer:
- For 8 Larger Cups: Cut the rectangle into 8 equal squares. You can do this by cutting it in half lengthwise, then cutting each half into four squares.
- For 16 Smaller Cups: Cut the rectangle into 16 smaller squares. You can do this by cutting the dough in half lengthwise, then cutting each half into 8 squares. This often works well if you want more bite-sized treats or have a smaller muffin tin.
Tip: A pizza cutter works wonderfully for clean, straight cuts!*
- Nestle the Dough: Carefully take each square of crescent dough and gently press it into the bottom and up the sides of the prepared muffin tin cups. You want to form a little cup shape with the dough. Don’t worry if it’s not perfectly even; it will bake beautifully regardless.
- Prepare the Apple Filling: Open your can of apple pie filling. If desired, you can empty the filling into a small bowl and stir in the optional ½ teaspoon of ground cinnamon and ¼ teaspoon of nutmeg. This extra step truly enhances the flavor profile. If the apple chunks are very large, you might want to give them a quick chop to make them fit better into the small crescent dough cups, but this is optional.
- Fill the Cups: Spoon the apple pie filling into each crescent dough cup. Fill them generously, but leave a little room at the top to prevent overflow during baking. Aim for about 1-2 tablespoons of filling per cup, depending on their size.
- Optional Topping: If you’re using turbinado sugar or brown sugar, sprinkle a small amount over the exposed edges of the crescent dough in each cup. This will give them a lovely golden-brown, slightly caramelized finish.
- Bake: Place the muffin tin in your preheated oven. Bake for 12 to 15 minutes, or until the crescent dough is golden brown and the apple filling is bubbly and heated through. Keep an eye on them towards the end of the baking time, as oven temperatures can vary.
- Cool: Once baked, carefully remove the muffin tin from the oven. Let the apple pie cups cool in the tin for about 5 minutes. This allows them to firm up slightly and makes them easier to remove.
- Serve and Enjoy: After 5 minutes, use a small knife or a spoon to gently lift each apple pie cup out of the muffin tin and transfer them to a wire rack to cool completely, or serve them warm. If desired, dust with powdered sugar before serving.
Creative Variations and Serving Suggestions
While delicious on their own, these 2-Ingredient Apple Pie Cups are also a fantastic canvas for your culinary creativity!
- Caramel Apple Pie Cups: Drizzle warm caramel sauce over the top of the baked cups. You can even mix a tablespoon of caramel sauce into the apple filling before baking for an extra rich flavor.
- Cranberry Apple: If you can find it, use an apple cranberry pie filling for a tart and sweet twist, especially lovely during the autumn and winter months.
- Nutty Topping: Before baking, sprinkle a small amount of finely chopped pecans or walnuts over the apple filling for added texture and flavor.
- Crumble Topping: For a mock apple crumble pie cup, mix together some softened butter, flour, and brown sugar to create a streusel topping, and sprinkle it over the apple filling before baking.
- Vanilla Bean Ice Cream: Serve warm with a scoop of premium vanilla bean ice cream that slowly melts over the spiced apples.
- Whipped Topping: A generous dollop of freshly whipped cream or a dairy-free whipped topping is always a good idea.
- Yogurt Parfait Style: For a lighter option, serve a warm apple pie cup with a side of plain Greek yogurt and a sprinkle of granola. It’s surprisingly delicious for breakfast or brunch!
- Cheese Pairing: For a traditional touch, serve alongside a thin slice of sharp cheddar cheese. The savory and sweet combination is a classic for a reason!
Tips for Success
- Don’t Overfill: While tempting, overfilling the cups can lead to messy spills in your muffin tin.
- Adjust Baking Time: Ovens vary, so keep an eye on your pie cups. If the crescent dough is browning too quickly, you can loosely tent the muffin tin with foil.
- Storage: Store any leftover apple pie cups in an airtight container at room temperature for up to 2 days, or in the refrigerator for up to 4 days.
- Reheating: Reheat gently in the microwave for 15-20 seconds or in a toaster oven at 300°F (150°C) for a few minutes until warm.
- Make Ahead: These are excellent for making ahead! Bake them, let them cool completely, then store. Reheat when ready to serve.
Beyond Dessert: When to Serve These Apple Pie Cups
While undeniably a perfect dessert, these versatile little cups can shine in other scenarios too:
- Breakfast or Brunch: A slightly healthier alternative to a full Danish, perfect with a cup of coffee or tea.
- Afternoon Snack: A comforting and satisfying treat to get you through the afternoon slump.
- Party Appetizer/Finger Food: Their individual size makes them ideal for serving at gatherings. They’re much less messy than a slice of pie!
- Holiday Tables: A simple yet elegant addition to your holiday dessert spread, especially when you’re short on time but still want a homemade touch.
The Magic of Simple Baking
In a world full of complex recipes and gourmet aspirations, sometimes the most satisfying creations are the simplest. These 2-Ingredient Apple Pie Cups embody the joy of effortless baking. They prove that you don’t need a pantry full of exotic ingredients or hours in the kitchen to create something truly delightful.
The combination of tender, flaky crescent dough and warm, spiced apple filling is a classic for a reason. It evokes feelings of home, comfort, and sweet indulgence. And the fact that you can achieve this with just two ingredients? That’s pure culinary genius.
So, next time you’re craving a sweet treat but are short on time or energy, reach for that can of crescent rolls and apple pie filling. You’ll be amazed at how quickly and easily you can whip up a batch of these irresistible Apple Pie Cups. They’re a testament to the fact that delicious doesn’t have to mean difficult. Happy baking!