There’s something inherently comforting about the aroma of warm apple pie wafting through the kitchen. It evokes memories of crisp autumn days, family gatherings, and pure, unadulterated bliss. But let’s be honest, making a traditional apple pie can sometimes feel like a monumental task. That’s where these Flaky Apple Pie Bars come in! They offer all the delightful flavors and textures of a classic apple pie, but in a much more convenient, shareable, and frankly, irresistible bar form.
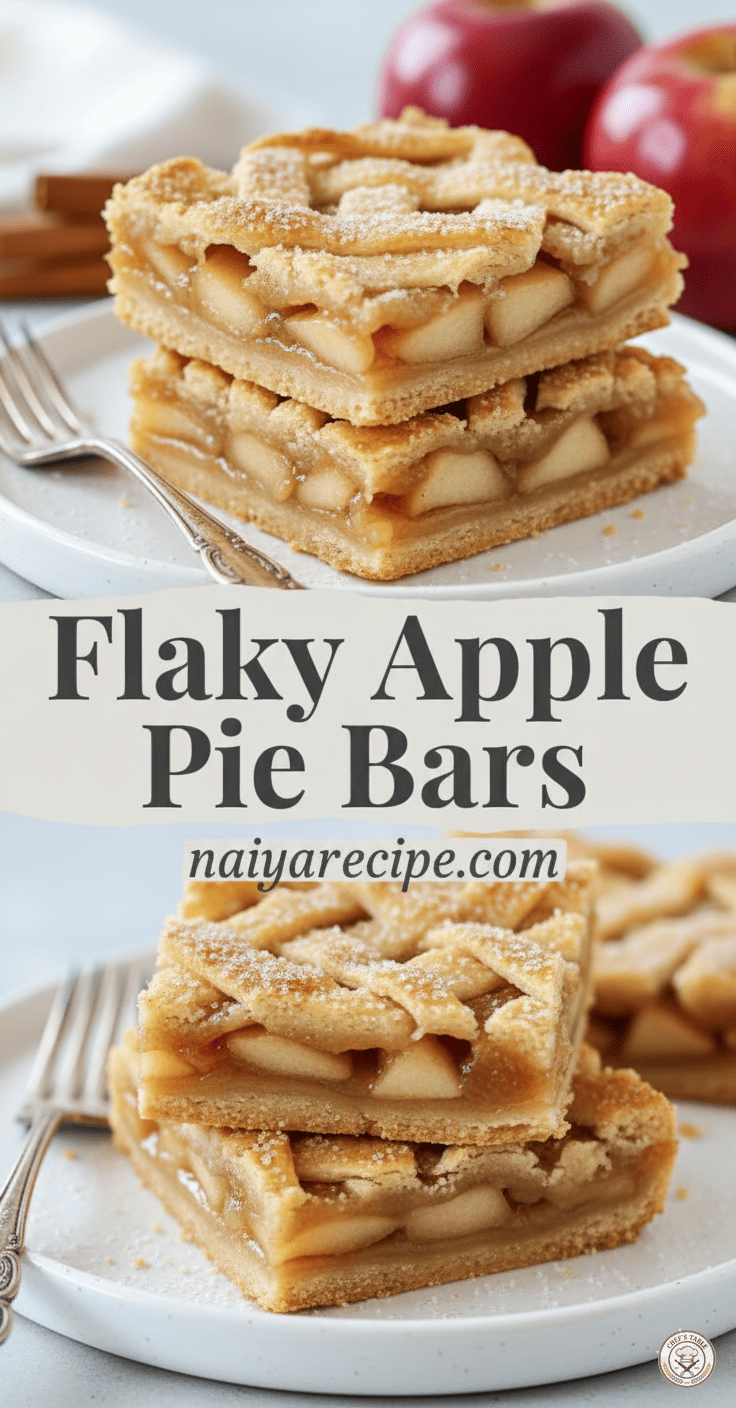
Imagine a buttery, flaky crust that practically melts in your mouth, cradling a luscious, warmly spiced apple filling. Each bite delivers a perfect balance of tender apples, sweet caramel-like sauce, and that wonderful hint of cinnamon. Then, to top it all off, a delicate lattice crust, just like a traditional pie, providing that satisfying texture and beautiful presentation. Dusted with a light shower of powdered sugar, these bars aren’t just a dessert; they’re an experience.
Why You’ll Fall in Love with Flaky Apple Pie Bars
These aren’t just any apple bars; they’re flaky apple pie bars, and that “flaky” isn’t just a descriptor, it’s a promise! The secret lies in a carefully crafted crust that achieves that delicate, melt-in-your-mouth quality often associated with the best pies.
Beyond the incredible texture, here’s why these bars will become a staple in your baking repertoire:
- Ease and Convenience: Forget wrestling with a full pie crust in a pie dish. These bars are baked in a rectangular pan, making them easier to assemble, bake, and slice. Perfect for when you crave pie but are short on time or patience.
- Portability: Their bar form makes them ideal for potlucks, picnics, bake sales, or simply packing in lunchboxes. No need for plates and forks if you’re feeling casual – though a fork certainly enhances the experience!
- Crowd-Pleaser: Who doesn’t love apple pie? These bars take that universal appeal and make it even more accessible. They disappear quickly wherever they’re served.
- Versatility: While phenomenal on their own, these bars can be elevated with a scoop of vanilla bean ice cream, a dollop of whipped cream, or a drizzle of caramel sauce for an extra touch of indulgence.
- Stunning Presentation: The lattice top isn’t just for show; it adds visual appeal that makes these bars look incredibly professional and inviting. Don’t worry, it’s easier than you think to create!
The Anatomy of a Perfect Apple Pie Bar
Let’s break down what makes these bars so incredibly delicious:
The Flaky Crust
The foundation of any great pie or pie bar is its crust. For these bars, we’re aiming for that golden-brown, tender, and impossibly flaky texture. The key to achieving this lies in a few simple principles:
- Cold Ingredients: Using very cold unsalted butter and ice water is crucial. The cold butter creates steam pockets as it bakes, which separate the layers of dough, resulting in flakiness.
- Minimal Handling: Overworking the dough develops gluten, leading to a tough crust. Mix just until combined, and handle gently.
- Resting Time: Chilling the dough before rolling helps the gluten relax, making it easier to work with and contributing to a tender crust.
The Sweet and Spiced Apple Filling
This is where the magic truly happens. A robust apple filling is the heart of these bars, brimming with natural sweetness and aromatic spices.
- Choosing Your Apples: The type of apple you use makes a difference. You want apples that hold their shape well when baked and offer a good balance of sweet and tart. Granny Smith apples are a classic choice for their tartness, which balances the sweetness of the filling. Honeycrisp, Fuji, or Braeburn are also excellent options. A mix of two or three varieties can add complexity to the flavor and texture.
- Perfectly Spiced: Cinnamon is non-negotiable in apple pie, but a touch of nutmeg or allspice can add depth. We’ll be creating a luscious sauce right in the pan with the apples, sugar, and spices, ensuring every bite is coated in deliciousness.
- Cooked to Perfection: Pre-cooking the apples slightly before baking helps them soften evenly and prevents the filling from being too watery in the final bars. It also allows the flavors to meld beautifully.
Essential Ingredients
Gathering your ingredients is the first step to baking success. Here’s what you’ll need:
For the Flaky Crust:
- All-purpose flour: The base for our tender crust.
- Granulated sugar: Adds a touch of sweetness to the crust itself.
- Salt: Balances the flavors and enhances the sweetness.
- Unsalted butter: Crucial for flakiness. Make sure it’s very cold, cut into small cubes.
- Ice water: The binding agent for the dough. The colder, the better!
For the Apple Filling:
- Baking apples: (e.g., Granny Smith, Honeycrisp, Fuji, Braeburn) Peeled, cored, and sliced.
- Granulated sugar: For sweetness.
- Brown sugar (light or dark): Adds a deeper, caramel-like flavor.
- All-purpose flour or cornstarch: To thicken the filling and prevent it from becoming too runny.
- Ground cinnamon: The essential apple pie spice.
- Ground nutmeg (optional): For added warmth and depth.
- Lemon juice: A splash brightens the apple flavor and prevents browning.
- Vanilla extract: Enhances the overall flavor profile.
- Unsalted butter: A small amount to melt with the apples for richness.
For Assembly and Topping:
- Egg wash: (1 egg yolk beaten with 1 tablespoon of water or milk) For brushing the lattice top, giving it a golden sheen.
- Turbinado sugar (optional): For sprinkling on top of the lattice, adding a delightful crunch and sparkle.
- Powdered sugar: For dusting the finished, cooled bars.
Step-by-Step Guide to Flaky Apple Pie Bars
Follow these instructions carefully, and you’ll be rewarded with truly spectacular apple pie bars.
Part 1: Making the Flaky Crust
- Combine Dry Ingredients: In a large bowl, whisk together the all-purpose flour, granulated sugar, and salt.
- Cut in the Butter: Add the very cold, cubed unsalted butter to the flour mixture. Using a pastry blender, two knives, or your fingertips, cut the butter into the flour until the mixture resembles coarse crumbs with some pea-sized pieces of butter still visible. This is key for flakiness!
- Add Ice Water: Gradually add the ice water, one tablespoon at a time, mixing gently with a fork or your hands until the dough just comes together. Be careful not to overmix. You might not need all the water, or you might need a tiny bit more – the dough should be cohesive but not sticky.
- Divide and Chill: Divide the dough into two portions, one slightly larger than the other (about 2/3 for the bottom crust, 1/3 for the lattice top). Flatten each portion into a disk, wrap tightly in plastic wrap, and refrigerate for at least 30 minutes, or up to 2 days. Chilling is crucial for easy rolling and a flaky crust.
Part 2: Preparing the Apple Filling
- Peel and Slice Apples: Peel, core, and slice your apples into uniform pieces, about 1/4 to 1/2 inch thick. Place them in a large bowl.
- Season the Apples: Add the granulated sugar, brown sugar, flour (or cornstarch), ground cinnamon, optional ground nutmeg, lemon juice, and vanilla extract to the sliced apples. Toss gently to coat all the apple slices evenly.
- Cook the Filling (Optional but Recommended): In a large saucepan or Dutch oven, melt the small amount of unsalted butter over medium heat. Add the seasoned apple mixture and cook for 5-7 minutes, stirring occasionally, until the apples begin to soften slightly and release some of their juices, and the sauce thickens slightly. This step ensures the apples are tender in the baked bars and prevents a watery filling. Remove from heat and let cool slightly.
Part 3: Assembling the Apple Pie Bars
- Preheat Oven & Prepare Pan: Preheat your oven to 375°F (190°C). Lightly grease a 9×13-inch baking pan, or line it with parchment paper, leaving an overhang on the sides for easy removal.
- Roll Out Bottom Crust: On a lightly floured surface, roll out the larger disk of chilled dough into a rectangle slightly larger than your 9×13-inch pan. Carefully transfer the dough to the prepared baking pan, gently pressing it into the bottom and slightly up the sides. Trim any excess dough if necessary.
- Add Filling: Pour the slightly cooled apple filling evenly over the bottom crust.
- Create the Lattice Top: On a lightly floured surface, roll out the smaller disk of chilled dough into a rectangle. Using a pastry wheel or a sharp knife, cut the dough into strips about 3/4 to 1 inch wide.
- Lattice Weave: Arrange half of the strips horizontally over the apple filling, spaced evenly apart. Fold back every other horizontal strip. Place a vertical strip over the unfolded horizontal strips. Unfold the horizontal strips. Now, fold back the alternating horizontal strips that were previously unfolded. Place another vertical strip. Continue this weaving pattern until you have a beautiful lattice top.
- Alternative: If a full lattice feels intimidating, you can simply lay the strips diagonally across the top, or cut out fun shapes with cookie cutters.
- Seal and Crimp: Trim any excess lattice strips. Press the ends of the lattice strips onto the edges of the bottom crust to seal. You can crimp the edges decoratively if desired.
- Egg Wash & Sugar: In a small bowl, whisk the egg yolk with 1 tablespoon of water or milk to create an egg wash. Lightly brush the lattice top with the egg wash. If desired, sprinkle with turbinado sugar for extra crunch and sparkle.
- Bake: Place the baking pan on a baking sheet (to catch any potential drips). Bake for 45-60 minutes, or until the crust is golden brown, the filling is bubbly, and the apples are tender when pierced with a knife. If the crust starts to brown too quickly, you can loosely tent the pan with aluminum foil.
Part 4: Cooling and Serving
- Cool Completely: This is the hardest part, but crucial! Once baked, remove the bars from the oven and let them cool completely in the pan on a wire rack for at least 2-3 hours, or even longer. This allows the filling to set properly, making them much easier to slice neatly. If you try to cut them warm, the filling will likely ooze out.
- Dust with Powdered Sugar: Once completely cool, lift the bars out of the pan using the parchment paper overhang. Transfer to a cutting board and dust generously with powdered sugar.
- Slice and Serve: Slice into individual bars using a sharp knife.
Tips for Success
- Don’t Skimp on Chilling: Chilled dough is happy dough! It’s easier to work with and results in a flakier crust.
- Avoid Overworking the Dough: The less you handle the dough, the more tender your crust will be.
- Apple Choice Matters: A mix of sweet and tart apples that hold their shape works best.
- Prevent a Soggy Bottom: Pre-cooking the apples slightly and baking the bars until the crust is deeply golden brown helps prevent a soggy bottom.
- Patience with Cooling: Resist the urge to cut into them too early. Let them cool fully!
Storage and Reheating
- Storage: Store leftover Flaky Apple Pie Bars in an airtight container at room temperature for up to 2-3 days, or in the refrigerator for up to 5 days.
- Reheating: If desired, you can gently reheat individual bars in the microwave for 15-20 seconds, or in a toaster oven at 300°F (150°C) for 5-10 minutes, until just warmed through.
Variations to Explore
While these bars are perfect as they are, don’t hesitate to get creative:
- Spice It Up: Add a pinch of ground ginger, allspice, or cardamom to the apple filling for a different flavor profile.
- Nutty Crunch: Fold in a handful of chopped pecans or walnuts into the apple filling for added texture and nutty flavor.
- Caramel Drizzle: Once cooled, drizzle a homemade or store-bought caramel sauce over the bars before serving for an extra layer of indulgence.
- Crumb Topping: If a lattice top feels too intricate, you can replace it with a simple streusel crumb topping made from flour, sugar, cold butter, and cinnamon.
These Flaky Apple Pie Bars are more than just a dessert; they’re a celebration of classic flavors in a convenient, delightful package. Whether you’re baking for a special occasion, a casual gathering, or simply to treat yourself, these bars are guaranteed to bring smiles and satisfy that craving for comforting, homemade goodness. Enjoy the process, savor the aroma, and delight in every flaky, apple-filled bite!
naiyarecipe.com