There’s something incredibly comforting about the smell of apples and cinnamon baking in the oven. It’s a scent that evokes warmth, family gatherings, and pure, unadulterated joy. And if you’re anything like me, you’re always on the lookout for a dessert that delivers on that promise without being overly complicated. Enter the humble yet magnificent apple crumble bar.
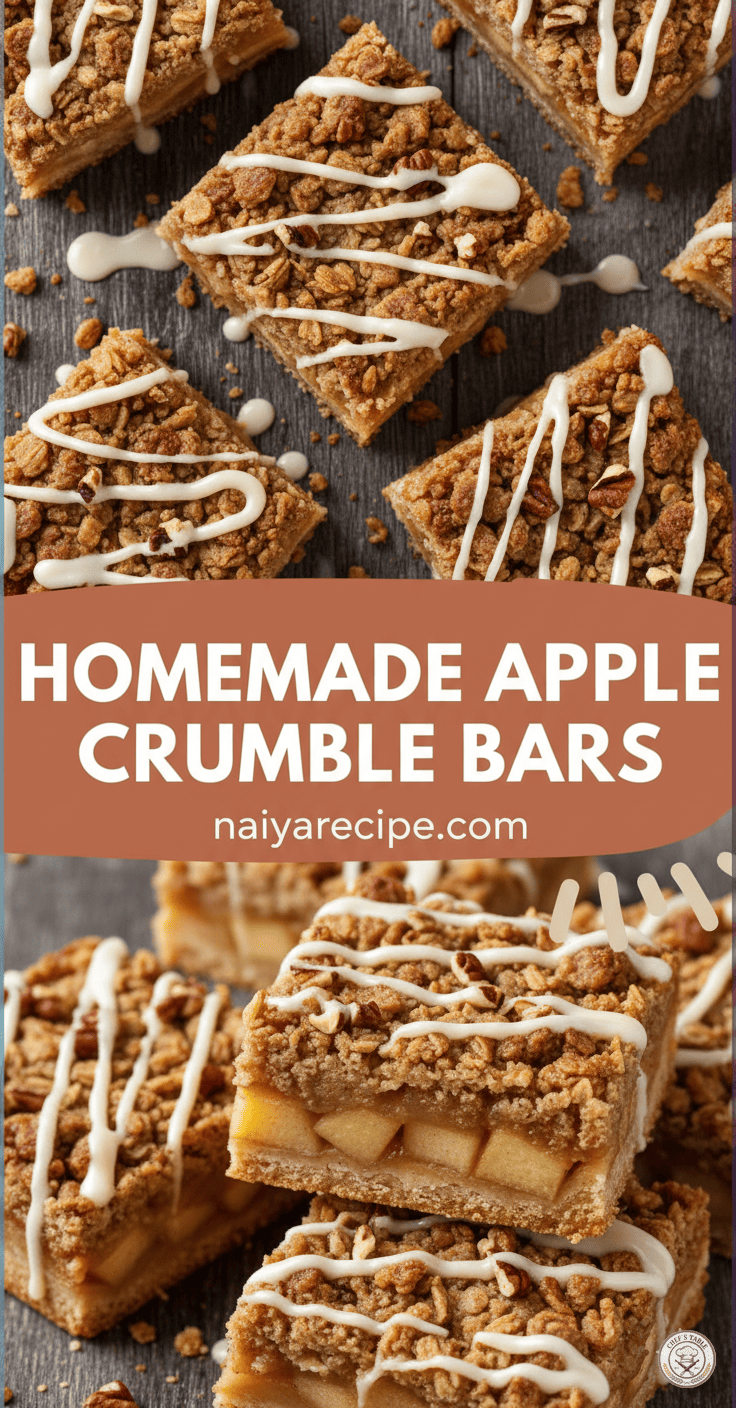
These aren’t just any apple crumble bars; these are the kind that make you close your eyes and savor each bite. They’re packed with tender, spiced apples, crowned with a buttery, crumbly oat topping, and finished with a delicate drizzle of sweet glaze. Perfect for a cozy evening in, a potluck, or just because you deserve a treat, these bars are a guaranteed crowd-pleaser.
Why Apple Crumble Bars?
You might be wondering, “Why bars instead of a traditional crumble or pie?” The answer is simple: convenience and portability! While I adore a classic apple pie, sometimes you want something that’s easy to serve, doesn’t require a plate and fork (though you’ll definitely want one for these!), and can be enjoyed on the go. Bars are also fantastic for meal prepping desserts – make a batch, cut them into squares, and store them for delicious treats throughout the week.
Another reason these bars shine is their perfect balance of textures. You get the soft, yielding apples, the satisfying chewiness of the oats in the crumble, and the slight crunch of the nuts (if you choose to add them). The glaze adds another layer of sweetness and a beautiful visual appeal that makes them look as good as they taste.
The Magic of Apples
The star of this show, of course, is the apple. But not all apples are created equal when it comes to baking. For the best apple crumble bars, you want an apple that holds its shape well and offers a good balance of sweetness and tartness. My personal favorites for baking are:
- Granny Smith: The classic tart apple, perfect for balancing out the sweetness of the crumble and glaze. They hold their shape beautifully.
- Honeycrisp: A fantastic all-rounder – crisp, juicy, and with a lovely sweet-tart flavor. They soften nicely without becoming mushy.
- Fuji: Sweet and firm, Fuji apples add a wonderful depth of flavor.
- Braeburn: Another great choice for baking, offering a pleasant balance of sweet and tart.
Often, I like to use a combination of apples to create a more complex flavor profile. For instance, pairing a tart Granny Smith with a sweeter Honeycrisp or Fuji can result in a truly dynamic apple filling.
Let’s Talk Crumble
The crumble topping is what sets these bars apart from a mere apple square. It’s rustic, full of texture, and provides that delightful contrast to the soft apple filling. My recipe incorporates oats, which not only add a lovely chewiness but also a subtle nutty flavor and extra fiber. Using cold unsalted butter is key here – it ensures that the crumble stays crumbly and doesn’t melt into a paste. You want to work the butter into the dry ingredients until you have coarse crumbs, mimicking the texture of wet sand.
The Sweet Glaze Finish
While optional, the sweet glaze truly elevates these apple crumble bars from delicious to divine. It adds a touch of extra sweetness, a creamy texture, and makes them look incredibly inviting. A simple mixture of powdered sugar and milk (or even a splash of lemon juice for a tangy kick) is all you need. Drizzle it over the cooled bars for the best results – this prevents the glaze from melting and becoming absorbed into the warm crumble.
Tips for Success
- Don’t Overmix the Dough: For the base, mix until just combined. Overmixing can lead to a tough crust.
- Chill the Dough: Chilling the base dough before pressing it into the pan can make it easier to handle and prevents it from becoming too sticky.
- Peel Your Apples: While some recipes leave the peels on, for a smooth and tender apple filling in bars, I highly recommend peeling them. It creates a more refined texture.
- Slice Apples Uniformly: Try to slice your apples into similar-sized pieces so they cook evenly. About 1/2-inch thick chunks are ideal.
- Don’t Overcrowd the Pan: Make sure your apples are spread relatively evenly in the pan. If they are too piled up, they might not cook through properly.
- Cool Completely: This is crucial! Resist the urge to cut into the bars while they are warm. The filling needs time to set, and cooling them completely will ensure clean, beautiful cuts. Plus, the flavors meld and deepen as they cool.
- Storage: Store leftover apple crumble bars in an airtight container at room temperature for up to 3 days, or in the refrigerator for up to 5 days. They can also be frozen for longer storage (see below).
Variations and Customizations
This recipe is incredibly versatile, and you can easily tweak it to suit your preferences.
- Add Nuts: Toasted pecans or walnuts can be added to the crumble topping for extra crunch and nutty flavor. Just mix them in with the oats and flour.
- Spice It Up: Beyond cinnamon, consider adding a pinch of nutmeg, allspice, or ground ginger to the apple filling for more warmth and complexity.
- Caramel Drizzle: Instead of a simple glaze, you could drizzle store-bought or homemade caramel sauce over the cooled bars for an extra decadent treat.
- Different Fruits: While these are apple crumble bars, you could experiment with other fruits like pears, peaches, or even mixed berries. Adjust baking time as needed based on the fruit’s water content.
- Gluten-Free Option: For a gluten-free version, use a 1:1 gluten-free flour blend in place of all-purpose flour and ensure your oats are certified gluten-free.
- Vegan Option: To make these vegan, substitute unsalted butter with a plant-based butter alternative and use plant-based milk for the glaze.
Serving Suggestions
These bars are fantastic on their own, but here are a few ideas to elevate them even further:
- With a Scoop of Ice Cream: A classic pairing! A scoop of vanilla bean ice cream melting over a slightly warmed apple crumble bar is pure bliss.
- A Dollop of Whipped Cream: Light and airy whipped cream provides a lovely contrast to the rich bars.
- A Sprinkle of Powdered Sugar: If you prefer not to make the glaze, a simple dusting of powdered sugar makes them look elegant.
- Alongside Coffee or Tea: These make a perfect accompaniment to your morning coffee or an afternoon cup of tea.
Freezing Instructions
Apple crumble bars freeze beautifully!
- Cool Completely: Ensure the bars are completely cooled and the glaze (if using) has set.
- Cut into Portions: Cut the bars into individual squares.
- Flash Freeze: Place the cut bars on a baking sheet lined with parchment paper, making sure they don’t touch. Freeze for 1-2 hours, or until solid. This prevents them from sticking together.
- Transfer to Container: Transfer the frozen bars to an airtight, freezer-safe container or freezer bag.
- Thaw and Reheat: Thaw individual bars at room temperature for a few hours, or warm them gently in the microwave or oven (300°F/150°C) until heated through.
With a little bit of effort and a whole lot of love, you can create these delightful Homemade Apple Crumble Bars that will bring a smile to anyone’s face. They are a testament to the simple joys of home baking and the timeless appeal of apples and cinnamon. So, preheat your oven, grab those apples, and get ready to fill your kitchen with the most inviting aromas!
naiyarecipe.com