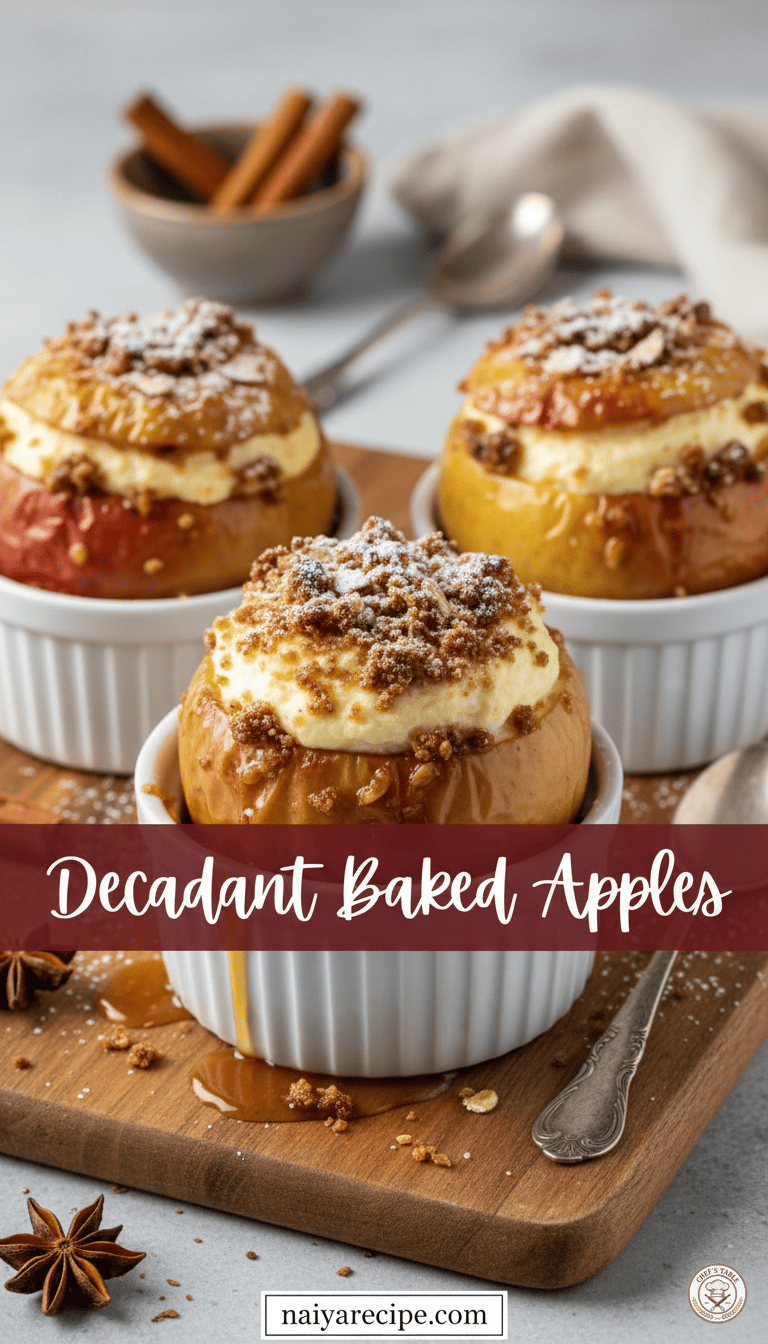
There’s a certain magic that happens when you take a simple, wholesome fruit like an apple and transform it into something truly extraordinary. These decadent baked apples are exactly that – a transformation. Imagine tender, sweet apples, slow-baked until perfectly soft, then generously filled with a creamy, dreamy cheesecake mixture, all crowned with a delightful crumble topping and a drizzle of golden caramel. It’s a dessert that speaks of comfort, warmth, and pure indulgence, perfect for any occasion, from a cozy family dinner to a festive gathering.
This recipe is more than just a list of ingredients; it’s an experience. The aroma alone, as these apples bake, will fill your kitchen with an inviting scent that promises something special. Each bite offers a harmonious blend of textures and flavors – the yielding warmth of the apple, the rich tang of the cheesecake, the satisfying crunch of the crumble, and the sweet embrace of caramel. It’s a dessert that feels both sophisticated and utterly approachable, a true crowd-pleaser that will have everyone asking for the recipe.
The Art of the Apple: Choosing Your Canvas
The foundation of any great baked apple recipe lies in the apple itself. Not all apples are created equal when it comes to baking. You want an apple that will hold its shape beautifully without turning to mush, one that offers a good balance of sweetness and tartness to complement the rich filling.
Here are some of the best varieties to consider:
- Honeycrisp: A fantastic choice, known for its crisp texture and perfectly balanced sweet-tart flavor. They hold up incredibly well in the oven.
- Fuji: Sweet and firm, Fuji apples maintain their shape and offer a lovely mild flavor.
- Gala: Another sweet and firm option, Gala apples are readily available and bake beautifully.
- Granny Smith (with a caveat): While very tart, Granny Smith apples can work if you prefer a sharper contrast to the sweet filling. However, they tend to be firmer and might require a slightly longer baking time or a little more pre-softening. I recommend mixing them with a sweeter apple if you opt for Granny Smiths.
- Braeburn: These apples are firm, sweet, and slightly tart, making them excellent for baking.
Tips for selecting the best apples:
- Look for apples that are firm to the touch, without any soft spots, bruises, or blemishes.
- Choose apples that are roughly similar in size to ensure even baking. Medium to large apples are ideal for stuffing.
- Wash and dry your apples thoroughly before preparing them.
The Heart of the Matter: Crafting the Cheesecake Filling
The cheesecake filling is what truly elevates these baked apples from delicious to decadent. It’s creamy, rich, and provides a wonderful contrast to the baked apple.
Key ingredients for a luscious filling:
- Cream Cheese: Opt for full-fat cream cheese, softened at room temperature. This is crucial for a smooth, lump-free filling.
- Granulated Sugar: Just enough to sweeten the cream cheese without overpowering the natural sweetness of the apples.
- Egg Yolk: Adds richness and helps to bind the filling, giving it a custardy texture.
- Vanilla Extract: A touch of vanilla enhances all the other flavors.
- Ground Cinnamon (optional): A pinch of cinnamon in the filling can add an extra layer of warmth and spice.
Making the filling:
- Ensure your cream cheese is at room temperature. This is non-negotiable for a smooth filling.
- In a medium bowl, combine the softened cream cheese and granulated sugar. Using an electric mixer (handheld or stand mixer), beat until light, fluffy, and completely smooth, scraping down the sides of the bowl as needed.
- Beat in the egg yolk and vanilla extract until fully incorporated. If using, add the ground cinnamon and mix well.
- The filling should be thick, creamy, and uniform. Set it aside while you prepare the apples.
The Perfect Topping: A Crunchy, Sweet Crumble
No decadent dessert is complete without a delightful topping, and this crumble delivers. It adds a wonderful textural contrast and another layer of sweet, buttery flavor.
Ingredients for the crumble topping:
- All-Purpose Flour: The base of our crumble.
- Brown Sugar: Adds a deep, molasses-rich sweetness and helps create that classic crumble texture.
- Unsalted Butter: Cold and cubed, this is essential for a tender, crumbly topping. Using cold butter prevents it from melting too quickly and creates those lovely, flaky bits.
- Ground Cinnamon: Complements the apples and adds warmth.
- Pinch of Salt: Balances the sweetness and enhances the flavors.
Assembling the crumble:
- In a small bowl, combine the flour, brown sugar, ground cinnamon, and salt. Whisk together until well combined.
- Add the cold, cubed butter to the dry ingredients.
- Using your fingertips, a pastry blender, or a fork, cut the butter into the flour mixture until it resembles coarse crumbs with some pea-sized pieces remaining. Avoid overworking the mixture, as this can lead to a tough crumble. The goal is a light, crumbly texture.
- Place the crumble in the refrigerator while you prepare the apples and filling. This helps keep the butter cold, which is key for a good crumble.
Preparing the Apples: The Foundation of Perfection
This step is crucial for ensuring your apples bake evenly and are ready to embrace their delicious filling.
Steps for preparing your apples:
- Wash and Dry: Thoroughly wash and dry your chosen apples.
- Core the Apples: This is where the magic begins. Using an apple corer, carefully remove the core from each apple, making sure not to cut all the way through the bottom. You want to create a cavity large enough to hold the filling. If you don’t have an apple corer, a small paring knife and a spoon can be used to carefully scoop out the core and some of the flesh, leaving a sturdy wall and bottom.
- Scoop a Little Extra (Optional but Recommended): To make more room for the generous cheesecake filling, you can carefully scoop out a little extra apple flesh from the center, creating a wider bowl. Be careful not to make the walls too thin.
- Prevent Browning: Apples tend to brown once exposed to air. To prevent this, you can brush the cut surfaces with a little lemon juice. This is especially helpful if you’re preparing the apples ahead of time.
- Create a Base (Optional): If your apples are a bit wobbly, you can slice a very thin piece off the bottom to create a flat base, ensuring they sit upright during baking. Be careful not to cut too much, as you want to maintain the integrity of the apple.
Assembling and Baking: The Grand Finale
Now comes the exciting part – bringing all the components together and letting your oven work its magic.
Assembly:
- Preheat Oven: Preheat your oven to a moderate temperature, around 375°F (190°C).
- Prepare Baking Dish: Lightly grease a baking dish that is large enough to comfortably hold all your apples without them touching too much. You can also add about a quarter inch of water to the bottom of the baking dish. This creates a steamy environment, helping the apples soften beautifully and preventing them from drying out.
- Stuff the Apples: Carefully spoon the cheesecake filling into the hollowed-out apples. Fill them generously, mounding the filling slightly at the top.
- Add Crumble Topping: Generously sprinkle the prepared crumble topping over the cheesecake filling, covering it completely. Gently press the crumble down a little to help it adhere.
- Drizzle with Melted Butter (Optional but Recommended for extra richness): For an even richer flavor and golden crust, you can melt a tablespoon or two of butter and drizzle it lightly over the crumble topping before baking.
Baking:
- Bake: Place the baking dish with the stuffed apples into the preheated oven.
- Baking Time: Bake for approximately 35-50 minutes. The exact baking time will depend on the size and variety of your apples.
- How to tell if they’re done: The apples should be tender when pierced with a fork but still hold their shape. The cheesecake filling should be set, and the crumble topping should be golden brown and crisp.
- Cooling: Once baked, carefully remove the baking dish from the oven. Allow the baked apples to cool in the dish for at least 15-20 minutes before serving. This allows the filling to set further and the apples to cool down to a more manageable temperature.
Serving Suggestions: Elevating the Experience
While these decadent baked apples are absolutely delicious on their own, a few additions can take them over the top.
- Caramel Drizzle: A generous drizzle of warm caramel sauce is a must! It adds a beautiful sheen, extra sweetness, and a lovely stickiness. You can use store-bought caramel sauce or make your own.
- A Dusting of Powdered Sugar: For an elegant finish and a touch of extra sweetness, dust the baked apples lightly with powdered sugar just before serving.
- A Scoop of Vanilla Bean Ice Cream: The classic pairing! The cold, creamy ice cream provides a delightful contrast to the warm, baked apple.
- A Dollop of Whipped Cream: Lightly sweetened whipped cream is another excellent option, adding a cloud-like texture and cool creaminess.
- Chopped Toasted Nuts: For an extra layer of crunch and nutty flavor, sprinkle some chopped toasted pecans or walnuts over the top.
- A Sprinkle of Cinnamon: A final touch of ground cinnamon can enhance the warm spice notes.
Tips for Success: Mastering Your Decadent Baked Apples
- Don’t Rush the Softening: Make sure your cream cheese is genuinely at room temperature. This is crucial for a smooth filling.
- Core Carefully: Take your time when coring the apples. You want a good cavity without piercing through the bottom or making the walls too thin.
- Don’t Overbake: Keep an eye on the apples. Overbaking can lead to mushy apples. They should be tender but still have some structure.
- Embrace the Caramel: Don’t skimp on the caramel! It truly brings all the flavors together.
- Make Ahead Option: You can prepare the apples (cored), the cheesecake filling, and the crumble topping a day in advance. Store the apples in a bowl of water with a little lemon juice (to prevent browning), covered in the refrigerator. Store the filling and crumble separately in airtight containers in the refrigerator. Assemble and bake when ready to serve.
- Storage: Leftover baked apples can be stored in an airtight container in the refrigerator for up to 3-4 days. Reheat gently in the microwave or a warm oven.
A Dessert to Cherish
These decadent baked apples are more than just a dessert; they’re a celebration of simple ingredients transformed into something extraordinary. They offer warmth, comfort, and a touch of elegance that will impress anyone lucky enough to try them. The combination of tender baked apple, creamy cheesecake, crunchy crumble, and sweet caramel is simply irresistible. So, gather your ingredients, preheat your oven, and prepare to create a truly memorable treat that will become a cherished part of your recipe repertoire. Enjoy the process, savor the aromas, and delight in every single bite of these truly decadent baked apples. They are a perfect ending to any meal, a comforting treat on a chilly evening, or a delightful centerpiece for a special occasion.