There’s something inherently comforting about a classic apple crumble. The warm, spiced apples, the buttery, crumbly topping – it’s a dessert that evokes memories of cozy evenings, family gatherings, and the simple joy of good food. But what if we could take all those beloved elements and re-imagine them in a fresh, visually appealing, and utterly delicious way? Enter the Deconstructed Apple Crumble – a modern twist on a timeless favorite that’s as delightful to look at as it is to eat.
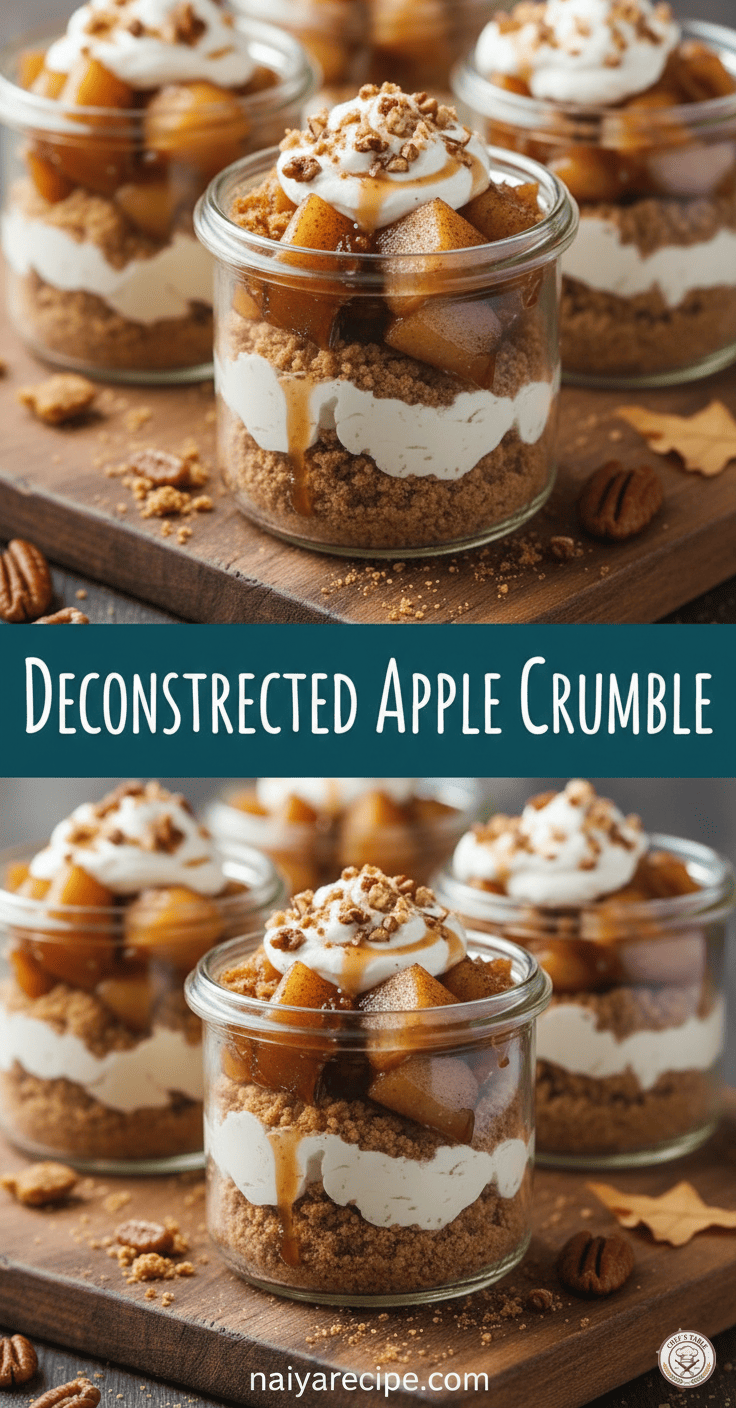
This recipe takes the essence of apple crumble and transforms it into individual, elegant servings, perfect for a dinner party, a special treat, or even just a fun weekend baking project. By layering the components in jars or glasses, we create a beautiful presentation that highlights each delicious element: the tender, spiced apples, the rich, creamy no-bake cheesecake layer, and the crunchy, sweet crumble. This deconstructed approach not only elevates the visual appeal but also allows for a wonderful interplay of textures and flavors in every spoonful.
Forget the fuss of a whole pie or a large crumble dish; these individual portions are easy to assemble, serve, and enjoy. They’re also incredibly versatile, allowing you to customize the spices, add your favorite nuts, or even experiment with different types of apples. Whether you’re a seasoned baker or just starting your culinary journey, this deconstructed apple crumble is a recipe that promises satisfaction and smiles.
Why Deconstructed? The Beauty of Layers
The beauty of a deconstructed dessert lies in its ability to present each ingredient in its best light. Instead of baking everything together, we cook each component separately, ensuring optimal texture and flavor.
First, the apples: We gently cook them until they are tender but still hold their shape, infused with warm spices like cinnamon and nutmeg. This ensures a delightful bite and a burst of autumnal flavor.
Next, the creamy layer: In a traditional crumble, this might be a scoop of ice cream or custard on the side. Here, we integrate a luscious, no-bake cheesecake filling that adds a rich, tangy counterpoint to the sweet apples. This creamy element provides a smooth texture that beautifully complements the other components.
Finally, the crumble: Instead of baking it on top of the apples, we create a separate, perfectly crunchy crumble. This allows it to retain its crispness and provides a wonderful textural contrast to the soft apples and creamy filling. The individual layering also means less cooking time for the entire dessert, as only the apples and crumble require heat.
The Stars of Our Show: Ingredients
To create this magnificent deconstructed apple crumble, you’ll need a few key ingredients, each playing a crucial role in the symphony of flavors and textures.
For the Spiced Apples:
- Apples: About 4-5 medium-sized apples. Varieties like Honeycrisp, Gala, Fuji, or Granny Smith (if you prefer a tarter bite) work wonderfully. A mix of sweet and tart apples can offer a more complex flavor profile.
- Butter: A small amount of unsalted butter for sautéing the apples, adding richness and helping them caramelize slightly.
- Brown Sugar: Adds sweetness and a molasses-like depth that pairs perfectly with apples. Adjust to your sweetness preference.
- Cinnamon: The quintessential apple spice, offering warmth and aroma.
- Nutmeg: A hint of nutmeg enhances the autumnal spice blend.
- Lemon Juice: A splash of lemon juice brightens the flavors and prevents the apples from browning too much.
- Water or Apple Juice: A little liquid to help the apples soften without drying out.
For the No-Bake Cheesecake Filling:
- Cream Cheese: Full-fat cream cheese, softened to room temperature, is essential for a smooth and creamy filling.
- Powdered Sugar: Sweetens the cream cheese and helps achieve a smooth consistency without graininess.
- Vanilla Extract: Enhances the overall flavor profile.
- Heavy Cream: Whipped to stiff peaks, this lightens the cream cheese mixture and gives it an airy, luxurious texture.
For the Crumble Topping:
- All-Purpose Flour: Forms the base of our delicious crumble.
- Rolled Oats: Adds a chewy texture and nutty flavor.
- Brown Sugar: For sweetness and a hint of caramel.
- Granulated Sugar: Balances the sweetness.
- Cold Butter: Cut into small pieces, this is crucial for creating that perfectly crumbly texture. The cold butter prevents it from melting too quickly and allows for distinct crumbs to form.
- Cinnamon: A touch more cinnamon to tie it all together.
- Pecans (Optional): Toasted and chopped pecans add a wonderful crunch and nutty flavor that complements the apples beautifully. You can also use walnuts or omit nuts if preferred.
For Garnish (Optional but recommended):
- Caramel Sauce: A drizzle of store-bought or homemade caramel sauce takes this dessert to the next level.
- Whipped Cream: A dollop on top adds extra indulgence.
- Extra Chopped Pecans: For a final flourish of crunch.
Crafting Your Deconstructed Masterpiece: Step-by-Step
Let’s break down the process into manageable steps to create your stunning individual apple crumbles.
Step 1: Prepare the Crumble Topping
The crumble topping is best made first, as it needs to bake and cool.
- Preheat Oven: Preheat your oven to 350°F (175°C). Line a baking sheet with parchment paper.
- Combine Dry Ingredients: In a medium bowl, whisk together the all-purpose flour, rolled oats, brown sugar, granulated sugar, and cinnamon.
- Cut in Butter: Add the cold, cubed butter to the dry ingredients. Using your fingertips, a pastry blender, or a fork, cut the butter into the flour mixture until it resembles coarse crumbs with some pea-sized pieces remaining. The key here is to work quickly so the butter doesn’t get too warm.
- Add Pecans (if using): Stir in the chopped pecans.
- Bake: Spread the crumble mixture evenly onto the prepared baking sheet. Bake for 12-15 minutes, or until golden brown and fragrant. Stir halfway through baking to ensure even crisping.
- Cool: Remove from the oven and let the crumble cool completely on the baking sheet. It will crisp up further as it cools.
Step 2: Cook the Spiced Apples
While the crumble cools, you can move on to the star of the show – the spiced apples.
- Peel, Core, and Dice Apples: Wash, peel, core, and dice your apples into small, uniform pieces (about 1/2 to 3/4 inch). This ensures they cook evenly.
- Sauté Apples: In a large skillet over medium heat, melt the butter. Add the diced apples, brown sugar, cinnamon, nutmeg, and lemon juice. Stir to coat the apples evenly.
- Simmer: Add a splash of water or apple juice (about 1/4 cup). Bring the mixture to a gentle simmer, then reduce the heat to medium-low. Cook, stirring occasionally, for 8-12 minutes, or until the apples are tender but still retain some bite. You don’t want them to turn to mush.
- Cool: Remove the skillet from the heat and allow the spiced apples to cool completely. This is important to prevent them from melting the cream cheese layer during assembly.
Step 3: Make the No-Bake Cheesecake Filling
This creamy layer adds richness and a delightful tang.
- Whip Cream Cheese: In a large bowl, beat the softened cream cheese with powdered sugar and vanilla extract using an electric mixer until smooth and creamy, with no lumps.
- Whip Heavy Cream: In a separate, chilled bowl, whip the heavy cream until stiff peaks form. Be careful not to overbeat, or it will become grainy.
- Fold Together: Gently fold the whipped cream into the cream cheese mixture until just combined. Be careful not to deflate the whipped cream. Set aside.
Step 4: Assemble Your Deconstructed Crumbles
Now for the fun part – layering! Grab your jars or glasses (about 6-8 ounce capacity works well).
- First Crumble Layer: Spoon about 2-3 tablespoons of the cooled crumble topping into the bottom of each jar, pressing down gently to create an even base.
- Cheesecake Layer: Pipe or spoon a generous layer of the no-bake cheesecake filling over the crumble. You can use a piping bag with a round tip for a neater look, or simply spoon it in.
- Spiced Apple Layer: Spoon a layer of the cooled spiced apples over the cheesecake filling.
- Repeat (Optional): If your jars are tall enough, you can repeat the layers: another sprinkle of crumble, another layer of cheesecake, and a final layer of apples.
- Top with Crumble: Finish with a final generous sprinkling of the crunchy crumble topping.
- Chill: Cover the jars and refrigerate for at least 1-2 hours to allow the flavors to meld and the cheesecake filling to set firmly. This also ensures everything is beautifully chilled for serving.
Step 5: Garnish and Serve
Just before serving, add your final touches.
- Drizzle with Caramel: Drizzle a little caramel sauce over the top of each deconstructed crumble.
- Add Whipped Cream: Top with a dollop of fresh whipped cream, if desired.
- Sprinkle Pecans: Finish with a sprinkle of extra chopped pecans for added crunch and visual appeal.
Serve chilled and watch as your guests delight in this elegant and irresistible dessert!
Tips for Success
- Cooling is Key: Ensure both the crumble and the spiced apples are completely cool before assembling. Warm ingredients will melt the cream cheese filling, leading to a messy rather than layered look.
- Softened Cream Cheese: For the smoothest, lump-free cheesecake filling, make sure your cream cheese is at room temperature.
- Don’t Overcook Apples: You want the apples to be tender but still have some structure. Overcooked apples will become mushy.
- Cold Butter for Crumble: Using very cold butter and working quickly when making the crumble helps create distinct, crisp crumbs.
- Make Ahead: This is an excellent make-ahead dessert! You can assemble the jars up to a day in advance and store them in the refrigerator. Just add the final garnishes (caramel, whipped cream, extra pecans) just before serving.
- Portion Control: Using individual jars or glasses makes portion control easy and adds a touch of sophistication.
- Customize Your Spices: Feel free to adjust the spice levels in the apples. A pinch of allspice or ginger could also be lovely.
- Gluten-Free Option: To make this gluten-free, use a gluten-free all-purpose flour blend for the crumble and ensure your oats are certified gluten-free.
Variations and Enhancements
While this recipe is fantastic as is, don’t hesitate to experiment and make it your own!
- Different Fruits: In place of apples, consider pears, peaches (fresh or frozen and thawed), or a mix of berries for a summer variation. Adjust cooking times as needed.
- Nutty Crumble: Experiment with other nuts in the crumble, such as walnuts, almonds, or even hazelnuts. For a truly unique flavor, toast the nuts before adding them.
- Gingerbread Crumble: Add a teaspoon of ground ginger and a pinch of cloves to the crumble mixture for a festive, warming twist.
- Maple Sweetener: Replace some of the brown sugar with maple syrup in the spiced apples for a rich, earthy sweetness.
- Citrus Zest: Add a bit of orange or lemon zest to the cream cheese filling for a brighter flavor.
- Chocolate Drizzle: For chocolate lovers, a drizzle of melted dark chocolate could be a decadent addition.
- Cookie Crumble Base: Instead of a baked oat crumble, you could crush digestive biscuits or graham crackers and mix with melted butter for a no-bake crumble base.
A Dessert for Every Occasion
The Deconstructed Apple Crumble is truly a versatile dessert. It’s elegant enough for a formal dinner party, yet comforting enough for a casual family meal. The individual servings make it perfect for potlucks, picnics, or any gathering where you want a beautiful and easy-to-serve dessert. Children and adults alike will adore the delightful layers and familiar flavors, presented in a fresh and exciting new way.
The act of layering itself is a meditative and enjoyable process, turning baking into an art form. Each scoop offers a balanced bite of sweet, spiced apples, creamy cheesecake, and crunchy crumble – a harmonious blend that tantalizes the taste buds.
So, the next time you’re craving the warmth and comfort of an apple crumble but want to impress with something a little different, reach for this deconstructed version. It’s a testament to how classic flavors can be reinvented, offering a new perspective on a beloved dessert. Enjoy the process, savor the flavors, and delight in the beautiful outcome of your culinary creativity!
naiyarecipe.com