There’s something incredibly comforting about a warm, bubbling apple cobbler. It’s a dessert that evokes memories of childhood, family gatherings, and the simple pleasures of a homemade treat. While trends in desserts come and go, the classic apple cobbler remains a steadfast favorite, and for good reason. It’s relatively easy to make, uses readily available ingredients, and delivers an explosion of warm, spiced apple goodness topped with a delightful, golden-brown crust.
This isn’t just any apple cobbler; this is an old-fashioned apple cobbler. What does that mean, exactly? It means we’re leaning into time-honored techniques and ingredients that create that truly rustic, hearty, and utterly delicious experience. We’re talking tender, sweet-tart apples nestled under a buttery, biscuit-like topping that’s crispy on the edges and soft in the middle. Forget overly complicated steps or exotic components; this recipe is about pure, unadulterated comfort.
Why Old-Fashioned is Best
In a world full of shortcuts and instant solutions, taking the time to create something truly old-fashioned can be incredibly rewarding. An old-fashioned apple cobbler stands out for several reasons:
- Simplicity: It relies on basic pantry staples and straightforward preparation, making it accessible for even novice bakers.
- Hearty Texture: The topping isn’t a thin, cake-like layer, but rather a substantial, scone-like crust that provides a wonderful textural contrast to the soft apples.
- Authentic Flavor: The focus is on the natural goodness of the apples, enhanced by classic spices, without overwhelming them with too many competing flavors.
- Versatility: While divine on its own, it’s also the perfect canvas for a scoop of vanilla ice cream or a dollop of fresh whipped cream.
The Stars of the Show: Apples
Choosing the right apples is crucial for a stellar apple cobbler. You want apples that will hold their shape during baking and offer a nice balance of sweetness and tartness. Here are some top contenders:
- Granny Smith: The quintessential baking apple. They are firm, tart, and hold their shape beautifully. If you love a tart cobbler, these are perfect.
- Honeycrisp: Crisp, sweet, and a little tart, Honeycrisps are excellent for baking as they maintain their texture.
- Fuji: Sweet and firm, Fujis also bake well without turning to mush.
- Braeburn: A fantastic all-purpose apple, offering a good balance of sweet and tart with a firm texture.
- Jonagold: A cross between Jonathan and Golden Delicious, these are sweet-tart and hold up well.
For the best flavor and texture, I often recommend using a combination of two or three different apple varieties. For instance, a mix of Granny Smith (for tartness and structure) and Honeycrisp or Fuji (for sweetness and complementary texture) creates a more complex and satisfying filling.
Preparation is Key: Peeling, coring, and slicing your apples uniformly ensures even cooking. Aim for slices that are about ¼ to ½ inch thick. Too thin, and they’ll turn to mush; too thick, and they might remain too firm.
Crafting the Perfect Filling
The filling is where the magic happens. It’s a delicate balance of sweetness, spice, and natural apple flavor.
Sweetener: Granulated sugar is the standard, but a touch of brown sugar can add a deeper, more caramel-like note. Adjust the amount based on the sweetness of your apples and your personal preference.
Spices: Cinnamon is non-negotiable. It’s the perfect partner for apples. A pinch of nutmeg and a tiny dash of allspice or cloves can elevate the flavor profile, but don’t overdo it. The goal is to enhance the apples, not mask them.
Thickener: A small amount of all-purpose flour or cornstarch helps to thicken the juices released by the apples during baking, preventing a watery filling. This creates that lovely, syrupy consistency we all crave.
A Touch of Zest: A squeeze of fresh lemon juice not only brightens the apple flavor but also helps prevent the apples from browning. It’s a small addition that makes a big difference.
The Glorious Topping
This old-fashioned cobbler features a biscuit-like topping, not a thin, cakey one. This means a rich, slightly dense, and incredibly flavorful crust that crisps up beautifully on top.
Flour Power: All-purpose flour is your best bet here.
Fat of Choice: Unsalted butter is the champion for flavor and tenderness. Make sure it’s cold and cut into small pieces. This is crucial for creating that flaky, tender texture. When cold butter melts in the oven, it creates pockets of steam, which in turn create tenderness and flakiness.
Leavening Agents: Baking powder gives the topping its lift and creates that scone-like texture. A pinch of salt balances the sweetness.
Liquid: Milk, or even buttermilk, is typically used to bring the dough together. Buttermilk adds a lovely tang and can contribute to an even more tender crumb.
Sugar on Top: A sprinkle of coarse sugar (like turbinado or demerara sugar) over the topping before baking adds a beautiful sparkle and a delightful crunch.
Step-by-Step Guide to Old-Fashioned Apple Cobbler
Let’s break down the process to ensure your cobbler is a resounding success.
1. Prepare Your Apples:
Peel, core, and slice your chosen apples into uniform ¼ to ½-inch pieces. Place them in a large bowl.
2. Make the Filling:
To the apples, add your sugar (granulated and/or brown sugar), cinnamon, nutmeg (if using), and flour or cornstarch. Add a squeeze of lemon juice. Toss everything gently until the apples are evenly coated. Allow this mixture to sit for about 10-15 minutes. This helps the apples release some of their juices, creating a more flavorful syrup.
3. Preheat and Prepare Baking Dish:
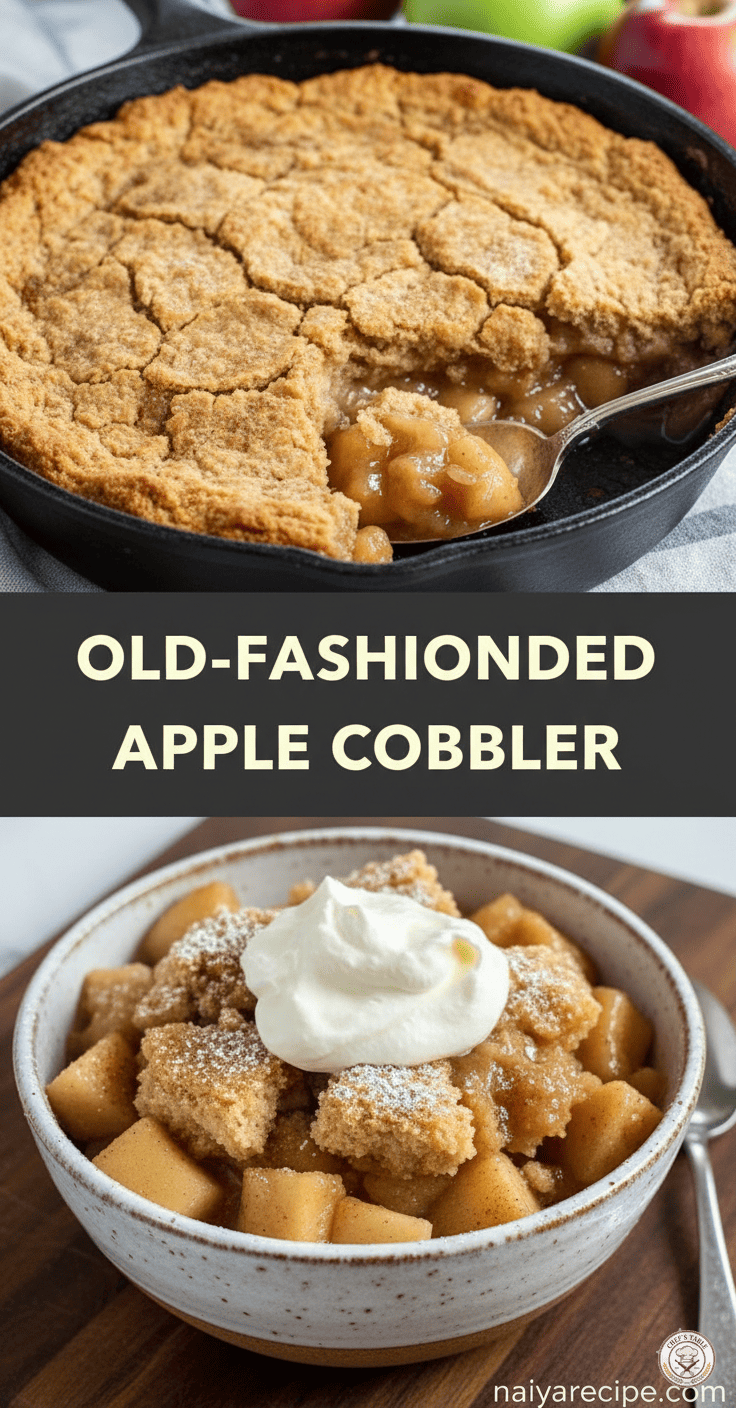
Preheat your oven to 375°F (190°C). Lightly grease a 9×13-inch baking dish or a 10-inch cast iron skillet (as pictured, for that rustic appeal).
4. Transfer Apples to Dish:
Pour the apple mixture into your prepared baking dish, spreading them evenly.
5. Make the Topping:
In a separate medium bowl, whisk together the flour, sugar, baking powder, and salt.
Add the cold, cubed butter to the dry ingredients. Using a pastry blender, two knives, or your fingertips, cut the butter into the flour mixture until it resembles coarse crumbs with some pea-sized pieces of butter remaining. This step is vital for a tender topping.
Gradually add the milk, mixing just until the dough comes together. Be careful not to overmix, as this can lead to a tough topping. The dough should be soft and shaggy.
6. Assemble the Cobbler:
Spoon dollops of the topping over the apple mixture. You don’t need to cover the apples completely; leaving some gaps allows the fruit to bubble up beautifully. Sprinkle the top with coarse sugar, if desired.
7. Bake to Golden Perfection:
Bake for 40-50 minutes, or until the topping is golden brown and cooked through, and the apple filling is bubbly and tender. If the topping starts to brown too quickly, you can loosely tent it with aluminum foil.
8. Rest and Serve:
Let the cobbler rest for at least 15-20 minutes before serving. This allows the filling to set up slightly and prevents it from being too runny.
Serving Suggestions
While a spoon is all you truly need, here are some classic ways to enjoy your old-fashioned apple cobbler:
- A La Mode: A scoop of good quality vanilla bean ice cream is the ultimate companion, creating a delightful contrast of warm and cold, creamy and crunchy.
- Whipped Cream: A generous dollop of freshly whipped cream, perhaps lightly sweetened with a touch of vanilla, adds a luxurious touch.
- Plain and Simple: Sometimes, the unadulterated flavors of the cobbler itself are all you need.
- Custard Sauce: A warm, homemade vanilla custard sauce can be a delightful addition for a more decadent experience.
Troubleshooting Tips
- Soggy Topping: This can happen if the apples release too much liquid and the topping isn’t thick enough. Ensure you’re using the correct amount of thickener in your apple filling. Also, make sure your oven is at the right temperature, as a too-cool oven can prevent the topping from crisping up.
- Hard Topping: Overmixing the dough for the topping can develop the gluten too much, leading to a tough crust. Mix just until combined. Also, ensure your butter is cold when you cut it in.
- Undercooked Apples: If your apples are still firm, they might have been sliced too thick or not cooked long enough. You can always cover the cobbler with foil and bake for an additional 10-15 minutes to tenderize the apples without over-browning the topping.
Storage and Reheating
Leftover apple cobbler can be stored, covered, in the refrigerator for up to 3-4 days.
To reheat: Gently warm individual servings in the microwave or place the entire dish (covered with foil) in a 300°F (150°C) oven until warmed through. The topping might not be as crispy as when fresh, but the flavors will still be wonderful.
A Timeless Classic
This old-fashioned apple cobbler is more than just a dessert; it’s a connection to culinary traditions, a testament to the beauty of simple ingredients, and a guaranteed crowd-pleaser. Whether you’re making it for a special occasion or just a cozy night in, the aroma alone will fill your home with warmth and promise. So go ahead, embrace the charm of the old-fashioned, and bake up a batch of this irresistible apple cobbler. It’s a recipe that has stood the test of time, and for good reason. Enjoy every single comforting bite!